


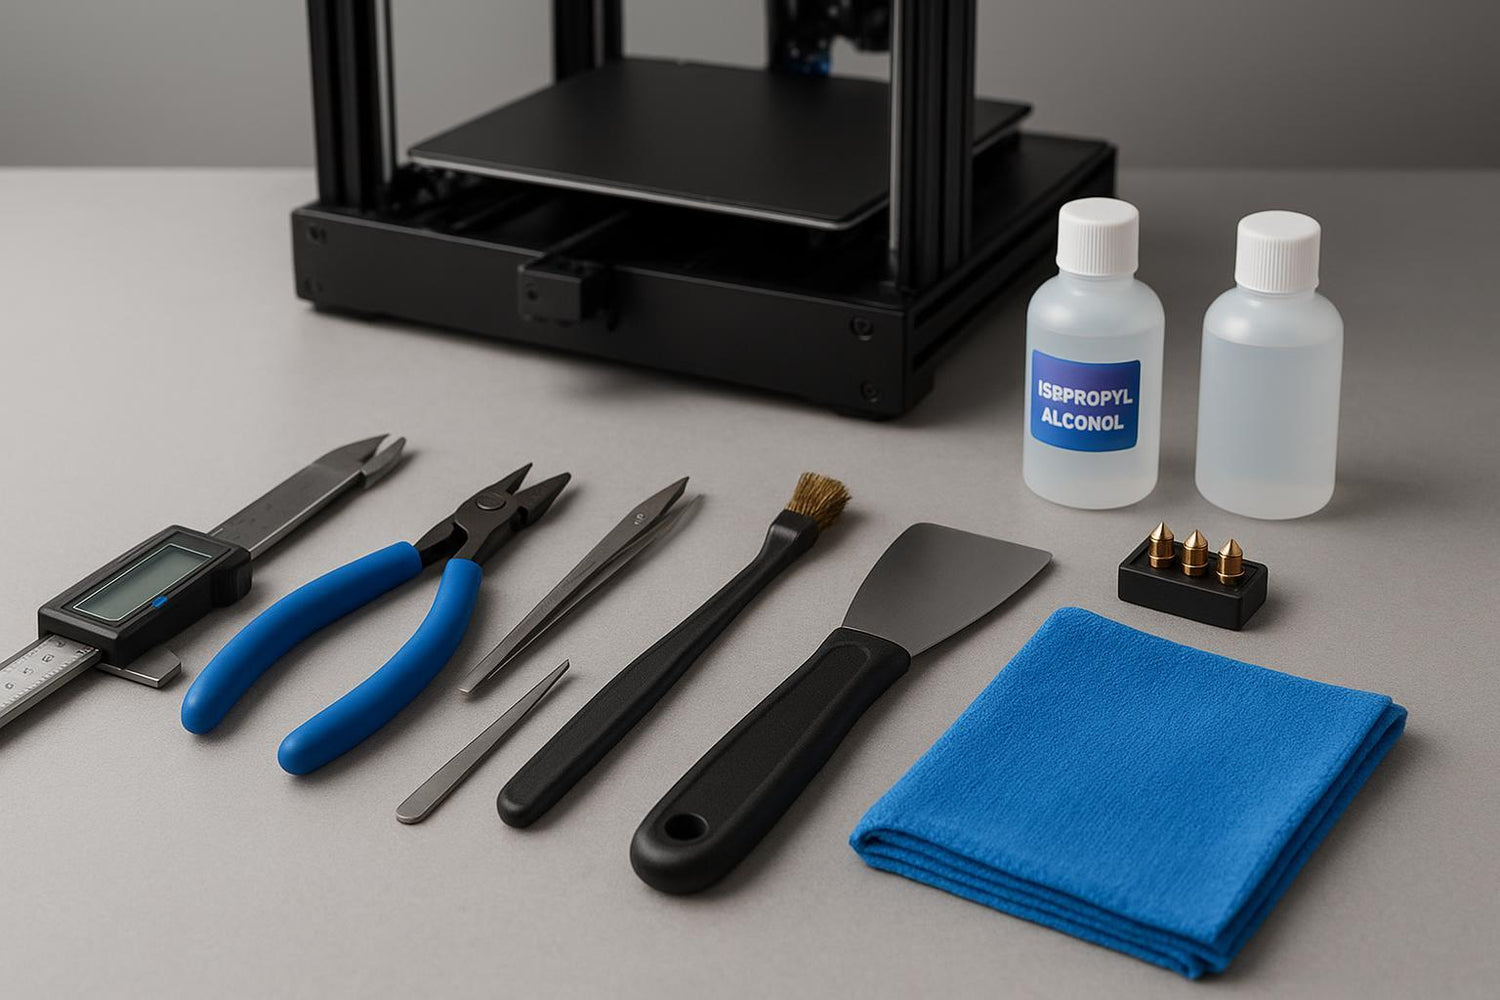
Most “3D printing tool kits” are either underpowered (you’ll bend the scraper on day two) or overloaded (68 pieces of mystery steel). If you’re new to FDM printing, you don’t need a museum of tools—you need a beginner 3D printing toolkit that prevents the failures that waste the most time: stuck prints, ugly first layers, and cloggy nozzles.
Below is a buy-first / buy-later framework, then the 10 essentials—in the order you’ll reach for them.
A beginner 3D printing toolkit in two purchase phases
Buy first (week 1): tools that keep you safe, protect the build surface, and make prints removable without damage.
Buy next (month 1): tools that reduce downtime—nozzle and filament care, measurement, and basic maintenance.
Buy later: finishing tools and “nice-to-haves” that only matter once your prints are already reliable.
If you want a quick sanity check on what typically trips people up early, Sovol’s internal checklist is a good start: Beginner mistakes in 3D printing and how to avoid them.
1) A thin scraper/palette knife (plus one plastic wedge)
A scraper is the difference between “print popped off” and “I gouged my PEI sheet.” A thin, flexible palette knife (or a purpose-made print removal tool) lets you get under the part without prying like a crowbar.
What to buy:
- One thin, flexible blade for getting under edges
- One stiffer blade for stubborn brims
- A plastic wedge (a guitar pick works) for delicate surfaces
Common mistake: using a thick paint scraper and attacking the plate at a steep angle.
2) Flush cutters (a.k.a. side cutters) for supports and clean filament cuts
You’ll use flush cutters constantly: trimming filament ends, clipping supports, and cleaning up blobs.
What to buy:
- A small pair with a fine tip for supports
- Don’t overspend—just avoid ultra-cheap cutters that misalign
Common mistake: twisting supports off by hand until a corner snaps.
3) Tweezers (one straight, one angled)
Tweezers are your “third hand” for removing stray strings, placing small parts, and pulling filament out of awkward spots.
What to buy:
- One straight-tip pair
- One angled pair for reaching around the toolhead
Common mistake: using metal tweezers to poke at hot parts while the printer is moving.
4) A small hex-key + screwdriver set (with proper handle)
Most printers ship with L-shaped hex keys. They work, but they’re slow and they encourage over-torquing. A handled set makes basic checks (gantry bolts, belt tensioners, toolhead fasteners) much less annoying.
What to buy:
- Metric hex keys with handles (or a small driver set)
- A #1/#2 Phillips and a small flathead
Common mistake: ignoring “it’s probably fine” wobbles until a layer shift shows up.
5) Isopropyl alcohol (IPA) + lint-free cloths for bed cleaning
If you only fix one habit, fix this one: clean bed, consistent first layer. A quick wipe removes skin oils and dust that sabotage adhesion.
What to buy:
- 90%+ IPA (common in the US)
- Microfiber or lint-free wipes
Safety basics (treat as non-negotiable): hotends and beds can burn you even during “quick cleanup.” The University of Illinois notes hot surfaces on 3D printers can cause burns in its 3D printer safety guidance (2026).
If you’re fighting adhesion, think of IPA + cloth + a good plate as your core build plate adhesion tools, then bookmark Sovol’s deeper guide to Build plate adhesion for successful 3D prints.
6) Digital calipers (because guessing is expensive)
Calipers aren’t just for engineers. They help you answer practical questions fast:
- Is your filament actually 1.75 mm?
- Is that hole undersized, or did you design it that way?
- Did your “0.2 mm” first layer end up closer to 0.28 mm?
This is why a digital caliper shows up on so many “essential 3D printing tools” lists.
What to buy:
- 0.01 mm resolution is fine for hobby FDM
- Get one that zeros reliably
Common mistake: chasing slicer settings when the part is simply dimensionally off.
7) A deburring tool (or hobby knife) + a small cutting mat
This is your cleanup MVP: removing brim scars, smoothing sharp edges, and cleaning holes. It’s also one of the easiest ways to make functional parts feel finished.
What to buy:
- A deburring tool with replaceable blades, or a hobby knife you respect
- A small cutting mat (protect your table and your fingers)
Common mistake: using a dull blade and applying too much force.
8) Nozzle cleaning basics: brass brush + cleaning needles (and a spare nozzle)
Nozzles clog. Sometimes because of dust, sometimes because of burnt residue, sometimes because you swapped filaments and left crumbs behind. A small maintenance kit keeps a minor issue from turning into a teardown. This is the boring value of having real nozzle cleaning tools on hand.
A practical beginner reminder: if you’re not explicitly following your printer’s manual for a “hot clean,” assume you should power down and let parts cool before brushing.
What to buy:
- A soft brass brush
- A set of cleaning needles appropriate for your nozzle size
- At least one spare 0.4 mm nozzle (or your printer’s default)
Common mistake: “cleaning” aggressively and damaging heater/thermistor wires.
9) A basic lubrication plan (and the right applicator)
You don’t need a full maintenance cart, but you do need a plan. Motion systems stay happier with light, periodic lubrication—these are unglamorous 3D printer maintenance tools, but they prevent weird artifacts later.
What to buy:
- The lubricant your printer’s manufacturer recommends
- A small applicator (dropper bottle or syringe)
Common mistake: over-lubing until dust turns into grinding paste.
10) Dry storage for filament (airtight box + desiccant)
If your prints suddenly get stringy or rough, moisture is often the boring culprit. You don’t need a dryer on day one if you only print PLA in a dry climate, but you do need sensible storage.
Best Buy’s beginner 3D printer accessories guide (2026) is a decent overview of why dry storage and spare nozzles pay off early.
What to buy:
- Airtight storage (box or bag)
- Fresh desiccant packs
Common mistake: leaving spools out for weeks and trying to “fix it in the slicer.”
Optional upgrades once your prints are already reliable
These aren’t essential, but they’re the “quality of life” add-ons that earn their space:
- A second build plate (so you can swap and keep printing)
- A filament dryer (if you print PETG/TPU/nylon often)
- Small needle files and sandpaper (if your projects are cosmetic)
Where Sovol fits (as neutral examples)
If you’re shopping for an open-source-leaning CoreXY platform and you like the idea of a community-driven design turned into a mostly pre-assembled kit, Sovol is worth a look. Two common reference points:
I’m intentionally not pitching specs here—your toolkit matters no matter which printer you own.
Next steps: make your first layer boring
Once you have the kit, use it to lock down the basics:
- If your first layer is inconsistent, Sovol’s troubleshooting guide is a good follow-up: Fix common first-layer problems.