


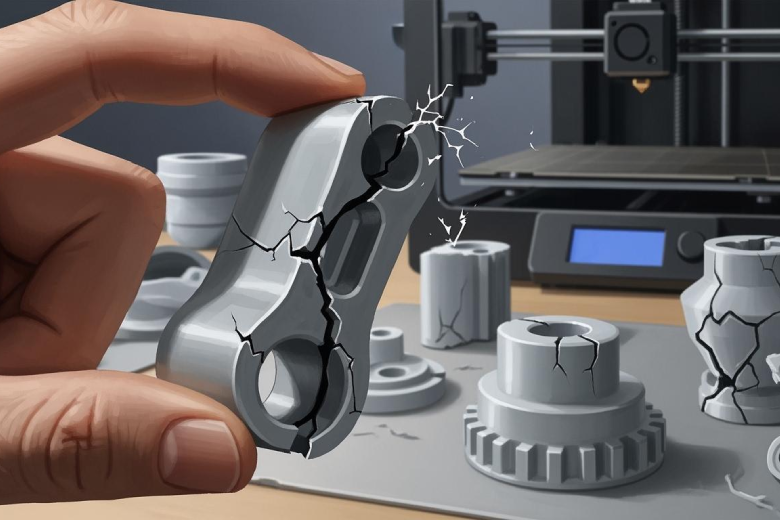
Cracks and breaks in 3D printed parts can feel discouraging. Many people run into the same problems, even after following instructions. Studies show that these failures often happen for a few main reasons:
- Manufacturing defects that make the part weaker
- Mistakes during assembly
- Problems with the material, like poor quality or the wrong type
- Parts wearing out over time
A few changes can help anyone create stronger and more reliable prints.
Key Takeaways
- Choose high-quality filament to improve the strength of your prints. Avoid materials that absorb moisture, as they can weaken parts.
- Store filament in dry, sealed containers to prevent moisture damage. Use desiccant packs to keep the environment dry.
- Optimize print settings by adjusting temperature and ensuring proper layer bonding. Regularly check your printer for maintenance.
- Design parts with adequate wall thickness and avoid sharp corners. Use rounded designs to distribute stress and reduce cracking.
- Protect finished prints from environmental factors like moisture and UV exposure. Store them in a controlled environment to extend their lifespan.
Material Problems in 3D Printed Parts
Filament Quality & Moisture
The quality of filament plays a major role in the strength of 3D printed parts. Some materials are more likely to crack than others. For example:
- PLA and PVB do not work well in chemically aggressive environments. These materials can develop cracks more easily.
- ABS often cracks because of stresses from uneven cooling during printing.
Moisture is another common problem. Many filaments absorb water from the air. When this happens, the filament can form micro-pores that are invisible to the eye. These tiny holes can trap organic residues and weaken the part. The table below shows how moisture affects the mechanical strength of 3D printed parts:
|
Issue |
Effect on Parts |
|---|---|
|
Micro-pores |
Absorb residues, reduce overall strength |
|
Delaminations |
Layers separate under stress or temperature changes, causing cracks |
If the filament absorbs too much moisture, the layers may not stick together well. This can lead to delaminations, where the part splits along the layer lines.
Storage & Handling
Proper storage and handling of filament are important for strong 3D printed parts. If filament is stored in a humid place, it can lose up to 33% of its strength. Problems like excessive stringing, brittle parts, and clogged nozzles can happen when filament is not stored correctly.
Some materials, such as PLA, PVA, and Nylon, are especially sensitive to moisture. These are called hygroscopic materials. They need to be kept in dry, sealed containers. Improper storage can make 3D printed parts much weaker and more likely to crack.
Tip: Store filament in airtight bags with desiccant packs to keep it dry and ready for use.
Print Settings & Cracks
Under-Extrusion & Layer Bonding
Under-extrusion happens when the printer does not push out enough filament. This leads to incomplete layers and weak spots in the print. Poor layer bonding means the layers do not stick together well. This makes the part brittle and more likely to crack.
- Under-extrusion can cause incomplete layers, which weakens the bond between layers.
- Not enough filament supply leads to poor bonding and lower strength.
- Checking filament diameter and feeder tension helps prevent under-extrusion.
When layers do not bond well, cracks can form along the layer lines. Regular checks and proper maintenance of the printer can help avoid these issues.
Temperature & Cooling Issues
Temperature plays a big role in how well layers stick together. If the printing temperature is too low, the filament does not melt enough to bond with the previous layer. If the bed temperature is too low, the part may cool too quickly and crack.
|
Temperature Type |
|
|---|---|
|
Printing Temperature |
230°C - 260°C |
|
Bed Temperature |
80°C - 110°C |
Cooling problems can also cause cracks. Some metals and alloys cannot handle fast temperature changes during printing. This can lead to breakage. Materials with high carbon content, like certain tool steels, may crack if cooled too quickly. Using proper lubrication and controlling cooling rates can help reduce stress and prevent cracks.
Tip: Always check your printer’s temperature settings and adjust cooling fans to avoid sudden temperature changes.
Design Flaws in 3D Printed Parts
Thin Walls & Infill Patterns
Wall thickness is a key factor in the stability of any printed object. Thin walls can make parts brittle. They may break, tear, or deform during use. When walls are too thin, the part cannot handle stress or force. This often leads to cracks or sudden failure.
Infill patterns also play a major role in strength. Infill fills the inside of a part and connects different areas. It improves physical properties and supports the structure. The choice of infill pattern affects how the part handles force. Patterns like grid, honeycomb, or diagonal can change the way a part bends or resists pressure.
The percentage of infill matters as well. Here are some important points:
- Higher infill percentages make parts less flexible but stronger.
- Lower infill percentages can cause weak spots and make objects tear easily.
- Infill direction and pattern affect strength and flexibility.
- Internal spaces created by infill allow parts to compress or expand under force.
- Connections between outer walls add stability and resistance.
A well-chosen infill pattern and proper wall thickness help prevent cracks. They make the part more durable and reliable.
Tip: For most projects, use a wall thickness of at least 1.2 mm and an infill percentage between 20% and 40%. Adjust these values based on the part’s purpose.
Sharp Corners & Orientation
Sharp corners can create stress points in a print. These areas often crack first when the part is used. Rounded corners spread out the force and reduce the risk of breaking. Changing the design to include curves instead of sharp angles helps improve strength.
Orientation during printing also affects durability. Printing a part in the wrong direction can make layer lines weak. Cracks often form along these lines. Placing the part so that layers run parallel to the main stress direction increases resistance to breaking.
Note: Always check the orientation and corner design before starting a print. Small changes can make a big difference in the strength of 3D printed parts.
Environmental Stress on Prints
Environmental factors can weaken 3D printed parts over time. Moisture, temperature changes, and sunlight all play a role in reducing strength and durability.
Humidity & Temperature Changes
Many plastics used outdoors are vulnerable to moisture and temperature shifts. Even condensation from day-night temperature differences can damage parts. Temperature fluctuations speed up aging and cause chemical reactions that break down materials.
- Moisture can harm parts even without direct contact with water.
- Temperature changes can lead to cracks and material fatigue.
- Outdoor conditions often cause faster wear and tear.
Humidity fluctuations have a strong impact on mechanical properties, especially for polyamides. These materials absorb moisture from the air, which changes their tensile strength, stiffness, and toughness. The water molecules act as plasticizers, making the part less stiff but more flexible. This can cause dimensional instability, which is a problem for parts that need tight tolerances. Drying the part can restore its original properties, but repeated exposure to humidity may lead to long-term issues.
Note: Store parts in dry environments and avoid sudden temperature changes to help maintain their strength.
UV Exposure & Aging
Sunlight contains ultraviolet (UV) radiation, which speeds up the aging process in many plastics. UV-cured photopolymers are especially sensitive. Prolonged exposure causes yellowing, brittleness, and loss of mechanical stability. Parts placed near windows or in light boxes age faster and become more fragile.
UV radiation triggers photochemical reactions that break down the polymer structure. This leads to visible changes and a decline in mechanical properties. Protecting parts from sunlight helps prevent these effects and extends their lifespan.
|
Environmental Factor |
Effect on Parts |
|---|---|
|
Humidity |
Reduces strength, causes swelling |
|
Temperature Changes |
Accelerates aging, causes cracks |
|
UV Exposure |
Leads to brittleness and yellowing |
Preventing Cracks in 3D Printed Parts
Cracks in 3D printed parts can be prevented with the right approach. Careful material selection, proper storage, optimized print settings, smart design, and post-processing all play important roles. Each step helps improve the strength and durability of your prints.
Material Selection & Storage Tips
Choosing the right material is the first step to strong 3D printed parts. Some materials, like PA12-CF, work well for parts that need to handle stress or high temperatures. This material offers toughness and temperature resistance. However, it is sensitive to moisture and needs careful handling to avoid problems with layer adhesion and accuracy.
Proper storage methods are essential for all filaments, especially those that absorb moisture from the air. Hygroscopic materials, such as PA12-CF and nylon, lose strength if not stored correctly. Vacuum packaging, drying cabinets, and humidity meters help keep materials dry and ready for use.
- PA12-CF is a good choice for tough, high-stress applications.
- Always store hygroscopic materials in sealed containers.
- Use vacuum bags or drying cabinets for best results.
- Check humidity levels with a meter to protect filament quality.
Tip: Drying filament before printing can prevent cracks caused by moisture.
Optimizing Print Settings
Print settings have a big impact on the quality and strength of 3D printed parts. Adjusting parameters like printing temperature, layer height, and print speed can reduce the risk of cracks. These changes help the material stick together better and make the print more stable.
Common mistakes include setting the extruder temperature too low, not cooling the part enough, or using the wrong infill pattern. Problems with the nozzle or print bed can also cause weak spots.
|
Setting |
Common Mistake |
Solution |
|---|---|---|
|
Extruder Temperature |
Too low |
Increase to recommended range |
|
Cooling |
Insufficient |
Adjust fan speed |
|
Nozzle |
Clogged or worn |
Clean or replace nozzle |
|
Infill Pattern |
Weak structure |
Choose stronger pattern |
|
Print Bed |
Poor adhesion |
Level and clean bed |
Better Design Practices
Good design helps prevent cracks and improves the structural integrity of 3D printed parts. Using lattice facades and organically shaped structures not only looks better but also makes parts stronger. Large objects need extra care to avoid deformation during printing.
Modern polymers provide excellent strength and durability. They keep their shape and resist damage, even in tough conditions. Simplifying geometric details and boundary conditions can help manage stress and avoid weak points.
- Use lattice or organic shapes for better strength.
- Design large parts to prevent warping or deformation.
- Choose modern polymers for long-lasting performance.
- Simplify shapes to reduce stress concentrations.
Protecting Finished Prints
Post-processing can improve the mechanical properties of 3D printed parts and repair small cracks. Techniques like thermal post-processing help fix minor defects. Proper support structures during printing prevent warping and reduce the chance of cracks.
Residual stresses from cooling can cause warping or cracking. Managing the cooling process is important, especially for metal prints. Cooling too quickly can lead to contraction and cracks.
- Use post-processing to repair small cracks.
- Apply thermal treatment for added strength.
- Remove supports carefully to avoid damage.
- Control cooling rates to prevent warping.
Understanding the stress field around crack tips helps identify the causes of cracks. Methods like the J-Integral and Energy Release Rate can analyze cracks without focusing on tiny details. Simplifying the design and using proper boundary conditions also help manage stress and prevent future problems.
Cracks in 3D printed parts often result from material issues, print settings, design flaws, or environmental stress. Many users report that small adjustments can quickly improve print quality, such as:
- Calibrating the filament feed
- Adjusting flow rate and print speed
- Using filament with tight diameter tolerance
Advanced systems like Meltio use precise controls and integrated technologies to reduce errors and repair complex cracks. With these practical steps, anyone can achieve stronger, longer-lasting prints.
FAQ
Why do my 3D printed parts crack along the layer lines?
Cracks often appear along layer lines because the layers do not bond well. Low printing temperature or under-extrusion can cause weak adhesion.
Tip: Increase the printing temperature and check filament flow for better layer bonding.
How can I store filament to prevent moisture damage?
Store filament in airtight containers with desiccant packs.
- Use vacuum bags for extra protection.
- Keep filament away from humid areas.
What is the best infill pattern for strong prints?
Honeycomb and grid patterns provide good strength.
|
Pattern |
Strength |
Flexibility |
|---|---|---|
|
Honeycomb |
High |
Medium |
|
Grid |
High |
Low |
Can sunlight damage my 3D printed parts?
Yes, sunlight can weaken parts over time. UV rays cause plastics to become brittle and yellow.
Note: Use UV-resistant materials or apply protective coatings for outdoor prints.