


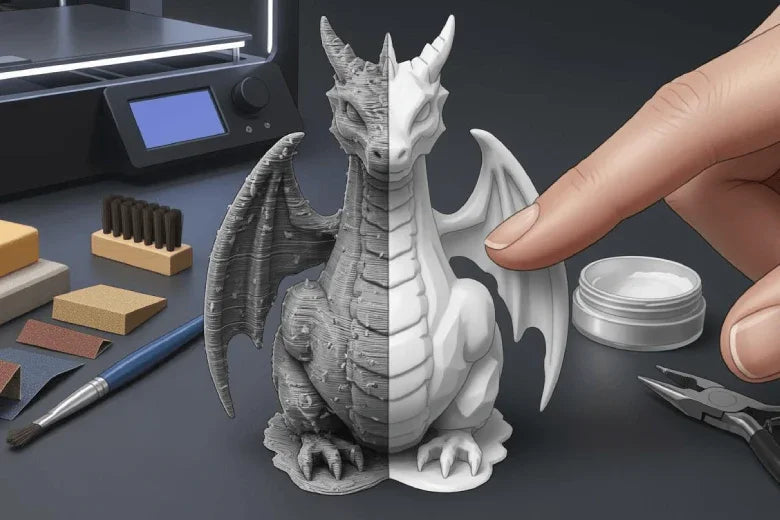
You want your 3d printing projects to look professional with a smooth surface finish. Achieving true smoothness often goes beyond the print itself. Over 70% of 3D-printed parts require some form of finishing. Techniques like thermal annealing or acetone vapor treatment can further enhance surface quality, though each method affects the final result differently.
Key Takeaways
- Adjust layer height and nozzle size to enhance surface smoothness. Smaller layers and nozzles yield finer details and smoother finishes.
- Choose the right filament for better results. Materials like PLA and PolySmooth PVB provide smoother surfaces and are easier to work with.
- Regularly clean the nozzle and calibrate the printer. This practice ensures consistent extrusion and helps achieve a smooth surface finish.
Improving smoothness with 3D printing settings
Layer height and nozzle size
You can make a big difference in the smoothness of your 3d printed parts by adjusting the layer height and nozzle size. Experimental studies show that using a smaller layer height gives you a finer resolution and a smoother surface. This setting helps you achieve a smooth surface finish, but you need to balance it with dimensional accuracy, especially if you plan to use high temperatures during the smoothing process. When you choose a smaller nozzle, you get finer details and a higher smoothing level. Larger nozzles print faster, but you may lose detail and surface quality. The nozzle size also affects how well the layers stick together, which is important for the overall quality of your 3d printing.
- Smaller nozzles create smoother surfaces and better details.
- Larger nozzles increase speed but reduce surface finishing quality.
Print speed and temperature
Print speed and temperature are key factors in improving smoothness. If you use the right material, you can print at higher speeds without losing surface quality. However, lower speeds often give you more uniform surfaces. For temperature, you need to find the right setting for your filament. High temperatures can cause over-extrusion and surface imperfections, while low temperatures may lead to poor bonding between layers. Each filament, like PLA or ABS, reacts differently, so always check the recommended settings.
Tip: Always test your print settings on a small part before starting a big project. This helps you avoid wasting time and material.
Ironing and top surface techniques
Advanced techniques like ironing can greatly improve the smoothness of your 3d prints. Ironing works by moving the nozzle over the top layer to flatten it, which reduces visible layer lines. This technique gives you a smoother top surface finish and can save you time on sanding and polishing. Ironed surfaces also fit better with other parts, making your 3d printed parts more accurate and professional.
- Ironing creates a polished, smooth surface on flat areas.
- You spend less time on post-processing like sanding and polishing.
By focusing on these settings and techniques, you can achieve a high-quality smooth surface finish and reduce the need for extra smoothing steps.
Material choice for smooth surface finish
Selecting filament for smoothness
Choosing the right filament plays a big role in improving smoothness. Different materials give you different results. You can compare popular filament types in the table below:
|
Filament Type |
Characteristics |
Surface Finish |
|---|---|---|
|
PLA |
Easy to print, eco-friendly, smooth and colorful prints |
Smooth and detailed |
|
PETG |
Durable, flexible, glossy finish |
Glossy and smooth |
|
PolySmooth PVB |
Easy to print, zero-warping, strong mechanical properties |
Produces a smooth surface |
PLA works well for beginners and gives you a smooth surface finish. PETG offers a glossy look and extra strength. PolySmooth PVB stands out for its ability to create a very smooth surface. You can use PolySmooth PVB for decorative 3d printed parts that need high-quality surface finishing.
Filament storage and handling
You need to store your filament properly to keep its quality. Moisture can ruin your filament and cause problems during 3d printing. Here are some tips:
- Store filament in a dry, airtight container.
- Use silica gel packs to absorb moisture.
- Avoid exposing filament to high humidity.
Proper storage helps you avoid extrusion issues and weak layers. High-quality filaments also improve smoothness and make your 3d prints last longer.
Trusted filament brands
You can trust several brands for reliable results and smooth surfaces:
- 3D Solutech PLA: Vibrant colors and smooth finish.
- Gizmo Dorks ABS: Strong and durable, great for post-processing.
- Taulman3D Nylon 645: Flexible and strong for industrial parts.
- Polymaker PolyMax PLA: Impact-resistant with a superb surface finish.
- Hatchbox PLA: Excellent bed adhesion and minimal warping.
- ColorFabb PLA/PHA: Tough and smooth with great color.
- Prusament PLA: High quality and smoothness.
- Fillamentum PLA Extrafill: High gloss and precise diameter.
Choosing the right filament and storing it well helps you achieve the best smoothing and surface results in your 3d printing projects.
Printer maintenance for consistent smoothness
Nozzle cleaning
You need to keep your 3d printer’s nozzle clean to achieve consistent smoothness on your prints. Over time, material can build up inside the nozzle. This buildup disrupts the extrusion process and causes uneven layers on the surface of your parts. When you clean the nozzle regularly, you prevent these problems. Clean nozzles help maintain accurate pressure at the nozzle tip. This accuracy is important for proper layer adhesion and a smooth surface finish. You can use a small wire brush or a cleaning filament to remove debris. If you notice rough spots or gaps in your prints, check the nozzle first.
Tip: Clean the nozzle after every few prints to avoid stubborn clogs and keep your 3d printing results consistent.
Bed leveling and calibration
You also need to level the print bed and calibrate your printer for the best smoothness. A well-leveled bed ensures that the first layer sticks evenly. This step sets the foundation for the rest of the print. If you skip calibration, you may see surface imperfections or rough textures. Here are some ways bed leveling and calibration impact your prints:
- Proper calibration leads to precise dimensions and smooth surface finishes.
- Poor calibration can cause surface imperfections like gaps and blobs.
- Inconsistent layer lines can result from inadequate calibration, affecting overall print quality.
- Issues such as over-extrusion and under-extrusion can arise from incorrect settings, impacting surface finish.
- Insufficient cooling or incorrect print speed can lead to rough surfaces.
You should check the bed level before each new project. This habit helps you produce 3d parts with a smooth surface and fewer defects.
Post-processing for smooth surface finish
You can transform the look and feel of your 3d printed parts by using the right post-processing methods. These techniques help you achieve a high-quality surface finish and boost the surface quality of printed parts. Each method works best for certain materials and applications. Let’s explore the most effective ways to improve smoothness and surface finishing.
Sanding and wet sanding
Sanding is one of the most common ways to improve smoothness on 3d printed parts. You start with low-grit sandpaper, such as 150 to 400 grit, to remove the rough outer layer. As you progress, you switch to higher grits, up to 2,000, for a finer finish. Wet sanding helps you control heat and reduces dust, making the process cleaner and more effective. You can use sanding to smooth both PLA and ABS prints. Sanding removes peaks and can decrease surface roughness, but you need to use the right technique to avoid scratches. Many makers combine sanding with filler primer or automotive fillers like bondo to fill in small gaps and layer lines. This combination gives you a smoother surface and prepares your parts for painting or coating.
Tip: Always sand in a circular motion and rinse your part between grits to avoid scratches and achieve a consistent smoothing level.
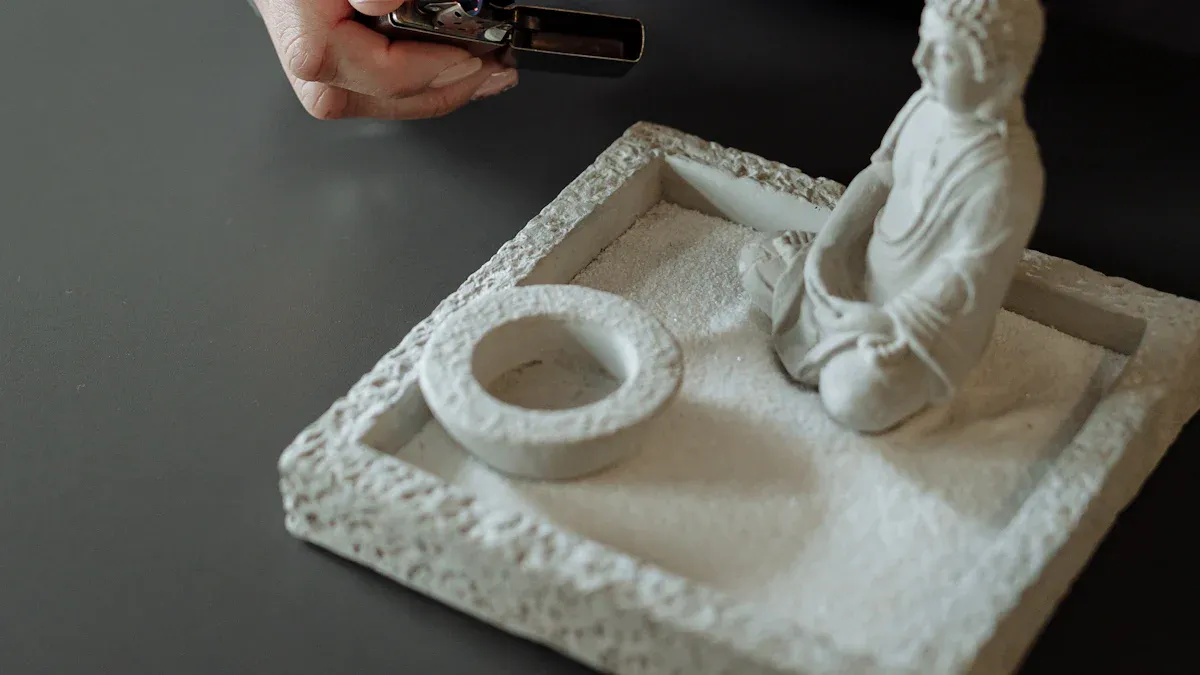
Chemical and vapor smoothing
Chemical and vapor smoothing, also known as vapour smoothing, works especially well for ABS and some specialty filaments. You expose your part to a solvent vapor, such as acetone, which melts the outer layer and creates a glossy, uniform surface. This process eliminates visible layer lines and gives your part a finish similar to injection-molded plastic. The table below shows the main benefits of chemical and vapor smoothing:
|
Benefit |
Description |
|---|---|
|
Eliminates visible layer lines, resulting in a glossy, uniform appearance akin to injection-molded parts. |
|
|
Enhanced Mechanical Properties |
Seals microvoids and surface defects, improving fatigue resistance and impact strength. |
|
Better Chemical and Water Resistance |
Creates a non-porous layer, enhancing resistance to moisture and chemicals, ideal for humid environments. |
|
Easier Cleaning and Sterilization |
Smooth surfaces prevent penetration of dirt and bacteria, crucial for medical and food applications. |
|
Enhanced Aesthetic Quality |
Provides a refined look, often eliminating the need for further finishing or painting. |
|
Improved Coating and Painting Adhesion |
Facilitates easier painting and coating due to reduced porosity and even surface. |
|
Dimensional Accuracy and Integrity |
Maintains fine details and tolerances without material removal. |
|
Scalability for Production |
Capable of processing hundreds of parts simultaneously, suitable for mass production. |
You must follow safety guidelines during the smoothing process. Always work in a well-ventilated area, such as outdoors or in a garage with the door open. Wear an organic vapor respirator and nitrile gloves. Remove all ignition sources within 10 feet, and keep a Class B fire extinguisher nearby. Acetone is highly flammable, so never use it in an enclosed space. Dispose of acetone-soaked materials in a sealed metal container labeled as hazardous waste, and check your local laws for proper disposal.
Bead blasting and abrasive methods
Bead blasting is a gentle and controlled way to improve the surface of 3d printed parts. You use spherical beads that strike the surface and remove only the top layer. This method gives you a smoother and more uniform finish than sandblasting, which can be too harsh for some materials. Bead blasting works well for cleaning, polishing, and preparing surfaces for coatings. It also improves mechanical strength without changing the shape of your part. You can use bead blasting on PLA, ABS, and other common materials to achieve an aesthetically pleasing result.
- Bead blasting is less damaging than sandblasting.
- It provides a uniform finish and enhances mechanical strength.
- The process does not significantly alter the dimensions of your parts.
Coatings and surface treatments
You can use coatings and surface treatments to further improve smoothness and protect your 3d printed parts. Filler primers work well with sanding to fill in small imperfections and layer lines, especially on PLA prints. After applying a filler primer, you sand the part again for a smooth surface finish. You can also use automotive fillers to fill deeper gaps before sanding and painting. Paints, clear coats, and specialty surface treatments add color, gloss, and extra protection. These coatings help you achieve a high-quality surface finish and make your parts more durable.
Note: Always let each layer of primer or paint dry completely before sanding or applying the next coat. This step ensures the best possible surface quality.
Polishing and buffing
Polishing and buffing give your 3d printed parts a mirror-like shine. You start by cleaning the part to remove dust and oils. Next, you use abrasive polishing to remove any remaining imperfections. Then, you apply a fine polishing compound to the surface. Buff the part with a soft cloth or polishing wheel to bring out a glossy finish. Finally, inspect your part for quality and touch up any areas as needed. Polishing is more aggressive and removes more material, while buffing focuses on creating a smooth, bright surface. When you use both sanding and polishing in sequence, you can achieve smooth as-printed parts with a professional look.
For best results, always inspect your part under good lighting after each step in the finishing process.
By using these post-processing methods, you can control the factors that affect smoothness and surface finishing. You will achieve a smooth surface finish and improve the overall quality of your 3d printing projects.
Surface finishing tools and materials
Sandpaper and abrasives
You need the right abrasives to achieve a smooth surface on your 3d printed parts. Sandpaper is the most common tool for smoothing. Start with a coarse grit to remove layer lines, then move to finer grits for a smooth finish. Wet sanding helps you avoid heat buildup and gives better results with finer grits. The table below shows which grit ranges work best:
|
Grit Range |
Purpose |
|---|---|
|
80-120 grit |
Start with coarse grit to remove layer lines |
|
220-400 grit |
Move to finer grits for a smooth finish |
|
Wet sanding |
Recommended for better results with finer grits |
Professionals also use abrasive smoothing methods like tumbling or bead blasting. These tools can cost more but save time on large projects.
Chemical agents and safety gear
Chemical agents like acetone or ethyl acetate can smooth the surface of some 3d printing materials. You must use safety gear to protect yourself during these processes. Always wear:
- Nitrile gloves to protect your skin from chemicals.
- Safety goggles to shield your eyes from splashes.
- A face mask or respirator to filter harmful fumes.
- An apron or lab coat to keep your clothes and skin safe.
Primers, paints, and fillers
Primers, paints, and fillers help you achieve a smooth surface finish on your 3d printed parts. Primers fill small imperfections and create a uniform base for painting. Fillers address deeper defects and prepare the surface for the next steps. Paints add color and protect the surface, making your parts look better and last longer. Using these materials is a standard part of post-processing in 3d printing. You get both improved smoothness and greater durability for your finished parts.
Common mistakes in improving smoothness
When you work to improve the smoothness of your 3d printed parts, you might run into some common mistakes. Knowing these pitfalls helps you avoid problems and get better results.
Over-sanding and surface damage
You may think that sanding more will always make your parts smoother. In reality, over-sanding can damage the surface and remove important details. If you use coarse sandpaper for too long, you risk flattening features or creating uneven spots. Always check your progress as you sand. Switch to finer grits as soon as the main layer lines disappear. This approach keeps your 3d parts looking sharp and professional.
Tip: Light pressure and patience give you the best finish without harming your print.
Incorrect chemical use
Using chemicals for smoothing can improve the look of your prints, but mistakes can cause harm. If you use the wrong chemical or skip safety steps, you risk health and environmental problems. The table below shows some risks you should know:
|
Risk Type |
Description |
|---|---|
|
Uncured resins can enter your skin or become airborne, causing health risks. |
|
|
Skin irritation |
Direct contact may lead to rashes or redness. |
|
Eye damage |
Splashes can hurt your eyes. |
|
Respiratory issues |
Fumes can cause dizziness or headaches. |
|
Long-term health risks |
Long exposure may cause chronic problems. |
|
Environmental impact |
Improper disposal can harm water and wildlife. |
Always wear gloves, goggles, and a mask when working with chemicals. Work in a well-ventilated area to protect yourself and the environment.
Skipping preparation steps
Skipping key steps before finishing can ruin your final surface. If you ignore layer thickness or raster angle settings, you may see roughness or poor accuracy. The table below explains how preparation affects your results:
|
Preparation Parameter |
Impact on Surface Quality |
|---|---|
|
Layer Thickness |
Affects surface roughness |
|
Raster Angle |
Directly impacts accuracy |
Finishing steps like sanding are essential for a smooth look. If you skip them, your 3d printing projects may keep visible lines and rough textures. Careful preparation leads to better surface quality and more impressive parts.
You can achieve excellent smoothness in 3d printing by focusing on model quality, careful sanding, and smart post-processing. Try different surface finishing methods, such as polishing or coating, to improve your 3d parts. Patience and attention to detail help you get the best results every time.
FAQ
What is the best way to smooth PLA prints?
You can use sanding and filler primer for PLA. Wet sanding with fine grit sandpaper gives you a smooth finish.
Can you use acetone vapor smoothing on PETG?
No, acetone vapor does not work on PETG. You should use sanding or bead blasting for PETG surface improvement.
How do you avoid over-sanding your 3D prints?
- Check your progress often.
- Switch to finer grit sandpaper as soon as layer lines disappear.
- Use light pressure to protect details.