


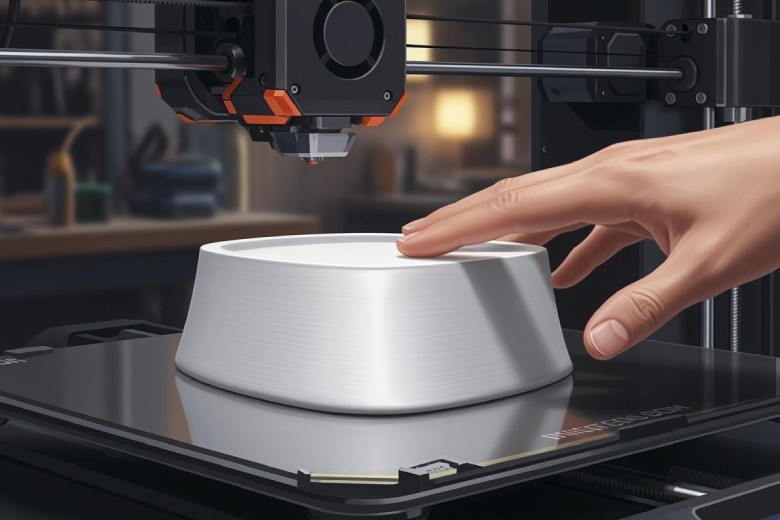
A flawless top layer results from careful tuning of your 3D printer settings, active monitoring, and thoughtful post-processing. The top layer covers the infill and creates a smooth finish.
- Surface roughness affects both the look and function of printed parts.
- Controlling this factor ensures high-quality, reliable results.
Key Takeaways
- Choose a layer height of 0.12 mm to 0.2 mm for finer details and smoother surfaces. This adjustment improves the overall appearance of your prints.
- Use three to four top layers to ensure full coverage and hide the infill structure. This simple step enhances the quality of the top layer significantly.
- Monitor your printer during the process. Adjust the flow rate and print speed to prevent common issues like gaps and rough surfaces.
3D Printer Settings for Top Layer
Choosing the right layer height is the first step to achieving a flawless top layer. Smaller layer heights, such as 0.12 mm to 0.2 mm, produce finer details and smoother surfaces. The steps between layers become less visible, which improves the overall appearance. Most FDM printers allow layer thicknesses from 0.1 mm to 0.4 mm. DLP printers can use much finer layer thicknesses, ranging from 0.01 mm to 0.05 mm, which results in higher precision.
The number of top layers directly affects surface quality. Adding three to four top layers ensures full coverage and hides the infill structure beneath. Proper calibration of the Z-axis and careful adjustment of slicer settings, such as line width and top layer pattern, also play a role in improving surface quality.
Tip: Use three to four top layers for best coverage. Adjust layer height to 0.12 mm or 0.16 mm for high detail and smoother surfaces.
|
Layer Height (mm) |
Effect on Quality |
|---|---|
|
0.12 - 0.16 |
|
|
0.20 |
Standard quality |
|
0.28 |
Faster prototyping, lower detail |
Infill Percentage and Coverage
The infill percentage is a key factor in supporting the top layer. A higher infill percentage increases stability and limits deformations. It helps the top layer sit flat and prevents visible infill lines or gaps. For most prints, an infill percentage of 20% to 40% works well. If the top layer needs extra support, increase the infill percentage to 50% or higher.
- A higher infill percentage enhances stability by supporting force flow.
- Smaller layer heights lead to smoother surfaces.
- The infill percentage affects how well the top layer covers the infill structure.
Mechanical and chemical smoothing processes can reduce surface roughness after printing. However, optimizing infill percentage and layer height during printing is the best way to achieve a flawless top layer.
Note: Adjust the infill percentage based on the object’s purpose. More infill means better support for the top layer, but it also uses more material.
Temperature and Cooling
Temperature and cooling are important top layer settings. Each filament type requires a specific hotend and bed temperature to optimize the top layer. Proper cooling ensures that freshly extruded filament hardens quickly, which leads to sharp details and precise layering. Different materials need tailored cooling strategies.
|
Filament Type |
Recommended Heated Bed Temperature |
|
|---|---|---|
|
PLA |
180°C – 230°C |
0°C – 60°C |
|
ABS |
200°C – 250°C |
80°C – 110°C |
|
PETG |
220°C – 250°C |
50°C – 75°C |
- Proper cooling is crucial for high surface quality in FDM 3D printing.
- Cooling helps the top layer harden quickly and prevents warping.
- Adjust cooling settings based on the filament used.
Printer settings must be tailored to the specific material and object requirements. The choice of slicer also affects the quality of the top layer. Smoother surfaces and higher precision are possible with careful adjustment of layer height, infill percentage, and cooling.
Top Layer Finishing and Troubleshooting
Real-Time Adjustments During Printing
Monitoring your printer during the printing process can make a significant difference in the top layer. Adjusting the flow rate helps control the amount of filament deposited on each layer. If you notice under-extrusion or over-extrusion, you can fine-tune the flow rate in your printer’s control panel. Print speed also affects the quality of the top solid layers. Slower speeds allow the filament to cool and settle, which leads to a smoother finish.
Some advanced printers use a 3D laser scanner to check each layer for irregularities as the print progresses. This feedback system can adjust the material flow in real time, compensating for any unevenness in the previous layer. Adjusting the Z-axis slightly during printing can also help if you see gaps in top layers or uneven surfaces. Careful observation and small tweaks during the print can prevent many common issues with the top layer.
Tip: Watch for signs of gaps in top layers, such as visible infill or rough patches. Pause the print if needed and adjust the flow rate or Z-offset to improve coverage.
Post-Processing Techniques
Post-processing can transform the top solid layers from good to flawless. Several methods are popular for smoothing and refining the top layer:
- Chemical Smoothing: Acetone vapor smoothing works well for ABS. The solvent softens the outer layers, causing them to partially melt and blend together. This process creates a smooth finish and can make 3d prints look similar to injection-molded parts.
- Sandblasting: This technique uses fine particles to gently abrade the surface, reducing the visibility of individual layers and improving surface quality.
- CNC Post-Processing: CNC machines can trim and polish the top layer for precise tolerances and a uniform appearance.
- Sanding: Mechanical sanding is effective for PLA and other materials that do not respond to chemical smoothing. Start with a coarse grit and move to finer grits for the best results.
- Heat Treatments: Carefully applying heat with a hot air gun can help blend the top solid layers, but it requires practice to avoid warping.
Chemical smoothing often produces better visual results than mechanical methods, especially for ABS. It improves surface quality, makes parts more resistant to dirt, and can even enhance mechanical properties. PLA does not respond well to chemical smoothing, so sanding remains the best option for this material.
Material-Specific Tips (PLA, ABS, PETG)
Each filament type requires specific settings to achieve a flawless top layer. The table below summarizes the best parameters for PLA, ABS, and PETG:
|
Filament |
Bed Temperature |
Nozzle Temperature |
Cooling Settings |
Print Speed |
Adhesion Effect |
Top Layer Notes |
|---|---|---|---|---|---|---|
|
PLA |
50–60 °C |
200–210 °C |
100% |
40-60 mm/s |
Uniform melting |
Sanding works best; chemical smoothing not effective |
|
ABS |
90–110 °C |
230–250 °C |
Off or low |
40-60 mm/s |
Strong adhesion |
Acetone smoothing and sanding both effective |
|
PETG |
70–80 °C |
220–250 °C |
30-50% |
40-60 mm/s |
Good adhesion |
Use wipe distance to reduce blobs |
- For PLA, use a heated bed and check the extrusion temperature before starting. Set the print speed between 40 and 60 mm/s for optimal surface quality.
- ABS benefits from reduced cooling and higher bed temperatures. Both sanding and acetone smoothing can improve the top solid layers.
- PETG prints best with moderate cooling and a wipe distance of 1-5 mm after retraction. This helps prevent blobs and stringing on the top layer.
Tools and Safety Gear
Finishing the top layer often requires specific tools and safety equipment. Essential tools include:
- Sandpaper (various grits)
- Precision files
- Hobby knives
- Hot air gun
- Acetone or other solvents (for ABS)
- Soft brushes for dust removal
- CNC machine (for advanced users)
Always use safety gear when post-processing 3d prints. Wear gloves when handling solvents or sanding. Use a respirator or mask to avoid inhaling fine particles or fumes. Work in a well-ventilated area, especially when using chemicals or heat.
Note: Never use acetone or other solvents near open flames or heat sources. Proper ventilation is essential for safety.
Common Surface Issues and Solutions
Many users encounter surface defects on the top layer. The most common problems include gaps in top layers, rough surfaces, blobs, and visible infill lines. These issues often result from incorrect print settings, insufficient filament flow, or poor layer adhesion.
- Gaps in top layers can be fixed by increasing the number of top solid layers to at least three or four. Adjust the fill amount to 20-25% for better support.
- Rough surfaces may indicate under-extrusion or low infill. Check the flow rate and increase the infill percentage if needed.
- Blobs and zits often appear when the nozzle leaves excess material. Use the wipe distance setting (1-5 mm) to help the nozzle clean itself after retraction.
- Nozzle maintenance is crucial for print quality. Clean the nozzle every 100-200 hours and replace brass nozzles every 200-400 hours to prevent clogs and maintain a smooth finish.
- Scars or marks on the top layer can occur if the nozzle touches the print. Adjust the Z-offset and check for proper bed leveling.
|
Common Issue |
Likely Cause |
Solution |
|---|---|---|
|
Gaps in top layers |
Under-extrusion, low infill |
Increase flow rate, add more top solid layers |
|
Rough surface |
Incorrect settings, low infill |
Adjust print speed, increase infill |
|
Blobs/zits |
Poor retraction, dirty nozzle |
Set wipe distance, clean/replace nozzle |
|
Visible infill lines |
Too few top solid layers |
Add more top solid layers |
Achieving a flawless top layer requires careful tuning and patience. Try these tips from experienced users:
- Adjust layer height to 0.2 mm for quality.
- Use 1 mm height for solid layers, with five solid layers for best coverage.
- Add two to four perimeters for extra stability. Stay safe and experiment for the best results!
FAQ
How do I fix rough top layers on my 3d printer?
Check the nozzle for clogs. Adjust the flow rate. Increase the number of top layers. Clean the 3d printer nozzle for better results.
What is the best way to clean a 3d printer after finishing a print?
Turn off the 3d printer. Remove leftover filament. Use a soft brush to clean dust. Wipe the bed with isopropyl alcohol for a smooth surface.
Why does my 3d printer leave gaps in the top layer?
Gaps often mean low infill or under-extrusion. Increase infill percentage. Add more top layers. Make sure the 3d printer extruder works correctly.