


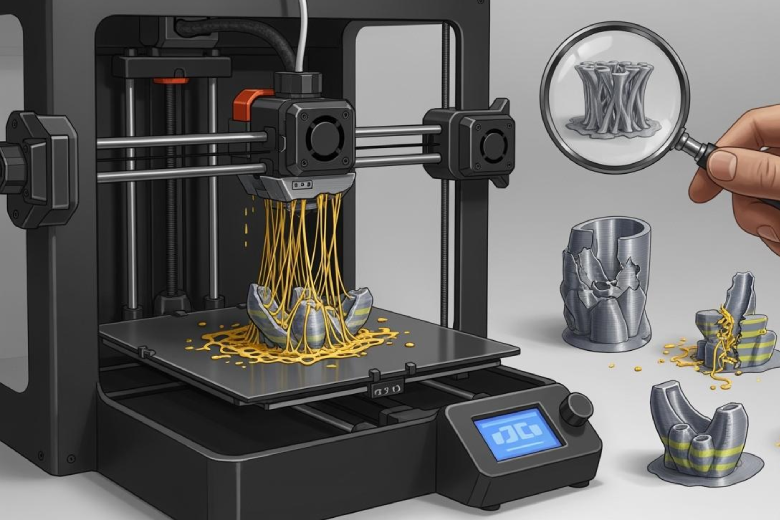
Many 3d printing failures happen worldwide. These include poor adhesion to the print bed, clogged nozzles, warping, stringing, under-extrusion, and over-extrusion.
Understanding these errors improves print quality and reduces frustration.
A troubleshooting guide helps identify issues early. Careful troubleshooting and preparation prevent common mistakes and lead to better results.
Key Takeaways
- Proper bed leveling is crucial for successful 3D prints. Regularly check and adjust the bed to ensure even adhesion and quality.
- Prevent extrusion issues by maintaining your printer. Clean the nozzle, calibrate the extruder, and adjust temperature settings to avoid under or over-extrusion.
- Address warping and adhesion problems early. Use heated beds, clean surfaces, and check environmental conditions to keep prints flat and secure.
Bed Leveling
Why Bed Leveling Matters
Bed leveling is a key step in 3D printing. A level bed helps the printer lay down the first layer of filament evenly. When the bed is not level, the nozzle may be too close or too far from the surface. This can cause problems with adhesion and print quality. Regular maintenance, such as cleaning the nozzle and checking the printer’s mechanical parts, helps prevent many issues before they start. A clean and well-maintained printer operates more reliably and produces better results.
Signs of Bed Leveling Failure
Common signs of bed leveling issues include:
- The nozzle sits too close to the bed, which blocks filament from coming out.
- The bed is misaligned, causing the first layer to not stick properly.
- The first layer looks uneven or has gaps.
- Prints peel off or warp at the corners.
Tip: If you notice these problems, stop the print and check the bed alignment before continuing.
Prevention and Fixes
Experts recommend several steps to avoid and fix bed leveling issues:
- Check for deformation by using a ruler or a piece of paper to test the distance between the nozzle and the bed at different points.
- Level the bed by adjusting the screws under the platform or use automatic leveling if your printer supports it.
- Make sure the heating bed is flat and installed correctly.
- Replace the bed if it is badly warped. Glass or aluminum beds resist warping.
- Use flexible build plates to help with minor unevenness and make print removal easier.
- Clean the nozzle and build plate before leveling.
- Align the printer axes and adjust the nozzle height using a thin piece of paper.
- Perform a test print to check the results.
Regular checks and careful setup reduce the risk of issues and improve print quality.
Extrusion Issues
Under-Extrusion
Under-extrusion happens when the printer does not push enough filament through the nozzle. This problem leads to missing layers, incomplete models, and weak prints. Several main causes can trigger under-extrusion:
- Low printing temperature prevents the filament from melting properly.
- Excessive cooling hardens the filament too quickly.
- High printing speed does not allow enough time for proper extrusion.
- Moist material can block the flow and cause inconsistent extrusion.
- An uncalibrated extruder may fail to deliver the right amount of filament.
Tip: If your printer stops extruding mid print or is not extruding at start, check the nozzle for any clogged material and inspect the filament for moisture.
Over-Extrusion
Over-extrusion occurs when too much filament comes out of the nozzle. This issue creates blobs, rough surfaces, and failed supports. Over-extrusion can also lead to strong supports that are difficult to remove. Sometimes, the extruder pushes more filament than needed, which causes surface defects and makes support structures messy.
Note: Over-extrusion often results in incomplete models and inconsistent extrusion across layers.
Troubleshooting Extrusion Problems
To fix extrusion issues, follow these steps:
- Clean the nozzle to remove any clogged debris.
- Adjust the printing temperature to match the filament type.
- Slow down the printing speed to improve extrusion consistency.
- Dry the filament before use to prevent moisture problems.
- Calibrate the extruder to ensure accurate filament delivery.
- Check for a clogged extruder if you notice missing layers or failed supports.
A well-maintained printer produces better results and reduces the risk of extrusion failures.
Print Quality Problems
Surface Defects
Surface defects can lower print quality and make models look unfinished. Many 3D prints show scratches, blisters, visible layers, or warping. These problems often cause gaps on the surface. The table below shows common surface defects and their causes:
|
Surface Defect |
Cause |
|---|---|
|
Scratches |
Damaged or dirty FEP film, mechanical issues, incorrect print parameters |
|
Blisters |
Poorly mixed resin, dirty resin tank, UV post-curing issues, low-quality resin |
|
Visible Layers |
Insufficient exposure times, mechanical movement issues |
|
Warping |
Uneven cooling, incorrect print settings |
Gaps can appear when the printer does not lay down material evenly. Gaps in top layers, gaps between infill and outline, and gaps in thin walls are all signs of poor print quality.
Spider Nets and Rough Patches
Spider nets, also called stringing, look like thin webs across the print. These often form when the nozzle moves and leaks filament, leaving gaps and rough patches. Rough patches can also show up if the filament absorbs moisture or if the nozzle is dirty. Gaps in the print can make the surface feel bumpy and weak.
Tip: If you see gaps or spider nets, check your retraction settings and keep your filament dry.
Improving Print Quality
Improving print quality means reducing gaps and making surfaces smooth. Here are some proven steps:
- Optimize print speed to prevent gaps and reduce stringing.
- Use anti-stringing filaments for better flow and fewer gaps.
- Update printer firmware for better control and fewer errors.
- Schedule regular maintenance to avoid gaps and rough patches.
- Calibrate the print bed to prevent gaps in thin walls.
- Use the coasting feature in slicing software to stop filament flow before the end of a path.
- Adjust retraction settings to prevent gaps between infill and outline.
- Store filament dry to avoid gaps caused by moisture.
- Clean or replace the nozzle to keep gaps from forming.
Following these steps helps you achieve better print quality and fewer gaps in your 3D prints.
Warping and Adhesion
Causes of Warping
Warping is a frequent problem in 3D printing. It happens when the printed part cools unevenly, causing internal stresses. These stresses pull the edges up, leading to curling or rough corners. Shrinkage during cooling can distort the shape, especially with large models. Poor adhesion between the print and the bed often leads to warping or parts not sticking to the bed. Some materials, like PP filament, ABS, ASA, and nylon, are more prone to warping because they need higher bed temperatures and stable environments. Environmental factors such as temperature and humidity also affect print quality. If the air is too dry or too cold, the filament may not stick well, increasing the risk of curling.
- Uneven cooling rates cause internal stress.
- Shrinkage during cooling promotes warping.
- Material distortion at the print bed affects large models.
- Poor adhesion leads to detachment and project failure.
Spotting Adhesion Issues
Spotting adhesion problems early helps prevent print failures. Signs include prints not sticking to the bed, corners lifting, or curling. In resin 3d printing, poor adhesion can cause layers to detach or models to fail. Proper calibration is important. The nozzle must be at the correct distance from the bed. Clean surfaces and advanced print plates improve adhesion. Regular checks for wear and contamination help maintain good adhesion. In resin 3d printing, evaluating material pairings and using analytical methods can identify issues before printing starts.
Tip: If you see corners lifting or prints detaching, check the bed level and clean the surface.
Solutions for Warping and Adhesion
Several solutions help reduce warping and improve adhesion:
|
Solution |
Description |
|---|---|
|
Optimal Positioning |
Place the model in the best spot on the print bed to minimize warping. |
|
Wall Thickness |
Increase wall thickness for large, thin-walled prints to avoid warping. |
|
Heated Chamber |
Use a heated chamber to keep temperature stable and reduce warping. |
|
Hollowing Out |
Hollow large parts to prevent sagging and uneven surfaces. |
- Heated build platforms help mitigate warping.
- High-temperature nylon varieties reduce deformation.
- Adhesion aids, like glue sticks or special sheets, improve poor adhesion.
- Increasing print bed temperature can help parts stick better.
Note: Good adhesion prevents curling and ensures prints stay flat. Regular maintenance and calibration are key to avoiding warping and poor adhesion.
Layer Shifting
Identifying Layer Shifts
Layer shifting happens when the printer’s moving parts lose their correct position during a print. This causes the layers to appear misaligned or staggered. You may notice that the print looks like it has been pushed sideways at a certain point. Sometimes, the shift is small and only affects a few layers. Other times, the entire print becomes unusable. Common signs include jagged edges, sudden steps in the model, or repeated patterns that do not match the design.
The table below shows typical causes and descriptions:
|
Cause of Layer Shifting |
Description |
|---|---|
|
Loose or worn belts |
Can skip teeth on the pulleys, causing misalignment. |
|
Loose or missing screws |
Can lead to vibrations and inaccurate printing. |
|
High printing speed |
Can cause the print head or bed to move too fast, resulting in misalignment. |
|
Unsuitable filament |
Can cause jamming or clogging, affecting layer stability. |
|
Complex models |
Can overwhelm slicing software, leading to errors. |
Preventing Layer Shifting
Prevention starts with regular maintenance. Check belts for tightness and wear. Tighten all screws on the printer frame and moving parts. Reduce print speed if you notice frequent shifts. Use filament that matches your printer’s specifications. Simplify complex models before printing to avoid errors. Clean the rails and lubricate them to ensure smooth movement.
Tip: Always run a test print after making adjustments to catch problems early.
Troubleshooting Guide for Layer Shifting
If you see layer shifting, follow these steps:
- Pause the print and inspect the belts for damage or looseness.
- Tighten any loose screws on the printer’s frame and moving parts.
- Lower the print speed in your slicing software.
- Check the filament for tangles or blockages.
- Update or re-slice the model if it is very complex.
- Restart the print and observe the first few layers closely.
Quick action can save time and material. Careful setup and regular checks help prevent future problems.
The five most common 3D printing failures include:
- Warping
- Stringing
- Insufficient bed adhesion
- Under-extrusion
- Sagging
Applying prevention and correction tips improves print quality:
- Careful bed leveling and nozzle settings ensure reliable first layers.
- Regular maintenance and calibration help avoid common issues.
- Selecting the right filament and adjusting settings leads to better results.
Have you faced any of these problems? Share your experiences or ask questions below.
FAQ
What causes 3D prints to warp?
Warping happens when the print cools unevenly. Heated beds and stable room temperatures help prevent this issue.
How can I fix stringing in my prints?
- Adjust retraction settings in your slicer.
- Keep filament dry.
- Clean the nozzle before starting a new print.
Why does my print not stick to the bed?
|
Reason |
Solution |
|---|---|
|
Dirty bed |
Clean with alcohol |
|
Bed not level |
Adjust leveling screws |
|
Wrong temperature |
Set correct bed temp |