


Regular care keeps 3D printers running smoothly and helps users achieve consistent results. Skipping maintenance can lead to clogged nozzles, uneven prints, or sudden breakdowns. Studies show that cleaning and proactive upkeep extend the lifespan of a printer and maintain high print quality.
|
Maintenance Type |
Benefit |
|---|---|
|
Regular maintenance |
Extends printer lifespan and print quality |
|
Routine cleaning |
Prevents jams and keeps prints consistent |
|
Proactive care |
Prevents issues that shorten printer life |
Making maintenance a habit ensures every print meets expectations.
Key Takeaways
- Regular maintenance extends the lifespan of your 3D printer and improves print quality. Make it a habit to clean and inspect your printer.
- Keep the nozzle and extruder clean to avoid clogs. Clean every 20-30 printing hours or after changing materials for best results.
- Lubricate moving parts monthly to reduce friction and wear. Use the right type of lubricant for different components to ensure smooth operation.
- Inspect belts and screws regularly to maintain print accuracy. Tighten loose parts to prevent layer shifting and misalignment.
- Establish a maintenance schedule with daily, weekly, and monthly tasks. A checklist helps track your printer's health and prevents costly repairs.
Essential Maintenance for 3D Printers
Cleaning Nozzle and Extruder
A clean nozzle and extruder help 3D printers produce smooth, accurate prints. Over time, filament residue and debris can clog the nozzle, causing under-extrusion or failed prints. Manufacturers recommend heating the nozzle, removing debris, and inspecting for damage as part of regular care. Light cleaning should take place every 20–30 printing hours or after switching to a new material. Using a dedicated cleaning filament can remove stubborn buildup and withstand higher temperatures. High-quality filaments leave less residue, so they help keep the nozzle cleaner for longer.
Several methods work well for cleaning nozzles:
|
Method |
Best For |
Steps |
|---|---|---|
|
Partial clogs and burnt residue |
Heat nozzle, push filament, cool to 90℃ (PLA) or 110℃ (ABS), pull filament out until clean. |
|
|
Needle Cleaning |
Minor blockages near the nozzle tip |
Heat nozzle, use a thin needle to poke through, extrude filament to clear debris. |
|
Soaking in Solvent |
Filament that doesn’t burn easily |
Remove nozzle, soak in acetone (for ABS) or ethyl acetate (for PLA), flush with wire/air. |
|
Nozzle Replacement |
When other methods fail |
Swap in a new nozzle if cleaning is ineffective, especially for degraded brass nozzles. |
Lubricating Moving Parts
Smooth movement is essential for precise printing. Rails, screws, and bearings need lubrication to reduce friction and wear. PTFE-based lubricants work well for most components because they do not attract dust. Silicone-based lubricants handle higher temperatures, while lithium-based greases suit heavy-load areas like bearings.
Check moving parts every month or after 100 hours of printing. Signs of dryness, stiffness, or noise mean it is time to apply a thin layer of lubricant. Always clean the parts before lubricating and avoid over-applying, as too much lubricant can attract dust and dirt.
- PTFE-based lubricants: Good for most rails and screws.
- Silicone-based lubricants: Useful for high-temperature areas.
- Lithium-based greases: Best for bearings and heavy loads.
Inspecting Belts and Screws
Belts and screws control the movement and accuracy of 3D printers. Loose or worn belts can cause layer shifting and misalignment. Screws and pulleys must stay tight to prevent inconsistent movement. Inspect belts for proper tension; they should sound like a low bass note when plucked. Check for loose set screws, wobbly Z screws, and damaged bearings. Replace any rough or noisy motors or bearings to avoid uneven layers.
|
Sign of Issue |
Description |
|---|---|
|
Major factors in layer shifting in 3D printers. |
|
|
Incorrect tension of belts |
Can lead to misalignment during printing. |
|
Unsecured motor pulleys |
Causes inconsistent movement, contributing to layer shifts. |
|
Loose set screws |
Can cause pulleys to slip. |
|
Wobbly Z screws |
Can lead to uneven layers or shifting. |
|
Rough or noisy bearings |
Should be replaced if found to be problematic. |
Dusting Printer Components
Dust can clog moving parts, affect print quality, and even cause hardware failures. Regular dusting keeps 3D printers working well and prevents overheating. Turn off and unplug the printer before cleaning. Use compressed air to blow dust out of fans, motors, and electronics. A microfiber cloth works well for wiping rails and screws. Never use water or wet cloths on electronics.
- Dust the printer every month or after heavy use.
- Clean hard-to-reach areas with canned air.
- Wipe rails and screws with a microfiber cloth.
- Add a little lubricant after dusting to keep parts moving smoothly.
Reminder: Keeping the inside of the printer clean helps prevent clogs and keeps prints consistent.
Bed Leveling and Calibration
Manual Bed Leveling
Manual bed leveling remains a fundamental skill for anyone using 3D printers. This process ensures the print bed sits at the correct distance from the nozzle, which is critical for high-quality prints. Improper leveling can cause several issues:
- Poor adhesion: Uneven gaps may cause prints to detach or warp.
- Inconsistent layer height: This can reduce overall print quality.
- Nozzle damage: The nozzle or bed can suffer damage if the bed is not level.
- Warping and subtle print issues: These problems often appear throughout the print.
To manually level a bed, users should follow these steps:
- Turn off the printer and let the bed cool.
- Locate the screws or knobs under each bed corner.
- If using software like Klipper, set XY locations for each screw in the configuration.
- Home the printhead to set the nozzle’s starting position.
- Move the nozzle to the first screw location.
- Place a piece of paper between the nozzle and bed.
- Adjust the screw until the paper moves with slight friction.
- Repeat for each screw, checking every corner and the center.
Tip: Always use the same piece of paper for consistency and repeat the process for accuracy.
Automatic Bed Leveling
Automatic bed leveling systems simplify the calibration process. These systems use sensors to measure the distance between the nozzle and the bed at multiple points. The printer then compensates for any unevenness during printing. The following table compares manual and automatic methods:
|
Method |
Advantages |
Disadvantages |
|---|---|---|
|
Greater control; precise adjustments |
Time-consuming; requires skill; risk of uneven prints |
|
|
Auto Leveling |
User-friendly; reduces setup time; corrects minor imperfections |
Dependent on filament and bed material; needs clean surfaces |
Automatic systems save time and help beginners achieve better results, but users must keep the bed and sensor clean for best performance.
Extruder Alignment
Proper extruder alignment ensures the printer delivers the correct amount of filament during each print. Calibration involves these steps:
- Preheat the hot end to the correct temperature.
- Manually feed filament until it flows smoothly.
- Mark a point on the filament 120 mm above the extruder.
- Extrude 100 mm of filament.
- Measure the remaining distance to the mark.
- Calculate the extrusion ratio and adjust the 'steps per unit' value in the firmware.
- Save the new value and perform a test extrusion.
Calibrating the extruder helps maintain accurate and consistent print results. This step is essential for anyone who wants reliable performance from 3D printers.
Print Bed Care
Cleaning the Bed Surface
A clean print bed helps every user achieve strong adhesion and smooth finishes. Dust, oils, and leftover filament can build up quickly, so regular cleaning is essential. Different bed surfaces require specific cleaning methods to avoid scratches or chemical damage. The following table shows safe cleaning agents and techniques for common bed types:
|
Bed Type |
Cleaning Method |
What to Avoid |
|---|---|---|
|
Glass Print Beds |
Wipe with isopropyl alcohol; soak in warm soapy water; rinse and dry completely |
Metal scrapers; abrasive sponges or powders |
|
PEI Spring Steel Plates |
Wash with warm soapy water; wipe with a soft sponge; rinse and dry |
Acetone; aggressive scrubbing tools |
|
Textured Surfaces |
Warm the bed; scrape with a plastic scraper; clean with warm soapy water |
Strong solvents; household cleaners with additives |
Users should choose isopropyl alcohol for glass and PEI surfaces. Warm water with mild dish soap works well for all bed types. Window cleaner can help with glass beds, but users must check for additives that may leave residue. Cleaning the bed after every few prints keeps the surface free from contaminants.
Inspecting for Damage
Regular inspection helps users spot problems before they affect print quality. Common types of damage include failed prints, bed leveling issues, and surface wear. Failed prints often leave messy layers or filament stuck to the bed. Bed leveling problems can cause poor adhesion, warping, blobs on z layers, or prints that fall apart easily. Users should look for scratches, chips, or uneven spots on the bed surface. If any damage appears, replacing or resurfacing the bed restores reliable performance.
- Failed prints leave residue or rough patches.
- Bed leveling issues cause warping or poor adhesion.
- Surface wear includes scratches, chips, or dents.
A well-maintained bed helps 3D printers deliver consistent results and reduces the risk of print failures.
Preventive Inspections
Checking Wires and Connectors
Wires and connectors play a vital role in the safe and reliable operation of 3D printers. Over time, connectors can loosen or collect debris, especially after repeated plugging and unplugging. Regular inspections help prevent electrical failures and print interruptions. Users should look for frayed wires, loose connections, or signs of overheating. Cleaning connector threads removes dust that could cause poor contact or signal loss.
- Inspect connectors and wires regularly, especially after moving or servicing the printer.
- Clean connector mating threads to prevent debris buildup.
- Replace any damaged or worn wires immediately.
Monitoring Fans and Cooling
Proper cooling ensures that both the extruder and printed parts maintain the right temperature. Cooling issues can lead to print defects or even hardware damage. The table below highlights common cooling problems, their symptoms, and solutions:
|
Cooling Issue |
Symptoms |
Fix / Solution |
|---|---|---|
|
Cooling Too Strong |
Cracks in ABS prints, weak PETG adhesion, brittle PLA parts |
Reduce fan speed, increase enclosure temperature, or raise extrusion temperature slightly |
|
Cooling Too Weak |
Stringing, sagging bridges, “melted” corners on small features |
Increase fan speed, lower nozzle temperature, or slow down print speed |
|
Fan Direction Problems |
One side of the print is sharp, other side droops, uneven surfaces |
Check if the cooling fan is installed backward or angled incorrectly; realign airflow |
|
Extruder Fan vs. Part Fan Issues |
Heat creep, filament softens/clogs, poor surface finish, dimensional errors |
Ensure both fans work correctly: extruder fan runs continuously, part cooling fan runs as needed |
Routine fan checks help maintain stable temperatures and prevent print failures.
Listening for Unusual Noises
Unusual sounds often signal mechanical problems in 3D printers. Clicking noises from the extruder may indicate filament feeding issues. These problems can result from low nozzle temperature, resistance in the filament path, incorrect extruder tension, or inconsistent filament diameter.
- Clicking sounds suggest the extruder struggles to push filament.
- Squeaks or grinding may point to dry rails or worn bearings.
- Sudden loud noises can mean loose screws or misaligned parts.
Firmware and Software Updates
Importance of Updates
Firmware and software updates play a vital role in keeping 3D printers reliable and secure. These updates optimize hardware functions, add new features, and fix bugs. Users often notice better performance and quieter operation after installing the latest firmware. Software updates introduce advanced capabilities such as multi-material support, adaptive structures, and AI-powered slicing. These improvements help users achieve higher print quality and unlock creative opportunities.
Regular updates also protect against security threats and malware. Outdated firmware can lead to performance issues, print failures, or reduced quality. Security vulnerabilities may expose the printer to cyber threats. Technical malfunctions, such as overheating, can cause hardware damage if updates are ignored.
Tip: Updating both firmware and software improves accuracy, speed, and compatibility, leading to a better 3D printing experience.
|
Benefit of Updates |
Description |
|---|---|
|
Performance Optimization |
Smoother operation, fewer bugs, and improved print quality |
|
New Features |
Multi-material support, adaptive structures, AI-powered slicing |
|
Security Protection |
Shields against malware and cyber threats |
|
Hardware Safety |
Reduces risk of overheating and technical malfunctions |
Safe Update Practices
Safe update practices help users avoid problems during the update process. Following the correct steps ensures that the printer receives the right firmware and software without errors.
- Download the correct firmware files for the printer model from a trusted source.
- Connect the printer to a computer using a USB cable.
- Open the slicing software, such as Cura, and navigate to the printer management section.
- Select the option to update firmware and choose the downloaded file.
- Upload the firmware and wait for the process to complete.
- Restart the printer to finalize the update.
Some printers require updates through a USB drive. Users should save the firmware file in the root directory, insert the drive into the printer, and follow on-screen instructions to install the update. After installation, restarting the printer confirms the new firmware version.
Note: Always verify the firmware version after updating to ensure successful installation.
Safe update practices prevent errors and keep 3D printers running smoothly.
Maintenance Schedules
A clear maintenance schedule helps users keep 3D printers in top condition. Regular attention prevents breakdowns and ensures reliable performance. The following sections outline daily, weekly, and monthly tasks, along with tips for tracking routines.
Daily Tasks
Daily care keeps the printer ready for every job. Users should:
- Clean the print bed to remove leftover filament or dust.
- Check filament levels before starting a print.
- Inspect ongoing prints for issues like layer shifting or under extrusion.
- Look for loose nuts or dust buildup on visible parts.
- Verify belt tension and motor mounts.
By spending a few minutes on these steps, users can avoid common problems and maintain optimal printing conditions. A clean print bed helps prints stick and reduces failures.
Weekly Tasks
Weekly maintenance focuses on reliability and smooth operation. Important tasks include:
|
Maintenance Task |
Impact on Reliability |
|---|---|
|
Prevents friction and wear over time. |
|
|
Calibrating Print Bed Level |
Ensures successful prints by maintaining proper height. |
|
Checking and Tightening Screws |
Maintains stability by preventing loosening. |
Extensive users may benefit from performing these checks more often.
Monthly Tasks
Monthly routines address deeper cleaning and long-term care:
- Clean the extruder nozzle to prevent residue buildup.
- Inspect belts and pulleys for wear and alignment.
- Review firmware and software for available updates.
- Lubricate moving parts like belts and linear rods.
Quarterly, users should consider a more thorough cleaning and software review, especially in dusty environments.
Creating a Checklist
Staying organized makes maintenance easier. Users can:
- Keep a maintenance log to record tasks, repairs, and issues. This helps spot patterns and plan future care.
- Establish a regular routine that includes cleaning, checking, and fixing. Consistency extends printer lifespan.
A simple checklist or logbook ensures no task gets missed and helps users track the health of their 3D printers over time.
Regular maintenance keeps 3D printers running longer and reduces costly repairs. Cleaning print beds, lubricating screws, and checking calibration prevent breakdowns and extend printer lifespan. Consistent care leads to better print quality:
- Cleaning and leveling the build plate prevents setbacks.
- Addressing minor problems, like cloudy streaks, improves results.
- Calibration and adjustments enhance print accuracy.
Neglecting maintenance can cause clogs, poor prints, and shortened lifespan. A simple routine, such as monthly checks and cleaning, helps users avoid these issues.
|
Maintenance Task |
Frequency |
|---|---|
|
Clean fans, inspect cables, verify belts |
Monthly |
|
Replace belts, seals, filters |
Every 2-4 years |
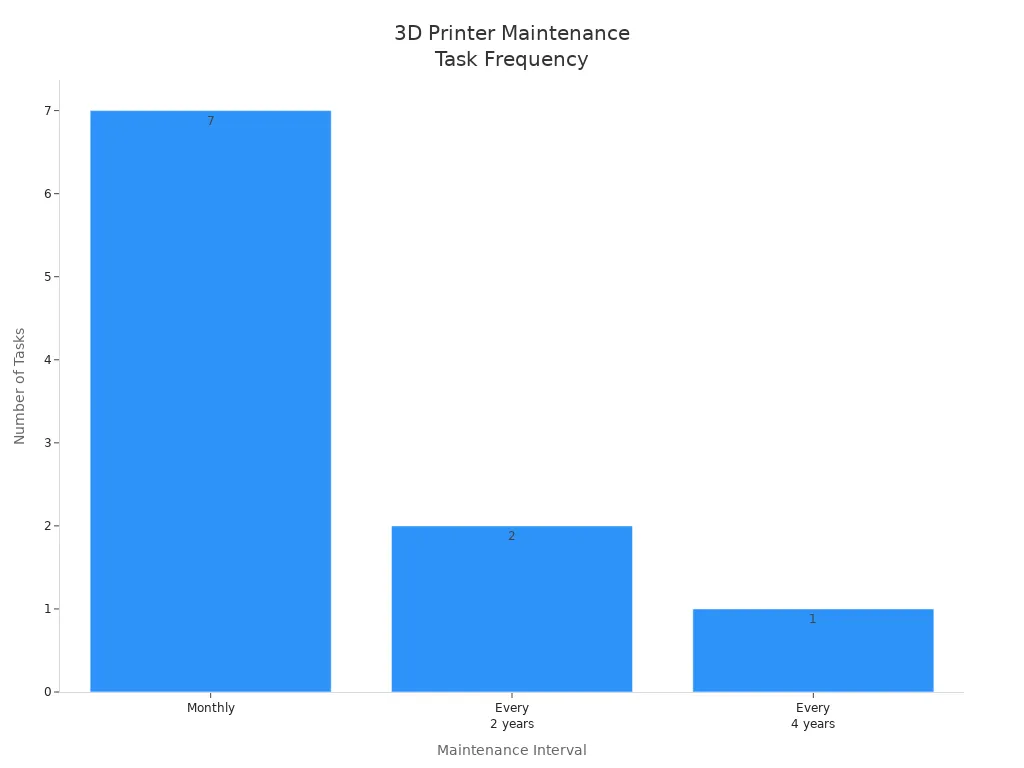
Proactive care ensures reliable performance and high-quality prints.
FAQ
How often should users clean the 3D printer nozzle?
Most users clean the nozzle every 20–30 printing hours or after changing filament types. Regular cleaning prevents clogs and keeps prints smooth.
What lubricant works best for 3D printer parts?
PTFE-based lubricants suit most rails and screws. Silicone-based lubricants handle high temperatures. Lithium-based greases work well for bearings. Always check the printer manual for recommendations.
Why does bed leveling matter for print quality?
Bed leveling ensures the nozzle stays at the correct distance from the bed. Proper leveling helps prints stick better and prevents warping or uneven layers.
What signs show a 3D printer needs maintenance?
Users may notice strange noises, rough movement, loose belts, or poor print quality. These signs suggest the printer needs cleaning, lubrication, or inspection.
Can users update firmware without technical skills?
Many modern printers offer easy firmware updates through USB drives or software. Users should follow the manufacturer’s instructions and back up settings before updating.