
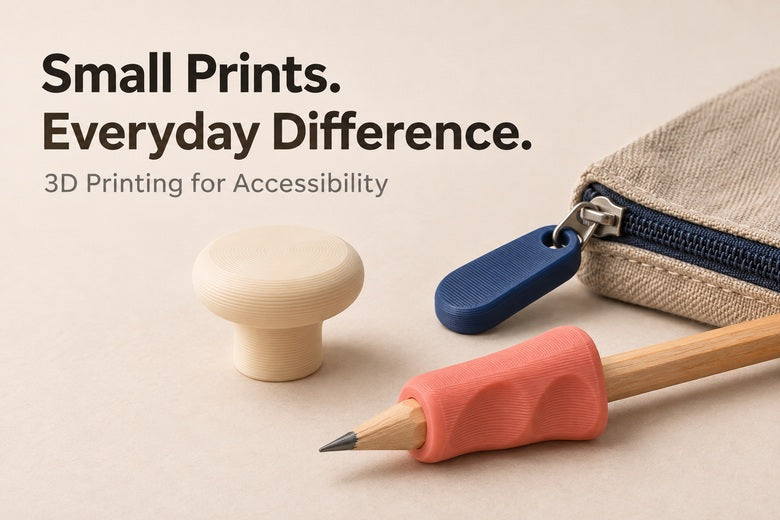
A pen cap is easy to overlook until opening it becomes the difficult part of writing. A small zipper pull can be similarly frustrating when it is hard to pinch or reach.
These are modest problems compared with the spectacular models often associated with 3D printing. Yet changing a grip, holding an object steady or making a small control easier to reach can be a meaningful project.
Practical accessibility starts with the person and the task. A clever print is only useful if it works for the person who will use it. Here are real projects to explore, the design lessons behind them and a sensible way to try an everyday adaptation.
The Reddit project that prompted this article
In an r/3Dprinting discussion about a one-handed pen cap holder, the maker shared a printable way to hold a cap and invited feedback. The author later clarified that the intended users included people with one hand or limited hand dexterity.
The replies raised an important issue: a mechanism can solve one problem while leaving another. If holding the cap becomes easier but adjusting a small screw remains difficult, that adjustment still matters.
The interesting lesson is the feedback process. Ask who the design is for, which movement is difficult, and whether the complete sequence is easier. A demonstration by the designer is a starting point, not proof that everyone will find it usable.
The maker links to the original model on MakerWorld. Check its current instructions and version before printing; access may depend on the platform.
1. Change the grip rather than the whole object
A thin pencil, small handle or narrow control presents a particular gripping surface. A sleeve or holder can change its size and shape without replacing the object itself.
For writing, explore the Palm Pen Holder by Makers Making Change. The project includes printable files, documentation and editable design files. It offers multiple hand and writing-tool sizes and uses a set screw to retain the utensil.
That is a useful contrast with simply scaling a decorative model. Hand fit and tool fit are separate requirements. A larger holder is not automatically better, and scaling the whole model also changes its openings and hardware interfaces.
Before making a full version, compare the documented sizes with the intended user's preferences. Check whether the person can place, hold and remove it comfortably, and whether someone else would need to adjust the screw. Do not force a hand into a tight opening.

2. Hold the object steady
Sometimes the difficulty is not grip size but the need to use two hands at once. Holding a pen cap stationary lets the other hand perform a different movement.
A desk-mounted holder and a belt-mounted holder can solve different versions of that task. The mounting position changes the direction of approach, reach, visibility and the force needed to keep everything stable.
Before choosing a mount, ask:
- Where will the object actually be used?
- Can the user reach it in their usual seated or standing position?
- Does it stay still while the object is inserted or removed?
- Can it be released without an awkward extra action?
- Does it obstruct another task or catch on clothing?
Try the complete activity rather than only the impressive moment in a short video. Taking a pen out, writing, replacing the cap and putting everything away all belong to the same task.
3. Make a small pull easier to find and hold
A larger zipper pull is another approachable idea. It gives a person a different surface or opening to hold instead of relying on a small metal tab.
This is a general design example rather than a recommendation for a particular file. Look for a documented attachment method and check the actual zipper. A bulky pull can catch on fabric; a weak connection can detach; a narrow opening may still be awkward to use.
The first trial should be on an ordinary pouch or similar noncritical item. Check both directions of travel and whether the added piece interferes with closing the zipper. The adaptation should change access to the pull, not require forcing a damaged or jammed zipper.

4. Give a small control a different handle
Small keys and caps are other places where a larger gripping surface can be worth exploring.
The Makers Making Change Key Turner is a documented example. Its looped handle holds a key using a screw, nut and washers. Follow the current project instructions and hardware list rather than assuming it is a print-only build.
Fit matters at both ends: the user needs a suitable handle, and the key still needs enough clearance to enter and turn in its actual lock. A larger handle should not become a reason to apply excessive force to a stiff lock.
For other examples, the organization's Low Tech Assistive Devices Kit includes projects such as openers and writing aids. Treat the library as a place to find documented options, not a promise that every device suits every user.
Choose by the task, not by the photo
| The difficulty | An idea to explore | The first check |
|---|---|---|
| A thin object is awkward to hold | A grip sleeve or writing holder | Comfort, retention and easy removal |
| Two hands are needed to remove a cap | A stationary cap holder | Mount stability and the complete opening sequence |
| A pull tab is hard to reach or pinch | A larger pull attachment | Secure attachment and no snagging |
| A small key head is awkward to manipulate | A suitable key-turner design | User fit, key retention and lock clearance |
Why customization is useful here
Two people doing the same activity may prefer different shapes, positions or movements. Even two pens can need different openings.
A printer makes it practical to try a small variation: a wider gripping area, a different angle or an alternative mounting position. Keep track of the change so feedback can lead to a specific next version.
Ask before printing for someone. They may already have a method they prefer. Offer options and let them decide whether the adaptation is helpful. A design does not need to look impressive or be entirely printed to be worthwhile.

A useful first-project workflow
- Choose one everyday task. Describe the actual difficulty instead of starting with a device name.
- Find a documented design. Read instructions, assembly needs, sizing guidance and the license.
- Check with the intended user. Agree on what to try and where it will be used.
- Print the relevant test or size sample. Keep the project's specified orientation and material requirements.
- Finish and inspect it. Remove sharp remnants and check for cracks, loose hardware and rough contact surfaces.
- Try the complete task gently. Stop if it causes discomfort, marks the skin, traps a finger or requires unexpected force.
- Record feedback. Change one aspect and compare, or choose a different solution if that works better.
Material choice should follow the project and use conditions. A part that flexes repeatedly has different needs from a rigid desk mount. More infill alone cannot compensate for a poorly oriented thin connection or an unsuitable material.
Keep these projects separate from safety-critical equipment. Do not improvise replacements for mobility supports, restraints or protective equipment. When an adaptation involves a health condition, body support or an established care plan, involve an appropriate professional and the person using it.
Frequently asked questions
Do I need a special printer?
Many small, documented everyday aids are intended for desktop FDM printing. Check each design's dimensions, material and hardware requirements. The model instructions matter more than the category label.
Do all accessibility prints need flexible filament?
No. Some designs use rigid plastic and others depend on flexibility. Do not substitute materials without checking the effect on fit and function.
Can I scale a model to fit?
Scaling changes every feature, including screw holes, wall thickness and attachment clearances. Use supplied sizes or editable parameters where available, then test the relevant interfaces.
Are downloaded models guaranteed to help?
No. Suitability depends on the person, the task, the print and the environment. A prototype or popular post is not a universal solution.
Can I share a modified version?
Check the original license and attribution requirements. Document your changes and describe your actual testing without implying professional validation you have not obtained.
Conclusion
A useful 3D print can be as small as a grip, a cap holder or a pull attachment. Its value comes from the task it makes more manageable for a particular person.
Start with a real need, use a documented project and listen to the user's feedback. When the fit or movement is wrong, revise it or choose another approach. The goal is a better everyday experience, not simply another printed object.
Illustrations show general design concepts, not replicas of the linked projects or tested assistive devices. Refer to the original project pages for the actual designs and build requirements.
