


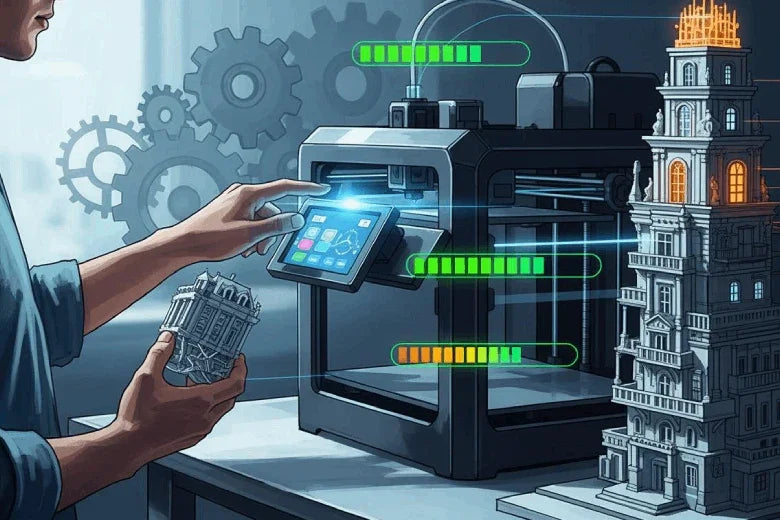
Sie möchten die Druckzeit verkürzen, aber gleichzeitig scharfe 3D-Drucke erhalten. Faktoren wie Schichthöhe, Düsendurchmesser, Druckgeschwindigkeit, Kühlung und Geschwindigkeit spielen eine wichtige Rolle, um ein ausgewogenes Verhältnis zwischen Geschwindigkeit und Qualität zu erzielen. Schon kleine Anpassungen in diesen Bereichen können spürbare Verbesserungen sowohl der Effizienz als auch der Ergebnisse bewirken.
Wichtigste Erkenntnisse
- Passen Sie die Schichthöhe an, um ein optimales Verhältnis zwischen Geschwindigkeit und Qualität zu erzielen. Dickere Schichten verkürzen die Druckzeit, können aber die Oberflächenbeschaffenheit beeinträchtigen.
- Nutzen Sie adaptive Schichthöhen in Ihrem Slicer. Diese Funktion ermöglicht schnellere Drucke, ohne dass Details in komplexen Bereichen verloren gehen.
- Vereinfachen Sie die Modellgeometrie, um die Druckzeit zu verkürzen. Weniger komplexe Designs führen zu schnelleren Drucken und einem geringeren Bedarf an Stützmaterial.
Einstellungen zur Verringerung der Druckzeit
Schichthöhe & Muscheln
Die Druckgeschwindigkeit lässt sich durch Anpassen der Schichthöhe deutlich beeinflussen. Dickere Schichten bedeuten weniger Druckdurchgänge für Ihren Drucker, was die Druckzeit verkürzt. Zum Beispiel: Drucken bei 0,3 mm statt 0,1 mm Dadurch verringert sich die Anzahl der benötigten Schichten für dieselbe Objekthöhe. Diese Änderung beschleunigt den Prozess, kann aber zu deutlicher sichtbaren Schichtlinien und einer raueren Oberfläche führen. Dünnere Schichten ermöglichen glattere Oberflächen und feinere Details, benötigen aber deutlich mehr Zeit.
| Wirkung | Dickere Schichten | Dünnere Schichten |
|---|---|---|
| Druckzeit | Verringerung aufgrund weniger Schichten | Zunahme aufgrund zusätzlicher Schichten |
| Druckqualität | Schlechte Haftung, sichtbare Schichtlinien | Bessere Details, glattere Oberflächenbeschaffenheit |
| Strukturelle Integrität | Schwächere Anleihen, Ausfallrisiko | Weniger Treppeneffekt, aber mehr Fehler |
Beim Anpassen der Wandstärke sollten Sie für die meisten Drucke etwa zwei Düsendurchmesser (ca. 0,8 mm) anstreben. Diese Einstellung sorgt für stabile Bauteile ohne unnötige Verlängerung der Druckzeit. Für zusätzliche Stabilität können Sie die Wandstärke erhöhen. 2-3 mm, Dies verlängert jedoch die Arbeitszeit. Die Dicke oben und unten sollte für ein gutes Gleichgewicht zwischen Festigkeit und Geschwindigkeit zwischen 1,6 und 2 mm liegen.
Tipp: Beginnen Sie mit einer moderaten Schichthöhe und Wandstärke. Testen Sie kleine Änderungen, um deren Auswirkungen auf Geschwindigkeit und Qualität zu beobachten.
Druckgeschwindigkeit & Temperatur
Die Druckgeschwindigkeit beeinflusst direkt, wie schnell Ihr Drucker einen Druckauftrag abschließt. Die meisten PLA-Drucke erzielen optimale Ergebnisse mit Geschwindigkeiten zwischen 40 mm/s und 150 mm/s. Für detailreiche Ergebnisse verwenden Sie langsamere Geschwindigkeiten von 30–60 mm/s. Ein guter Kompromiss zwischen Geschwindigkeit und Qualität liegt bei 60–100 mm/s. Wenn es schnell gehen muss und kleinere Ungenauigkeiten akzeptabel sind, sind auch Geschwindigkeiten bis zu 150 mm/s möglich.
- Typische Druckgeschwindigkeit für PLA: 50-70 mm/s
- PLA
Max Maximale Druckgeschwindigkeit: Bis zu 150 mm/s
Sie sollten auch die Drucktemperatur anpassen, wenn Sie die Geschwindigkeit erhöhen. Höhere Temperaturen fördern das schnellere Schmelzen und Fließen des Filaments, was für eine gute Schichthaftung bei höheren Geschwindigkeiten wichtig ist. Für PLA gibt es einen Temperaturbereich von 180-220 °C Funktioniert einwandfrei. Wenn Sie zu schnell drucken, ohne die Temperatur zu erhöhen, riskieren Sie eine schlechte Haftung und schwache Ausdrucke.
Notiz: Beachten Sie stets den empfohlenen Temperaturbereich Ihres Filaments. Jedes Material hat seine eigenen Anforderungen.
Adaptive Schichthöhen
Die adaptive Schichthöhe ist eine praktische Funktion vieler Slicer. Sie ermöglicht es Ihrem Drucker, in einfachen Bereichen dickere Schichten und dort, wo Details benötigt werden, dünnere Schichten zu verwenden.Dieser Ansatz trägt dazu bei, die Druckzeit zu verkürzen, ohne dabei die Qualität auf komplexen Oberflächen zu beeinträchtigen.
- Die adaptive Schichthöhe verwendet feine Schichten für detaillierte Abschnitte und grobe Schichten für flache oder einfache Bereiche.
- Sie erhalten weichere Kurven und scharfe Konturen dort, wo es darauf ankommt, und sparen gleichzeitig Zeit bei weniger wichtigen Teilen.
- Diese Methode nutzt das Material auch effizienter und ist daher eine praktische Wahl für große oder komplizierte Modelle.
Füllschichten kombinieren
Das Kombinieren von Füllschichten ist eine weitere Möglichkeit, die Druckzeit zu verkürzen. Anstatt jede Füllschicht einzeln zu drucken, kann Ihr Drucker mehrere Schichten zusammenfügen. Diese Technik beschleunigt nicht nur den Druckvorgang, sondern verbessert auch die Festigkeit des Bauteils durch eine optimierte Haftung zwischen den Schichten.
- Mehrschichtige Füllkonfigurationen erzeugen stärkere Verbindungen, insbesondere bei Waben- oder Gitterstrukturen.
- Sie sparen Zeit, weil der Drucker weniger Aufwand für das Innere des Modells aufwendet und sich stattdessen mehr auf die Außenwände und Oberflächen konzentriert.
Tipp: Verwenden Sie kombinierte Füllschichten für Funktionsteile, die Festigkeit und schnelle Fertigung erfordern.
Durch diese Anpassungen können Sie die Druckzeit verkürzen und gleichzeitig die Druckqualität und das ansprechende Design Ihrer Ausdrucke erhalten. Testen Sie Änderungen immer zuerst an kleinen Modellen, bevor Sie größere Projekte angehen. So finden Sie die optimale Einstellung für Ihren Drucker und Ihr Material.
Modellgestaltung zur Reduzierung der Druckzeit
Die Gestaltung Ihres 3D-Druckers hat einen großen Einfluss auf die Druckgeschwindigkeit. Durch gezielte Anpassungen Ihres Modells können Sie die Druckzeit verkürzen, ohne Kompromisse bei Qualität oder Stabilität einzugehen.
Geometrie vereinfachen
Komplexe Modelle benötigen deutlich länger zum Drucken als einfache. Durch die Vereinfachung der Geometrie reduzieren sich die Anzahl der Schichten und die komplexen Bewegungen, die der Drucker ausführen muss. Beispielsweise ist ein einfacher Würfel in etwa einer Stunde gedruckt, während ein detailliertes Automodell mehrere Stunden oder sogar einen ganzen Tag benötigen kann. Komplexere Formen erfordern zudem zusätzliche Stützstrukturen, was die Druckzeit weiter verlängert.
- Vereinfachung der Geometrie reduziert die Anzahl der Schichten.
- Weniger komplizierte Bewegungsabläufe bedeuten schnellere Ausdrucke.
- Einfache Formen benötigen weniger Stützmaterial.
Sie können diese bewährten Vorgehensweisen befolgen, um Ihre Designs zu optimieren:
- Erhöhen Sie die Schichthöhe für schnellere Druckvorgänge..
- Drucken Sie nur Merkmale, die vom 3D-Druck profitieren.
- Minimieren Sie die Oberfläche Ihrer Bauteile.
- Den Bedarf an Unterstützungsmaterial minimieren.
- Berücksichtigen Sie bei der Gestaltung die Druckausrichtung.
- Komplexe Teile sollten in kleinere, leichter zu druckende Teile zerlegt werden.
Hohlmodelle & Füllmaterialoptionen
Durch das Hohlformen Ihrer Modelle oder die Anpassung der Fülldichte lässt sich die Druckzeit deutlich verkürzen. Hohlmodelle benötigen weniger Material und lassen sich schneller drucken, allerdings muss dies mit der für Ihre Anwendung erforderlichen Stabilität abgewogen werden. Füllmuster und -dichten beeinflussen sowohl das Gewicht als auch die Haltbarkeit Ihres Drucks.
| Fülldichte (%) | Auswirkungen auf die Stärke | Auswirkungen auf das Gewicht | Auswirkungen auf die Druckzeit |
|---|---|---|---|
| 0-15 | Geringe Festigkeit, gut für dekorative Teile | Minimaler Materialeinsatz | |
| 15-50 | Mittlere Festigkeit, ideal für Prototypen | Ausgewogene Materialnutzung | Mittlere Druckzeit |
| 50-100 | | Erhöhter Materialverbrauch | Erhöhte Druckzeit |
Bei den meisten nicht-funktionalen Drucken können Sie geringe Fülldichten oder sogar Hohlmodelle verwenden, um die Druckzeit zu verkürzen. Blitzförmige Füllungen oder Gyroidmuster tragen ebenfalls zur Beschleunigung des Prozesses bei und gewährleisten gleichzeitig eine ausreichende Stabilität für viele Anwendungen.
Hinweis: Passen Sie die Fülleinstellungen immer dem Verwendungszweck Ihres Drucks an. Dekorative Objekte benötigen weniger Stabilität als mechanische Teile.
Druckausrichtung
Die Ausrichtung Ihres Modells auf der Bauplatte hat einen erheblichen Einfluss auf die Druckzeit und den Bedarf an Stützmaterial. Durch die Änderung der Ausrichtung von vertikal zu horizontal lässt sich oft die Anzahl der benötigten Schichten reduzieren, was zu schnelleren Drucken führt.
| Orientierungstyp | Druckzeit (Stunden) | Teile pro Bausatz | Verwendung von Unterstützungsmaterialien |
|---|---|---|---|
| Hohe Ausrichtung | 5.4 | 42 | Höher |
| Kurze Orientierung | 1.2 | 10 | Untere |
- Das Drucken eines Zylinders in horizontaler Ausrichtung erfordert möglicherweise nur 100 Schichten, während das Drucken in vertikaler Ausrichtung 300 Schichten erfordern könnte.
- Weniger Schichten bedeuten weniger Zeitaufwand Druckkosten.
- Die Verringerung der Z-Höhe Ihres Modells ist eine der einfachsten Möglichkeiten, die Druckzeit zu verkürzen.
Sie können auch diese bewährten Vorgehensweisen befolgen:
| Bewährte Vorgehensweise | Beschreibung |
|---|---|
| Den Unterstützungsbedarf verringern | Die Teile so ausrichten, dass möglichst wenig Material herabhängt. |
| Verwenden Sie hölzerne oder lösliche Stützstrukturen. | Diese Stützstrukturen lassen sich leichter entfernen und sparen Nachbearbeitungszeit. |
| Löcher vertikal ausrichten | Verringert den Bedarf an Stützkonstruktionen. |
| Wende die 45°-Regel an | Um zusätzliche Stützen zu vermeiden, sollten die Überhänge unter 45° liegen. |
| Kürzer ist schneller | Minimieren Sie die Z-Höhe für schnellere Druckvorgänge. |
Drucken in Teilen
Manchmal kann es helfen, die Druckzeit zu verkürzen, wenn man ein Modell in mehreren kleineren Teilen anstatt in einem großen Teil druckt.Dieser Ansatz ermöglicht es Ihnen, die Ausrichtung und Füllung jedes Teils zu optimieren, wodurch der Bedarf an Stützstrukturen reduziert und Druckfehler minimiert werden.
| Vorteil/Nachteil | Beschreibung |
|---|---|
| Komplexe Konstruktionen lassen sich durch das Zusammensetzen kleinerer Teile erstellen. | |
| Geschwindigkeit für Einzelteile | Das Drucken einzelner Teile kann schneller gehen, die Serienproduktion kann sich dadurch aber verlangsamen. |
| Auswirkungen auf die physische | Der Druckprozess kann aufgrund von thermischen Spannungen die Materialeigenschaften beeinflussen. |
Das Drucken in Einzelteilen erleichtert zudem den Austausch oder Nachdruck einzelner Abschnitte, falls etwas schiefgeht. Oft lässt sich ein Projekt schneller abschließen, indem man kleinere, schnell gedruckte Teile zusammensetzt, anstatt auf den Abschluss eines großen Druckvorgangs zu warten.
Hinweis: Bei der Aufteilung von Modellen sollten die Verbindungspunkte so gestaltet sein, dass sie einfach zu montieren und für Ihre Anwendung ausreichend stabil sind.
Durch die Fokussierung auf das Modelldesign lässt sich die Druckzeit verkürzen, ohne die benötigte Qualität und Festigkeit zu beeinträchtigen. Kleine Änderungen an Geometrie, Füllung, Ausrichtung und Teileaufteilung können Ihren 3D-Druck-Workflow erheblich optimieren.
Drucker-Upgrades & Wartung
Verwendung einer größeren Düse
Sie können die Druckzeit verkürzen, indem Sie eine größere Düse verwenden. Eine breitere Düse ermöglicht dickere Schichten und größere Konturen, wodurch Ihr Drucker die Druckaufträge schneller abschließt. Zum Beispiel eine 0,60-mm-Düse Die Druckzeit für einfache Objekte wie Kopfhörerständer oder Blumentöpfe lässt sich halbieren. Größere Düsen haben jedoch Schwierigkeiten mit feinen Details und kleinem Text und eignen sich daher am besten für Funktionsteile oder Modelle, die keine hohe Auflösung erfordern.
Tipp: Verwenden Sie eine größere Düse für Prototypen, mechanische Teile oder alle Drucke, bei denen die Geschwindigkeit wichtiger ist als filigrane Details.
Regelmäßige Wartung
Wenn Sie Ihren Drucker in optimalem Zustand halten, können Sie hohe Druckgeschwindigkeiten und qualitativ hochwertige Ergebnisse erzielen. Sie sollten Düse reinigen Regelmäßiges Ölen der Führungsschienen und beweglichen Teile sorgt für einen gleichmäßigen Filamentfluss. Straffe Riemen gewährleisten präzise Druckerbewegungen und verhindern so Verzögerungen und Fehlausrichtungen. Das Ölen der Schienen und beweglichen Teile trägt zu einem reibungslosen Betrieb und damit zu präziseren Druckergebnissen bei.
Hier sind einige empfohlene Wartungsroutinen:
- Reinigen Sie Walzen und Wege, um Verstopfungen zu vermeiden.
- Aktualisieren Sie Treiber und Firmware für optimale Leistung.
- Tonerkartuschen prüfen und Tintenstände, um Unterbrechungen zu vermeiden.
- Kalibrieren Sie Ihren Drucker, um die Genauigkeit zu gewährleisten.
- Bei komplexen Problemen sollten Sie einen professionellen Service in Anspruch nehmen.
- Häufige Probleme beheben, bevor sie die Druckgeschwindigkeit beeinträchtigen.
Notiz: Regelmäßige Wartung beugt Verstopfungen vor, reduziert den Verschleiß und sorgt dafür, dass Ihre Ausdrucke scharf aussehen.
Auch ein Upgrade Ihres Druckers kann einen großen Unterschied machen. Neuere Modelle bieten höhere Druckgeschwindigkeiten, Automatischer Duplexdruck und Papierfächer mit hoher Kapazität. Dank der mobilen Druckfunktionen können Sie Druckaufträge schnell von jedem Gerät aus starten. Diese Verbesserungen helfen Ihnen, Zeit zu sparen und die Effizienz zu steigern, insbesondere bei hohem Druckaufkommen.
Effizienz der Slicing-Software
Slicer-Einstellungen
Sie können optimieren Slicer-Einstellungen um die Druckzeit zu verkürzen und gleichzeitig eine hohe Druckqualität zu erhalten.Slicing-Software bietet Funktionen zur Steuerung von Schichthöhe, Druckgeschwindigkeit und Fülldichte. Durch Anpassen dieser Einstellungen haben Sie die volle Kontrolle über die Druckgeschwindigkeit und das endgültige Erscheinungsbild Ihrer Bauteile.
| Besonderheit | Beschreibung | Auswirkungen auf Druckzeit und -qualität |
|---|---|---|
| Anpassung der Schichthöhe | Steuert die Dicke jeder gedruckten Schicht. | Feinere Schichten verlängern die Druckzeit; gröbere Schichten beschleunigen den Druckvorgang. |
| Variable Schichthöhe | Passt die Schichtdicke innerhalb eines einzelnen Druckvorgangs dynamisch an. | Verbessert die Qualität in kritischen Bereichen und reduziert gleichzeitig die Gesamtzeit. |
| Adaptive Slicing-Algorithmen | Optimiert die Schichthöhen basierend auf der Modellgeometrie. | Bietet ein ausgewogenes Verhältnis von Qualität und Geschwindigkeit ohne manuelle Anpassungen. |
| Druckgeschwindigkeitseinstellungen | Steuert die Bewegungsgeschwindigkeit des Druckkopfes während der Extrusion. | Beeinflusst Zeitaufwand und Qualität; langsamere Geschwindigkeiten führen zu besserer Qualität. |
Achten Sie außerdem auf Einstellungen wie Materialflussrate, Kühlung und Wandstärke. Diese Optionen beeinflussen sowohl die Druckdauer als auch die Festigkeit des fertigen Bauteils.
Tipp: Verwenden Sie adaptive Slicing-Algorithmen, um Geschwindigkeit und Detailgenauigkeit automatisch auszubalancieren. Sehen Sie sich Ihr Modell in der Vorschau des Slicers an, um zu sehen, wie sich Änderungen auf die Druckzeit auswirken.
Speichern & Wiederverwendung Pro Dateien
Das Speichern und Wiederverwenden von Slicer-Profilen trägt zu konsistenten Ergebnissen und effizienten Arbeitsabläufen bei. Wenn Sie ein Profil für ein bestimmtes Material oder einen bestimmten Modelltyp erstellen, können Sie es für zukünftige Projekte anwenden, ohne die Einstellungen neu konfigurieren zu müssen.
| Nutzen | Beschreibung |
|---|---|
| Das Speichern von Profilen steigert die Produktionseffizienz, da der Bedarf an Neukonfigurationen minimiert wird. | |
| Reduzierte Rüstzeiten | |
| Verbesserte Kontrolle | Einheitliche Profile tragen dazu bei, die Druckqualität und Konsistenz über verschiedene Druckaufträge hinweg zu gewährleisten. |
Sie können eine Profilbibliothek für verschiedene Filamente, Düsengrößen und Modelltypen erstellen. Dieser Ansatz spart Zeit und stellt sicher, dass Sie stets bewährte Einstellungen verwenden, um die Druckzeit zu verkürzen und die Qualität zu erhalten.
Hinweis: Aktualisieren Sie Ihre Profile regelmäßig, sobald Sie neue Optimierungen entdecken. So bleiben Ihre Arbeitsabläufe effizient und Ihre Ausdrucke zuverlässig.
Fehler, die es zu vermeiden gilt
Risiken durch überhöhte Geschwindigkeit
Sie könnten versucht sein, Ihren Drucker auf Höchstgeschwindigkeit einzustellen. Zu hohe Geschwindigkeit führt jedoch häufig zu schlechten Ergebnissen und Zeitverschwendung. Bei zu schnellem Drucken riskieren Sie eine schwache Schichthaftung, raue Oberflächen und sogar Fehldrucke. Viele Benutzer übersehen weitere häufige Fehler, die sich ebenfalls auf Druckzeit und -qualität auswirken:
- Übermäßige Überhänge: Überhänge ohne ausreichende Stützung können zu Durchhängen oder Fehldrucken führen. Konstruieren Sie Modelle daher immer so, dass steile Überhänge minimiert werden.
- Unzureichende Wandstärke: Dünne Wände brechen leicht, während dicke Wände Material verschwenden und die Druckzeit verlängern. Finden Sie ein ausgewogenes Verhältnis zwischen Festigkeit und Effizienz.
- Falsche Netzauflösung: Niedrig aufgelöste Netze erzeugen raue Oberflächen. Hoch aufgelöste Netze verlangsamen den Druckvorgang. Wählen Sie die passende Auflösung für Ihre Anforderungen.
- Ungenaue Skalierung: Falsche Skalierung verschwendet Zeit und Material. Überprüfen Sie Ihre Maße daher sorgfältig, bevor Sie mit dem Drucken beginnen.
- Missachtung von Materialrichtlinien: Jeder Filamenttyp hat spezifische Anforderungen. Halten Sie sich stets an die empfohlenen Einstellungen für Ihr gewähltes Material.
Kühlung & Haftungsprobleme
- Eine gute Kühlung verhindert Verformungen und gewährleistet stabile Schichten.
- Langsame Druckgeschwindigkeiten (ca. 60 mm/s) Verbesserung der Schichthaftung und Druckqualität.
- Zu hohe Geschwindigkeiten können zu schlechter Haftung auf dem Druckbett führen, was wiederum zu Fehldrucken führt.
Notiz: Passen Sie die Kühlungs- und Geschwindigkeitseinstellungen stets an Ihr Material und Modell an. Sorgfältige Abstimmung hilft Ihnen, häufige Fehler zu vermeiden und zuverlässige Ergebnisse zu erzielen.
Durch die Kombination intelligenter Strategien lassen sich schnellere Druckergebnisse ohne Qualitätsverlust erzielen. Die folgende Tabelle hebt Folgendes hervor die effektivsten Methoden:
| Strategie | Auswirkungen auf die Zeit | Auswirkungen auf die Qualität |
|---|---|---|
| Schichthöhe | Beschleunigt den Druck | Verbessert die Auflösung |
| Adaptive Schichten | Spart Zeit | Sorgt für Details |
| Druckgeschwindigkeit | Verkürzt die Dauer | Verbessert das Finish |
| Fülldichte | Verkürzt die Druckzeit | Erhöht die Kraft |
Experimentieren Sie mit verschiedenen Einstellungen und Modelloptimierungen. Dokumentieren Sie Ihre Ergebnisse und halten Sie fest, was für Ihren Drucker am besten funktioniert. Regelmäßige Aufzeichnungen helfen Ihnen, Druckqualität und Effizienz kontinuierlich zu verbessern. Bleiben Sie neugierig und optimieren Sie Ihren Prozess stetig, um die besten Ergebnisse zu erzielen.
Häufig gestellte Fragen
Wie kann man den Druckprozess beschleunigen, ohne an Festigkeit einzubüßen?
Sie können die Schichthöhe erhöhen und eine größere Düse verwenden. Wählen Sie ein moderates Füllmuster. Testen Sie die Einstellungen an kleinen Modellen, um die optimale Balance zu finden.
Führt eine höhere Druckgeschwindigkeit immer zu geringerer Qualität?
Nein. Sie können die Drehzahl moderat erhöhen und die Temperatur anpassen. Achten Sie auf ausreichende Kühlung und Wandstärke. Überwachen Sie die Ergebnisse, um sichtbare Mängel zu vermeiden.
Wie lassen sich Druckfehler beim schnelleren Drucken am besten vermeiden?
Überprüfen Sie stets die Haftung auf dem Druckbett und kalibrieren Sie Ihren Drucker. Verwenden Sie die empfohlenen Temperaturbereiche. Beobachten Sie die ersten Schichten genau, um Probleme frühzeitig zu erkennen.