Ready to get more strength and accuracy from your diy 3d printer? Small changes in design or materials can help a lot. You might be surprised how a small change makes your prints stronger. Even if you are new or have built many 3d printers, you can always get better.
Did you know? In 2017, about 40% of 3D printing fans were new, but by 2018, almost half said they were experts or professionals.
Experience Level
Percentage (2017)
Percentage (2018)
Novices
40%
N/A
Beginners
N/A
15%
Intermediates
N/A
41% (professionals)
Experts
N/A
Nearly 50% (professionals)
Try different design changes or material settings. See how much stronger your diy 3d printer can be. Every test helps you get closer to the best mix of strength and detail.
Key Takeaways
- Begin with a frame that is square and stable. Make sure the moving parts line up well. This helps your prints come out smooth and correct.
- Adjust your printer with care. Level the bed and set the nozzle height right. This helps the first layers stick well and stay strong.
- Pick strong infill patterns and use thicker walls. Set the flow rate correctly. This makes your 3D printed parts last longer.
- Plan your parts with smart direction. Use fewer overhangs and good bridging. This makes your prints stronger and look better.
- Keep your printer clean and oiled. Update it when needed. Store filament in a dry place. This helps your prints stay good every time.
DIY 3D Printer Setup
Setting up your diy 3d printer the right way makes a huge difference. You want every print to come out strong and clean. Let’s look at the basics that help you get the most from your 3d-printing projects.
Frame Squareness
A square frame is the backbone of your 3d printer. If your frame is even a little off, you’ll see problems like crooked prints or layers that don’t line up. You want every corner to form a perfect right angle. Use a carpenter’s square or a digital angle finder to check each joint. Tighten all screws and brackets so nothing shifts during 3d-printing.
Tip: Place your printer on a sturdy table. Wobbly surfaces can cause vibrations that ruin your 3d prints.
A solid, square frame keeps your motion components in line. This helps your diy 3d printer move smoothly and print with better accuracy.
Motion Components
Motion components are the moving parts that guide your print head and bed. These include rods, rails, belts, pulleys, and stepper motors. If any of these parts are loose or misaligned, your 3d-printing quality drops fast.
Common issues you might face:
- Loose or tight timing belts can slip or skip, causing layer shifts in your 3d prints.
- Screws that aren’t tight or parts that don’t line up can make the movement rough.
- If you forget to lubricate rods or lead screws, you’ll hear squeaks and see uneven layers.
- Weak frames or thin mounting plates can bend, making your 3d printer less accurate.
- Overheating stepper drivers can cause missed steps, which leads to shifted layers.
- Vibrations from the environment or unstable tables can mess up your 3d-printing results.
You can prevent most of these problems with regular checks. Make sure belts have the right tension. Lubricate moving parts every few weeks. Keep your 3d printer on a stable surface. These small steps help your diy 3d printer run smoother and last longer.
igus® Parts
Want to take your 3d-printing to the next level? Try using igus® parts in your build. These low-friction, wear-resistant components can make a big difference. Standard 3d printer parts like ABS bushings wear out quickly. igus® iglide® materials last much longer—up to 50 times more than regular 3d-printing plastics.
Here’s what makes igus® parts special:
- iglide® I3 material wears down much slower than ABS, so you don’t have to replace parts as often.
- Bearings made from igus® materials work well even in tough conditions, like underwater.
- Drive nuts made from igus® last 6 to 18 times longer than regular ones.
- igus® parts have lower friction, so your 3d printer moves with less effort and noise.
- These parts are almost maintenance-free, which means less time fixing and more time printing.
Note: If you print a lot or use your diy 3d printer for big projects, upgrading to igus® parts can save you time and money in the long run.
Choosing the right parts and keeping your 3d printer in top shape sets you up for better 3d-printing results. Start with a square frame, check your motion components, and consider igus® upgrades for smoother, longer-lasting prints.
Printer Calibration
Getting your 3d-printing dialed in starts with good calibration. You want every print to stick well and look sharp. Let’s break down the steps that help you get the most from your printer.
Bed Leveling
Bed leveling is the first thing you should check before starting any 3d-printing project. If your bed is not level, your prints might not stick or could come out uneven. Use a piece of paper or a feeler gauge to check the gap between the nozzle and the bed at each corner. Adjust the bed until you feel a slight drag on the paper. Some printers have auto bed leveling, but it’s always good to double-check by hand. A level bed gives you a strong base for every 3d-printing job.
Tip: Always recheck your bed after moving your printer or changing the build plate.
Z Offset
The Z offset sets the height of your nozzle above the bed. This setting is key for first layer adhesion and overall 3d-printing quality. Here’s how Z offset affects your prints:
- The Z offset controls how close the nozzle gets to the bed, which is crucial for first layer adhesion.
- If the Z offset is too high, the filament won’t stick, and your print may fail.
- If the Z offset is too low, the nozzle can scrape the bed or block filament flow, causing squished layers.
- The right Z offset gives you a smooth, strong first layer.
- Test with small prints and watch how the filament lays down to fine-tune this setting.
- Some printers offer live Z-adjustment and mesh bed leveling to help you get perfect results.
Test Models
You can use special test models to fine-tune your 3d-printing settings. These models help you adjust temperature, flow, and extrusion for your printer. Here are some popular options:
- Print a temperature tower to find the best temperature for your filament.
- Calibrate your extruder steps to make sure you get the right amount of filament.
- Use a K-factor pattern to check extrusion at different speeds.
- Try retraction tests to reduce stringing and oozing.
- Print a speed test model to find the fastest reliable 3d-printing speed.
- After making changes, print a complex model to see how your settings work in real life.
With careful calibration, you set your printer up for success. Every step helps you get cleaner, stronger 3d-printing results.
3D-Printing Settings
Getting the best results from your 3d printer means you need to tweak the settings for every project. The right choices in your slicer, speed, temperature, and layer height can turn a good print into a great one. Let’s break down what you should know about 3d-printing settings.
Slicer Software
Your slicer software is where you control most of your 3d-printing. Programs like Cura and PrusaSlicer give you powerful tools to fine-tune every detail. You can use advanced features to get better prints, save time, and use less filament. Here’s a quick look at some slicer features that help you optimize your 3d-printing:
|
Feature |
Description |
|---|---|
|
Intelligent Algorithms |
Optimize tool paths and material use for faster, more accurate 3d prints. |
|
Precise Wall Optimization |
Make outer walls stronger and smoother. |
|
Seam Control |
Hide or move seams for a cleaner look. |
|
Advanced Calibration Tools |
Fine-tune temperature, flow, and retraction for pro results. |
|
AI Print Fault Detection |
Catch problems like under-extrusion before they ruin your print. |
|
Adaptive Slicing & Variable Layer Height |
Change layer height on the fly for more detail where you need it. |
|
Multi-Plate Lamination |
Print many parts at once to save time. |
|
Remote Monitoring |
Watch and control your 3d printer from anywhere. |
You can also find special controls in PrusaSlicer for top fill patterns and mesh repair, or try Cura’s plugins for extra features. These tools help you get the most out of your 3d-printing projects.
Print Speed & Temp
Print speed and temperature work together in 3d-printing. If you print faster, you need a higher temperature to keep the filament flowing. Slower speeds let you use lower temperatures, which can help avoid stringing and blobs. If your temperature is too high, you might see sagging, warping, or rough surfaces. Too low, and you get weak layers and gaps. Always test with temperature towers and small models to find the best settings for your filament. Different 3d materials like PLA, PETG, or ABS need their own speed and temperature combos. Small, detailed prints do best with slow speeds and cooler temps, while big models may need more heat and speed.
Retraction & Flow
Retraction settings help you fight stringing and blobs in your 3d prints. When your printer moves without printing, it pulls the filament back to stop oozing. If you see lots of strings, try increasing the retraction distance or slowing the retraction speed. Some filaments, like PETG, need more retraction than others. Blobs can also show up if your bed isn’t level or your Z offset is off. Moisture in your filament and cooling can also affect how well your retraction works. Keep an eye on these settings to keep your 3d prints clean.
Layer Height
Layer height changes how your 3d prints look and feel. If you use thinner layers, you get smoother surfaces and more detail, especially on curves and holes. Thicker layers print faster and can make your part a bit stronger, but you’ll see more lines. Here’s a quick table to help you choose:
|
Aspect |
Thinner Layers (Lower Height) |
Thicker Layers (Higher Height) |
|---|---|---|
|
Surface Finish |
Smoother, more accurate |
Rougher, more lines |
|
Strength |
Slightly less |
|
|
Print Time & Cost |
Longer, uses more filament |
Shorter, uses less filament |
|
Post-Processing |
More important |
Less important |
If you want a shiny, detailed model, use thinner layers. For strong, quick prints, go with thicker layers. Think about what matters most for your 3d-printing project before you pick your layer height.
Make Strong 3D Prints
You want your 3D printed parts to last, right? If you want to make strong 3d prints, you need to focus on a few key settings. Let’s break down what really matters for part strength.
Infill Pattern
The infill pattern inside your print shapes how much strength your part has. If you use a strong infill pattern, you get better results. Patterns like gyroid, hexagonal, and triangular give you strong 3d prints because they spread out force in all directions. Gyroid infill is great for multi-directional strength and uses material efficiently. Hexagonal (honeycomb) infill copies nature’s design for a strong, lightweight part. Triangular infill resists heavy loads from different angles. Cubic infill works well for big parts that need to be light but still tough.
|
Infill Pattern |
Best Use Case |
Strength Level |
Material Usage & Print Speed Characteristics |
|---|---|---|---|
|
Hexagonal |
Lightweight yet durable parts |
High |
Best strength-to-weight ratio; slower print speed but efficient material use |
|
Triangular |
Heavy-duty parts |
High |
Excellent strength-to-weight ratio; good for multidirectional stresses |
|
Gyroid |
Functional parts with multi-directional stresses |
High |
Near-isotropic strength; excellent weight-to-strength ratio; longer print times |
|
Cubic |
Large prints needing weight reduction |
Good |
Good strength in all directions; efficient for large parts |
|
Rectangular |
Prototypes and general use |
Medium |
Faster print speed; medium strength; flexible but less efficient in strength |
If you want to make strong 3d prints, pick a pattern that matches your needs. For most projects, gyroid or hexagonal infill gives you the best balance of strength and material use.
Wall Thickness
You can increase wall thickness to boost part strength. Thicker walls mean your strong 3d prints can handle more stress. Most of the strength in 3D printed parts comes from the outer shell, not the infill. If you set your wall thickness to 2-3 mm, you get much tougher parts. Thick walls also help with overhangs and make your prints more durable.
- Stress is highest near the surface, so more outer walls help.
- Most part strength comes from the shell, not the inside.
- Thicker walls don’t always mean much more material or time.
- Designs with thick shells last longer and resist damage.
If you want to make strong 3d prints, always check your wall thickness setting before you start.
Infill Density
You can increase infill density to make strong 3d prints, but don’t go overboard. Low densities (10-20%) work for light or decorative parts. Medium densities (30-50%) give you a good mix of strength and material use. If you go above 60%, you get maximum strength, but you waste material and time. Most functional parts do best with 40-50% infill. This range gives you strong 3d prints without using too much filament.
Tip: Use gradient infill if you want extra strength only in high-stress areas. Combine medium infill density with thick walls for the best part strength.
Flow Rate
Flow rate controls how much filament your printer pushes out. If you set it wrong, your strong 3d prints might not stick together or could look messy. Calibrate your flow rate so layers bond well. Good layer bonding means better part strength. If you use too much flow, your parts get blobs and lose accuracy. Too little flow makes weak prints that break easily. Always test your flow rate with a simple cube before printing important parts.
If you want to make strong 3d prints, remember: strong infill patterns, thick walls, smart infill density, and proper flow rate all work together. Try different settings and see which ones give you the best part strength for your projects.
Design for 3D-Printing
When you start a new 3d-printing project, your design choices matter a lot. Good design for 3d-printing helps you get strong, well-printable parts that look great and work as intended. Let’s look at how you can boost part strength and print success by thinking about orientation, overhangs, and bridging.
Part Orientation
How you place your parts on the print bed changes everything. If you want to maximize strength, you need to determine part orientation based on the main forces your parts will face. For 3d-printing, especially FDM, layers stick together best when you align them perpendicular to the direction of pulling or bending. This makes your functional parts much stronger.
- Place critical surfaces upright to get a smoother finish.
- Turn your parts to use fewer supports and save material.
- Always check the load paths and adjust orientation for the best part strength.
- For complex shapes, you might split the design and glue it later.
Tip: Don’t forget to balance strength, surface quality, and print time. Sometimes you need to test a few orientations to find the best one.
Overhangs & Supports
Overhangs are parts of your design that stick out with nothing below. In 3d-printing, the maximum overhang angle you can print without supports is usually about 45°. If you go steeper, the filament may sag or droop. Short, curved overhangs can sometimes go up to 70° or even 80°, but only for small distances.
- Try to avoid overhangs beyond 45° in your design for 3d-printing.
- Use supports only when you really need them. Too many supports waste time and filament.
- Adjust layer height and cooling to help with tricky overhangs.
A smart design for 3d-printing keeps supports to a minimum and makes your parts easier to finish.
Bridging
Bridging happens when your 3d printer lays filament across open gaps. For bridges under 5mm, you often don’t need supports at all. You can get clean bridges by lowering the print temperature and turning up the cooling fan. Slow down the print speed for bridges to help the filament stay straight and strong.
- Use high-quality filament for better bridges.
- Test your bridging settings with small prints before starting big functional parts.
- Change the orientation to make bridges shorter if possible.
Note: Good bridging means your parts come out cleaner and need less post-processing.
If you focus on smart design for 3d-printing, you get stronger, better-looking 3d parts every time. Think about orientation, watch your overhangs, and master bridging to make your 3d-printing projects a success.
Print Quality
You want every 3d print to look sharp and last long. Print quality depends on how well you take care of your printer and the choices you make before you start printing. Let’s look at some easy ways to boost your 3d print quality.
Nozzle & Extruder
Your nozzle and extruder work hard every time you start a 3d print. If you want top quality, you need to keep these parts clean and working smoothly. Here’s a simple maintenance schedule:
- Clean the nozzle when you see clogs or after long printing sessions.
- Replace brass nozzles every six months, or sooner if you use abrasive filaments.
- Check and clean extruder feeder wheels every week, especially with tricky materials.
- Use cleaning filament often and watch filament flow to stop blockages.
- Once a month, clean fans, check belt tension, lubricate rods, and inspect extruder gears.
- Keep spare nozzles and cleaning tools nearby so you can fix problems fast.
- Always follow safety steps and lubricate moving parts to keep your 3d printer running smoothly.
Tip: Regular care means fewer surprises and better print quality every time.
Hotend Sock
A hotend sock helps your 3d printer keep the nozzle temperature steady. The silicone sock wraps around the hotend and stops heat from escaping. This keeps the temperature stable, even when cooling fans blow air during 3d printing. You get fewer temperature drops and less risk of thermal runaway. The sock also keeps the heater block clean, stopping filament from sticking. If your sock gets damaged or loose, you might see temperature swings and lower print quality. Make sure the sock fits tight and replace it if you see cracks or wear.
Build Surface
The build surface is where your 3d print starts. If you want strong adhesion and less warping, pick the right surface for your filament. Here are some top choices:
- Textured PEI sheets stick well and last long, great for ABS and ASA.
- Smooth PEI sheets give a glossy finish but sometimes need extra glue.
- PEX plates work like PEI but handle high heat better.
- Carbon fiber glass plates make PLA, PETG, and TPU prints look shiny, but you may need adhesives.
- Heated beds and careful leveling help every 3d print stick and stay flat.
- LayerLock surfaces work best for polypropylene and stop warping.
- Packing tape can work for some filaments but needs frequent changes.
Note: Always level your bed and set the nozzle height right before you start a new 3d print. This helps you get the best quality and stops warping.
Layer Shifts
Layer shifts can ruin your 3d print quality. These happen when parts move out of place during printing. Here’s a table showing common causes and how you can prevent them:
|
Primary Cause |
How to Prevent |
|---|---|
|
Loose belts or pulleys |
Tighten belts and pulleys, clean and lubricate moving parts |
|
Overheating stepper drivers |
Check voltage, add cooling fans, slow down print speed |
|
Vibrations or wobbly tables |
Put your 3d printer on a solid, level surface |
|
Bad calibration or slicer settings |
Level the bed, calibrate axes, use test prints, lower speed |
|
Nozzle clogs or build plate issues |
Clean nozzle, check for obstructions, secure build plate |
If you check these things often, you’ll see better 3d print quality and fewer failed prints.
Filament & Storage
Material Choice
When you start a new print, you want to choose the right material for your project. Each filament has its own strengths and best uses. Some are tough and heat-resistant, while others are flexible or see-through. Check out this table to help you decide:
|
Filament Material |
Key Properties |
Typical Applications |
|---|---|---|
|
Polycarbonate (PC) |
Very strong, impact resistant, heat resistant |
RC parts, drone parts |
|
Bendlay |
Tough, flexible, highly translucent |
Cups, containers, light-up objects |
|
PORO-LAY Series |
Porous, flexible, unique textures |
Filters, sponges, creative models |
If you want to select strong material, polycarbonate is a great pick. For see-through or flexible prints, try Bendlay or PORO-LAY. Always match your filament to your project’s needs.
Dry Storage
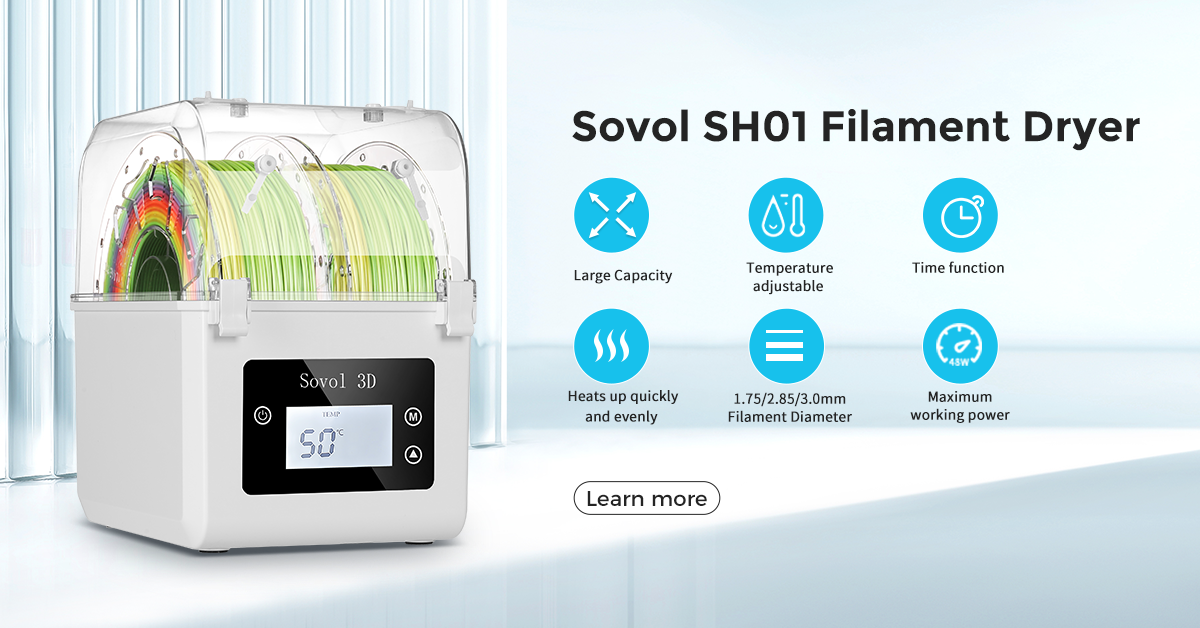
Filament loves to soak up water from the air. Wet filament can ruin your prints. You might hear popping sounds or see bubbles in your layers. Wet filament can also make your parts weak and cause jams in your printer. Dry storage keeps your filament safe and ready to use.
Tip: Store your filament in a dry box or cabinet with a humidity gauge. You can even print straight from some dry boxes!
Here’s what happens if you skip dry storage:
|
Problem |
What You See |
How Dry Storage Helps |
|---|---|---|
|
Swelling, popping, weak parts |
Bubbles, rough surfaces, poor strength |
Dry boxes keep filament dry and strong |
Keep your filament dry, and you’ll get smoother, stronger prints every time.
Specialty Filaments
Want to try something new? Specialty filaments open up a world of options. Flexible filaments like TPU bend and stretch, perfect for phone cases or toys. Composite filaments, like carbon fiber or metal-filled, make parts that are super strong or even feel like real metal. High-temperature filaments, such as PEEK, can handle heat and stress but need special printers.
- Metal-filled filaments give your prints weight and a cool look, but they wear down brass nozzles fast. Use a steel nozzle for these.
- Carbon fiber blends make parts light and tough, great for drones or RC cars.
- Flexible filaments need slow speeds and careful temperature control.
- High-temp filaments need a printer that can get really hot and stay safe.
Specialty filaments let you create parts for almost any job. Just remember to check your printer’s limits before you try something new.
Maintenance & Upgrades
You need to take care of your DIY 3D printer. Regular maintenance and smart upgrades help your printer work better. These steps stop problems and make your prints look nicer.
Routine Cleaning
Clean your printer often to keep it working well. Wipe the build plate and nozzle after a few prints. This stops dust and old filament from piling up. Once a month, clean deeper. Check for loose screws and clean the fans. Look for any parts that look worn out. If you see dust or plastic bits, take them off right away. A clean printer works better and lasts longer.
- Wipe the build plate and nozzle after a few prints.
- Deep clean and check belts, fans, and screws every month.
- Remove dust and old filament so your printer runs smooth.
Tip: Set a phone reminder so you remember to clean your printer.
Lubrication
Moving parts need to stay smooth and quiet. Lubricate rods, lead screws, and bearings every month. If you hear squeaks or feel rough movement, add more lubricant. Watch for signs like more friction or uneven motion. Do not use too much lubricant, or dust will stick and cause clogs. Taking care of these parts keeps your printer quiet and helps you avoid breakdowns.
- Lubricate moving parts once a month.
- Listen for squeaks or rough sounds.
- Don’t use too much lubricant or dust will stick.
Firmware Updates
Updating your printer’s firmware gives you new features and better prints. Marlin firmware now works with 32-bit boards and automatic bed leveling. It also supports input shaping for smoother moves. These updates help your printer print more accurately. Klipper firmware uses a Raspberry Pi to handle hard tasks. This means faster prints and better quality. You can change settings with text files and try new features quickly. Keeping firmware updated makes your printer more reliable and precise.
Community Mods
People in the 3D printing community share lots of ideas and upgrades. You can find mods that make your printer faster and stronger. Here are some popular upgrades:
|
Community Mod |
What It Improves |
|---|---|
|
Open-source design sharing |
Faster innovation and problem-solving |
|
Automatic mesh bed leveling |
Better print accuracy and setup |
|
Sensorless homing |
Fewer wires and more reliable starts |
|
Removable print sheets |
Easier print removal |
|
CoreXY system |
Smoother, faster, and more accurate moves |
|
High-temp extruders |
More material choices (like ABS, Nylon) |
|
Enclosed build chamber |
Stable temps for consistent results |
A good enclosure keeps your prints safe from dust and drafts. It also keeps the temperature steady, which helps with materials like ABS. The Voron community is a great example of people working together. They share guides, tips, and new ideas online. This teamwork helps you try new mods and get better results.
Note: Community mods can make your printer work even better. Try new ideas and share what you learn!
You can boost your 3D printer’s performance by focusing on setup, calibration, settings, and smart design. Try new tweaks, adjust your design for each project, and keep your printer in top shape. Track your results and see what works best for you. Don’t forget to share your wins with the community. Keep learning and stay curious—there’s always something new to discover in 3D printing!
FAQ
How often should I calibrate my 3D printer?
You should check calibration before every big project or after moving your printer. If you see problems like poor first layers or shifting, calibrate right away. Regular checks help you catch issues early and keep your prints looking great.
What is the best way to store filament?
Keep your filament in a dry box or airtight container with silica gel packs. Moisture can ruin your prints. If you hear popping or see bubbles, your filament might be wet. Dry storage keeps your filament strong and ready to use.
Why do my prints keep warping at the corners?
Warping happens when prints cool too fast or the bed isn’t level. Try using a heated bed, slow down cooling, and make sure your bed is clean and level. Some surfaces, like PEI sheets, help parts stick better and stop warping.
Can I use any slicer software with my DIY printer?
Most DIY printers work with popular slicers like Cura or PrusaSlicer. Check your printer’s firmware and file type. Some slicers offer extra features or plugins. Try a few and see which one fits your workflow best.
How do I know if my nozzle needs replacing?
If you see under-extrusion, uneven lines, or clogs that won’t clear, your nozzle might be worn out. Brass nozzles wear faster with abrasive filaments. Keep a spare nozzle handy so you can swap it out quickly.

