


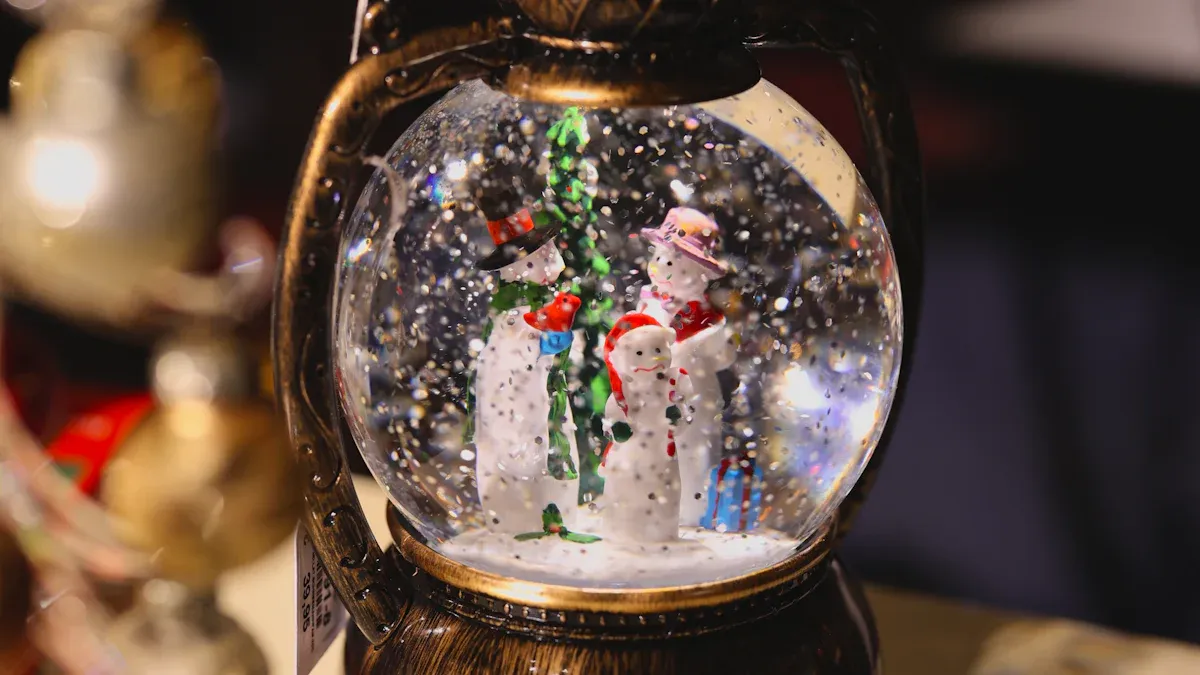
You hold the power to create magic with a 3D printer—yes, even your very own eigenen Schneekugel! Imagine crafting a sparkling snow globe scene that no store shelf could ever offer. People use 3D printers for all sorts of DIY projects, from seasonal decorations to custom vases and picture frames. You get to design, print, and assemble a tiny world that reflects your style. Grab your imagination and get ready to bring a winter wonderland to life!
Key Takeaways
- Use durable, water-resistant filaments like PETG or Nylon for your snow globe. This ensures your creation lasts and stays leak-free.
- Design your snow globe using Tinkercad, a beginner-friendly platform. Follow tutorials to learn essential 3D design skills while having fun.
- Seal your printed parts thoroughly before assembly. Sand rough edges and use waterproof adhesives to prevent leaks.
- Customize your snow globe with themes and colors. Personal touches make your creation unique and perfect for gifting.
- Experiment with different designs and materials. Your creativity is the limit, and each snow globe can tell a different story.
Materials and Tools
Ready to build your own snowy masterpiece? You need the right gear to make your snow globe sparkle and survive a splash. Let’s break down the essentials!
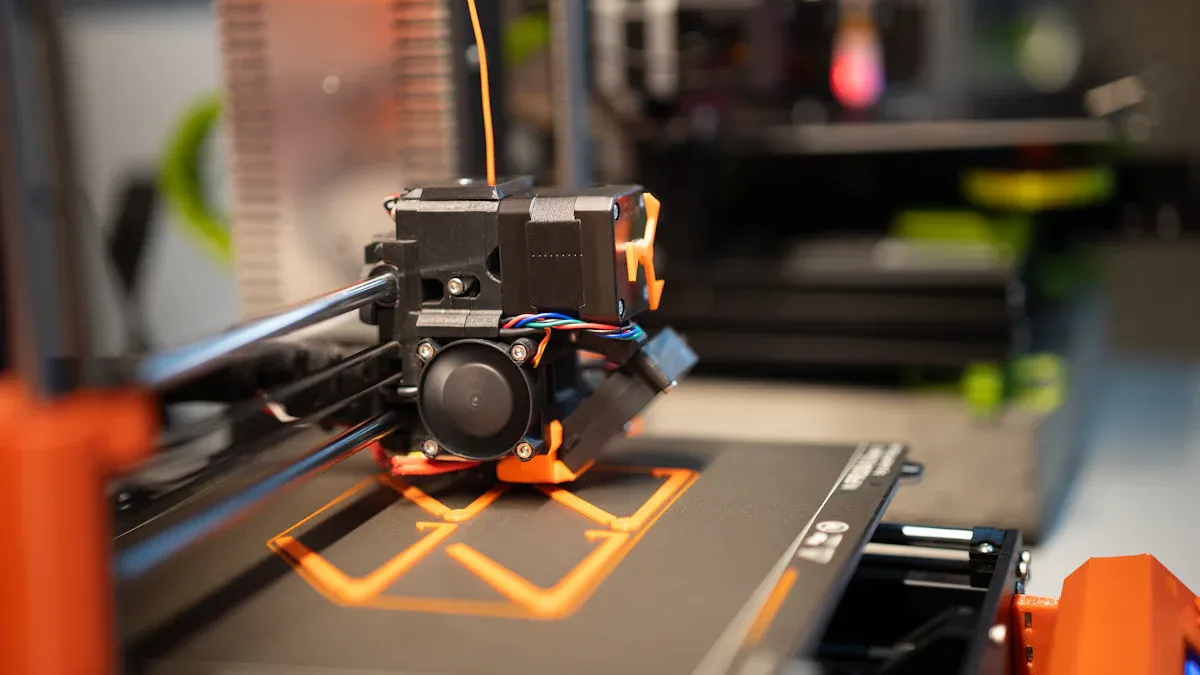
3D Printer and Filament Choices
Your 3D printer is the magic wand. You want a filament that laughs in the face of water. PLA works for beginners, but if you crave durability, try these:
- PETG: Tough, water-resistant, and famous for surviving underwater adventures.
- Nylon: Strong and stubborn, but a bit tricky to print. If you like a challenge, go for it!
- TPU (Ninjatek Cheetah): Flexible and perfect for parts that need to bend or bounce.
Tip: Always pick filaments labeled “safe” and “non-toxic” for anything that touches water. You don’t want your snow globe turning into a science experiment!
Globe, Water, Glycerin, and Glitter
The globe is your stage. You want it clear, sturdy, and roomy enough for your tiny winter scene. Here’s a handy table to help you choose:
|
Material |
Description |
|---|---|
|
Clear Plastic Christmas Ball |
Wide necks fit trees and figurines with ease. |
|
Distilled Water |
Keeps your globe clean and rust-free. |
|
Glycerin |
Slows down the glitter for a dreamy snowfall. |
|
Tinsel Glitter |
Big flakes look like real snow swirling around. |
|
Figurines/Trees |
Plastic or ceramic critters, trees, or anything you fancy. |
|
E6000 Glue |
Holds your scene together, even underwater. |
|
Sand Paper |
Roughs up surfaces for better glue grip. |
Adhesives and Optional Tools
You want your snow globe to survive shakes, spins, and maybe a tumble off the shelf. Grab these helpers:
- Epoxy or E6000 glue for waterproof sealing.
- Super glue for locking down loose trees or snowmen.
- Sand paper for prepping surfaces.
- Extra glitter or snowflakes for a blizzard effect.
- Glycerin for that slow-motion snowstorm.
With these tools, you’re ready to create a snow globe that dazzles and lasts. Let the crafting begin!
Designing Your eigenen Schneekugel
You stand at the gateway to your own snowy universe. Designing your eigenen Schneekugel is where the magic really begins. Whether you want a tiny penguin parade or a miniature city skyline, you get to decide what lives inside your globe. Let’s break down how you can turn your wildest ideas into a 3D-printed reality.
Using Tinkercad for Custom Designs
Tinkercad rolls out the red carpet for beginners. You don’t need to be a tech wizard to use it. The platform guides you step by step, so you never feel lost. Here’s how Tinkercad makes designing your eigenen Schneekugel a breeze:
- Tinkercad offers a simple tutorial that walks you through every click and drag.
- You learn essential 3D design skills while building your snow globe scene.
- The interface feels friendly, even if you’ve never touched 3D software before.
Tip: Don’t be afraid to experiment! Tinkercad encourages you to play around with shapes, sizes, and colors. Your eigenen Schneekugel can be as wild or as classic as you want.
Downloading or Creating 3D Models
Not ready to design from scratch? No problem! The internet bursts with ready-made 3D models just waiting for a new home inside your snow globe. Check out these popular spots:
- Sketchfab: Dive into a treasure chest of 3D snow globe models. You’ll find everything from tiny castles to dancing snowmen.
- CGTrader: Over 17,000 models, both free and premium. You can grab a model and tweak it to fit your vision.
If you want to create your own, keep these design tips in mind:
- Scale your model so it fits inside the globe. Aim for about 7 units along the largest side.
- Offset your model so it sits right on the “snow” at the bottom.
- Give your globe walls some thickness. You can make the inside hollow by scaling a copy to 98% of the original size.
- Add a lens-shaped base with a snow texture for extra winter magic.
Note: Always check that your models use safe, non-toxic materials, especially for anything that will touch water.
Customizable Panes and Personal Touches
Now comes the fun part—making your eigenen Schneekugel truly yours! You can swap out panes, add your favorite characters, or even invent a new kind of snow. The options stretch as far as your imagination.
Here’s a look at some of the most popular ways people customize their snow globes:
|
Customization Option |
Description |
|---|---|
|
Confetti Styles |
Over 50 styles, including Cat Confetti, Ice Confetti, and Football Confetti. |
|
Crushed Ice |
Light, pearlized confetti for a kaleidoscope effect. |
|
Classic Snow |
Traditional white snow bits for a timeless look. |
Want to go even further? Try painting your 3D-printed figures, adding LED lights, or creating a themed scene for a special occasion. Your eigenen Schneekugel can celebrate a birthday, show off your favorite animal, or capture a memory from your last vacation.
Pro Tip: Share your finished creation with friends or give it as a one-of-a-kind gift. Nothing says “I care” like a custom snow globe you designed and built yourself!
3D Printing Snow Globe Parts
Print Settings and Preparation
You stand at the printer, ready to bring your snowy scene to life. The right settings make all the difference between a leaky disaster and a globe that holds up to every shake. Want your snow globe to stay watertight? Here’s your secret recipe:
- Material Choices: PETG, Nylon, or ASA work best for water resistance. PLA can work, but it likes to let water sneak through over time.
- Wall Thickness: Go for 1.2 to 1.6mm. Set 3–5 perimeter shells. Thick walls keep the water where it belongs.
- Infill: Crank it up to 100%. Grid or cubic patterns lock everything tight.
- Layer Height: Stick with 0.1–0.2 mm. Thin layers bond better and keep leaks away.
- Flow Rate: Bump it up to 102–105%. A little extra plastic fills in the gaps.
- Print Temperature: PETG loves 240–250℃. Hotter temps help layers melt together.
Tip: Print a small test piece first. Dunk it in water and check for bubbles. No bubbles? You’re golden!
Troubleshooting Print Issues
Sometimes, your printer throws a tantrum. Warping, stringing, or gaps can sneak in and ruin your masterpiece. Don’t panic! You can fix most problems with a few tweaks:
- Warping? Use a heated bed and add a brim or raft.
- Gaps or leaks? Increase wall count or flow rate.
- Stringing? Lower the print temperature or adjust retraction settings.
- Layer separation? Slow down the print speed and raise the temperature.
If you spot tiny holes, seal them with a dab of epoxy or silicone. Your snow globe will thank you!
Estimated Print Times
Print times depend on your design’s size and detail. A simple snow globe base or figure might finish in 1–2 hours. A large, detailed scene could take 6–8 hours or more. Here’s a quick guide:
|
Part |
Print Time (Approx.) |
|---|---|
|
Small Figurine |
30–60 minutes |
|
Globe Base |
2–4 hours |
|
Full Scene Insert |
4–8 hours |
⏳ Patience pays off! Let your printer work its magic, and soon you’ll have a snow globe ready for assembly.
Snow Globe Assembly
You’ve printed your parts, gathered your glitter, and now you stand at the most exciting part—putting your eigenen Schneekugel together! This is where your winter wonderland takes shape. Let’s walk through each step so your snow globe survives every shake, swirl, and snowstorm.
Preparing and Sealing Printed Parts
Before you start gluing or filling, you need to make sure your 3D-printed parts are ready for a watery world. Water loves to find tiny holes, so you want to seal every nook and cranny.
- Start by sanding any rough edges or seams. Smooth surfaces help glue and sealant stick better.
- Rinse your printed parts with warm water and mild soap. Dry them completely.
- For the ultimate leak-proof globe, try vacuum impregnation. This process pulls resin deep into the tiny pores of your print, sealing them tight. Choose a resin made for waterproofing, and follow the instructions for vacuum pressure and curing time. You don’t want to rush this step—let the resin cure fully for the best results.
- If you don’t have a vacuum chamber, you can brush on a thin layer of clear epoxy or resin. Make sure to cover every surface that will touch water.
Tip: Hold your parts up to the light. If you see pinholes or thin spots, add another coat of sealant. A little patience now saves you from a soggy disaster later!
Securing Figures with Adhesive
Now it’s time to set the stage inside your globe. Your snowmen, trees, or tiny penguins need to stay put, no matter how much you shake things up.
- Use E6000 glue for a bond that laughs at water and time. This glue holds your figures down with superhero strength.
- Want extra insurance? Dab a bit of glue on the base of each figure, then press it firmly onto the globe’s bottom. Hold it in place for a minute or two.
- For delicate or flexible parts, you can use a toothpick to apply glue in hard-to-reach spots.
- Let everything dry for several hours. Don’t rush—your patience will pay off with a scene that stands tall through every blizzard.
- Figures that float or tip over can ruin the magic. Make sure each piece is anchored before you move on!
Filling and Sealing the Globe
Here comes the moment of truth—adding water, glitter, and sealing your snowy masterpiece. This step turns your creation from a simple model into a swirling eigenen Schneekugel.
- Fill the globe about three-quarters full with distilled water. Add a splash of glycerin to slow the fall of your glitter. Sprinkle in your favorite snow or confetti.
- Gently tap the globe to release any air bubbles. You want a smooth, dreamy snowfall, not a bubble bath!
- Before you close the globe, run a bead of silicone adhesive around the inside edge of the lid or base. This creates a watertight seal that keeps your winter scene safe.
- Press the lid or base onto the globe. Wipe away any extra glue that squeezes out.
- Let the silicone set for as long as the package says. Don’t shake or flip the globe until the seal is rock solid.
Once everything dries, give your snow globe a gentle shake. Watch the glitter swirl and your scene come alive. You did it! Your own snowy world, safe and sound, ready for display or gifting.
Customizing Your eigenen Schneekugel
Multi-Color Printing and Painting
Why settle for plain when you can go wild with color? Multi-color 3D printing lets you create snowmen with bright scarves, penguins with orange beaks, or even a rainbow unicorn. If your printer only uses one color, grab some acrylic paints and let your imagination run loose.
Painting your figures turns them into tiny works of art. Try these techniques for a magical finish:
- Use the dry brush method to create a glassy illusion on your globe.
- Outline the circle with a small round brush and titanium white for a frosty edge.
- Grab a #4 bright brush and add reflections with gentle, dry strokes. This makes your globe look like it’s catching the winter sun.
Tip: Let each layer of paint dry before adding the next. Your snow globe will look crisp, not muddy!
Themed Scenes and Gift Ideas
Themes turn your eigenen Schneekugel into a story. Picture a snow-covered castle rising from a sparkling landscape, just like the enchanting fairytale scenes that wow craft communities online. Maybe you want a tiny village, a favorite animal, or a scene from your last vacation. The only limit is your imagination.
Here are some fun ideas to get you started:
|
Theme |
Perfect For |
|---|---|
|
Snowy Castle |
Fantasy lovers |
|
Birthday Party |
Friends and family |
|
Sports Team |
Super fans |
|
Holiday Wonderland |
Festive celebrations |
|
Pet Portrait |
Animal enthusiasts |
You can even add a personal touch by painting names or special dates on the base. Your snow globe makes a one-of-a-kind gift that shows you care. Share your creations with friends, or surprise someone with a snowy scene that brings back memories.
Nothing beats the smile when someone shakes a globe and sees a world you made just for them!
You just learned how to design, print, and assemble your own snow globe. Your creativity shapes every scene, and experimentation brings surprises. Why choose 3D printing? You get rapid prototyping, cost savings, wild design freedom, eco-friendly options, and fewer parts to assemble.
- Make your snow globe in hours, not weeks.
- Save money and reduce waste.
- Create shapes that defy tradition.
Share your snowy masterpiece or drop your questions below. Your winter wonderland awaits! ❄️
FAQ
Can I use tap water instead of distilled water?
Tap water brings unwanted minerals and cloudiness to your globe. Distilled water keeps your snow globe crystal clear. Want a sparkling scene? Stick with distilled!
What if my snow globe leaks?
Don’t panic! Dry everything. Add more silicone or epoxy around the seal. Let it cure. Test again. Still leaking? Try a double layer of sealant for extra protection.
Can I put real snow or organic items inside?
Real snow melts. Organic items rot. Your snow globe turns into a science experiment gone wrong. Stick with plastic, ceramic, or waterproof 3D prints for a globe that lasts.
How do I keep glitter from clumping?
Tip: Mix glitter with a little glycerin before adding water. Shake gently. Glycerin slows the fall and keeps the glitter swirling like a snowstorm!