


A 3D Print Temperature Tower lets you try many temperatures in one print. This helps you find the best setting for your filament. Many people say they get better prints and fewer problems with this method:
- You can see the best temperature for strong layers and a shiny look.
- It helps you find and fix problems like warping or weak layers fast.
- You can adjust settings for materials like PLA, ABS, or PETG.
|
Benefit |
Description |
|---|---|
|
Improving print quality |
You get smoother and stronger parts by picking the right temperature and stopping common mistakes. |
|
Reducing material waste |
You save time and filament because you avoid bad prints. |
|
Enhancing filament compatibility |
You can test different brands or colors and feel sure about your choice. |
You do not need special skills to begin. With one simple test print, you will see your results get better.
Key Takeaways
- Use a 3D Print Temperature Tower to test many temperatures in one print. This saves both time and filament. It helps you find the best settings for your material.
- Look at each part of the tower for layer sticking, surface look, stringing, and warping. This helps you pick the best temperature for strong and smooth prints.
- Change slicer settings based on the filament type. Different materials like PLA, ABS, and PETG need certain temperature ranges for best results.
- Watch your print closely to spot problems like stringing or weak sticking early. Write down notes during the process to help you make better prints next time.
- Print a temperature tower when you change filament brands or colors. This helps keep your 3D prints high quality and working well.
3D Print Temperature Tower Basics
What It Is
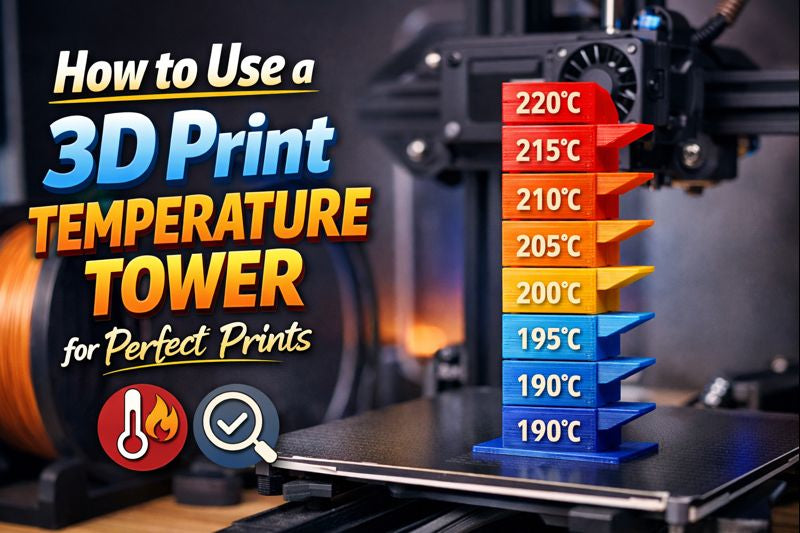
A 3D Print Temperature Tower is a special calibration model that helps you test different nozzle temperatures in a single print. You print the tower in sections, with each section using a different temperature. This method lets you see how your filament reacts to changes in heat. You can spot the best temperature for your material by checking each part of the tower.
The tower works as a visual guide. You can compare how the layers stick together, how smooth the surface looks, and how well the printer handles small details. The table below shows how different temperatures affect print quality:
|
Temperature (°C) |
Intercoat Adhesion |
Quality of Finish |
Fine Details |
|---|---|---|---|
|
220 |
Poor |
Rough |
Blurry |
|
215 |
Fair |
Acceptable |
Moderate |
|
210 |
Good |
Smooth |
Clear |
|
205 |
Very Good |
Excellent |
Sharp |
|
200 |
Optimal |
Best |
Best |
|
195 |
Poor |
Rough |
Blurry |
|
190 |
Very Poor |
Unusable |
Unclear |
Why Use One
You use a 3D Print Temperature Tower to find the best settings for your filament. This tool helps you get strong, smooth, and detailed prints. You can test different materials like PLA, ABS, or PETG. Each material needs its own temperature range. For example:
- PETG prints best between 220-245°C. You get better results with a heated bed set to 75-90°C.
- PLA usually needs lower temperatures and more cooling.
- PETG does not need as much cooling as PLA, but you may need to adjust the fan for the best finish.
When you print a temperature tower, you can check for problems like stringing, poor bridging, or weak layers. You want to pick the lowest temperature that still gives you good results. This helps you save filament and avoid failed prints.
Tip: Many beginners think you only need to look at the tower to pick the best temperature. For strong parts, you should also check how well the layers stick together and how the part feels.
Some towers need you to change the temperature manually in the printer’s G-code. Make sure you follow the instructions for your model and slicer.
Setup and Slicing
Model Selection
You need a good model before you print your temperature tower. Many people share free models online. You can get a 3D Print Temperature Tower from trusted websites. Here are two popular places to look:
|
Source Name |
Description |
|---|---|
|
This site has many 3D models, including temperature towers. |
|
|
You can find a free STL for a Smart Temperature Tower here. It also gives updates and tips. |
You can download these models as STL files:
- Cults3D: Has lots of temperature tower models.
- Printables.com: Has a free STL for a Smart Temperature Tower.
Pick a model that fits your printer’s size and the filament you want to use. Some towers have numbers or marks for each temperature. This helps you check your results.
Tip: Always read the model’s notes for special steps or slicer tips.
Slicer Settings
After you get your model, open it in your slicer software. Cura is very popular, but PrusaSlicer and Bambu Studio work too. You need to set the right temperatures for your material. Here is a quick chart for common materials:
|
Material |
Bed Temperature |
Extruder Temperature |
|---|---|---|
|
PLA |
50–60°C |
190–220°C |
|
ABS |
90–110°C |
220–250°C |
Check these slicer settings too:
|
Setting |
Optimal Range |
Material Example |
|---|---|---|
|
Printing temperature |
195–220°C |
PLA (200–210°C) |
|
Build plate temperature |
50–110°C (60°C for PLA) |
PLA |
|
Initial layer temp |
A bit higher than normal |
N/A |
|
Enable temp tower |
Good for calibration |
N/A |
- Nozzle temperature for PLA: 190-215°C
- Nozzle temperature for ABS: 220-240°C
- Bed temperature for PLA: 50-60°C
- Bed temperature for ABS: 90-110°C
Nozzle temperature changes how the filament comes out. If it is too hot, you might get too much plastic. If it is too cool, not enough plastic comes out. Bed temperature helps the print stick. A hotter bed usually helps with sticking.
Note: Some slicers let you change the temperature at different heights. In Cura, go to "Extensions > Post Processing > Modify G-Code." Use "ChangeAtZ" to set new temperatures for each part of the tower.
Temperature Steps
You need to set temperature steps to test different values in one print. Most towers use steps of 5°C or 10°C. For example, start at 220°C and lower by 5°C every 10 mm. This helps you see how your filament works at each temperature.
To set temperature steps in your slicer:
- Open your slicer and load the tower model.
- Go to the post-processing or script area (in Cura, use "ChangeAtZ").
- Add a temperature change at the right layer or height for each part.
- Make sure each step matches the marks on your tower.
Tip: Write the temperature on each part of your tower. This makes it easy to compare after printing.
You also need to set the cooling fan for your material:
- For PETG, set the fan to 30-60% after the first layers.
- Print the first layer with the fan off (0%) to help it stick.
- For PLA, use more fan for a smoother finish.
- For ABS, keep the fan off or very low to stop warping.
- More fan can make layers weaker, so change it if needed.
A good 3D Print Temperature Tower shows clear results. You can see which temperature gives you the best strength, look, and detail for your filament.
Printing the Tower
Start the Print
You have your temperature tower model ready in the slicer. Now you can start printing. Follow these steps to get good results:
- Put the G-code file on your printer. Make sure you picked the right filament and set the temperature zones.
- Check that the bed and nozzle are at the right temperatures. This helps the print stick well.
- Begin the print and watch the first layer closely. A good first layer helps the whole tower print better.
- Watch as the printer moves through each temperature zone. You should see clear changes between the sections.
- Do not touch the print while it is running. Let the printer finish the tower without stopping it.
Tip: Write down your print settings before you start. This will help you compare results and fix problems later.
Monitor Progress
You need to watch the print as it builds each part. Look for changes in how the surface looks, how the layers stick, and small details. Try these tips:
- Look for thin strings, blobs, or rough spots. These can mean the temperature is wrong.
- Check if bridges and overhangs look good in each section. Good bridges mean the temperature is right for your filament.
- See if layers pull apart or warp. Bad sticking often happens in cooler parts.
- Write down what you see in a spreadsheet. This helps you remember which temperatures work best next time.
|
Observation |
What to Look For |
Action to Take |
|---|---|---|
|
Stringing |
Thin threads between features |
Lower temperature |
|
Poor bridging |
Sagging or gaps |
Raise temperature |
|
Layer separation |
Cracks or splits |
Adjust temperature |
Note: If you see big problems, stop the print and check your settings. Small changes can make your print much better.
You will learn the most by watching the print and writing notes. Careful watching helps you find the best temperature for your filament and project.
Inspecting Results
Visual Checks
After your print finishes, you need to inspect the tower closely. Start by looking at each section from top to bottom. You want to check for four main things:
- Layer Adhesion: Gently press on each section. Good adhesion means the layers do not separate or crack when you apply light pressure.
- Surface Finish: Look for smooth and even surfaces. Shiny or glossy areas often show the right temperature. Dull or rough spots can mean the temperature was too low or too high.
- Stringing: Check for thin, hair-like strings between features. Too much stringing means the temperature was likely too high.
- Warping: Look at the base and corners. Warping or lifting from the bed shows the temperature or cooling was not ideal.
You can use a table to record your findings:
|
Section Temp (°C) |
Layer Adhesion |
Surface Finish |
Stringing |
Warping |
|---|---|---|---|---|
|
220 |
Poor |
Rough |
High |
Yes |
|
215 |
Fair |
Acceptable |
Medium |
No |
|
210 |
Good |
Smooth |
Low |
No |
|
205 |
Very Good |
Excellent |
None |
No |
Picking the Best Temperature
Now compare each section of your 3D Print Temperature Tower. Find the section with the best mix of strong layers, smooth finish, and little or no stringing. This section shows the optimal temperature for your filament.
Follow these steps:
- Identify the section with no cracks or splits.
- Check for a clean surface with minimal marks.
- Make sure there is little to no stringing.
- Confirm the base stays flat with no warping.
Pick the temperature that gives you the best results in all these areas. Write this value down for future prints. You can now use this temperature for stronger, cleaner, and more reliable 3D prints.
Troubleshooting
Common Issues
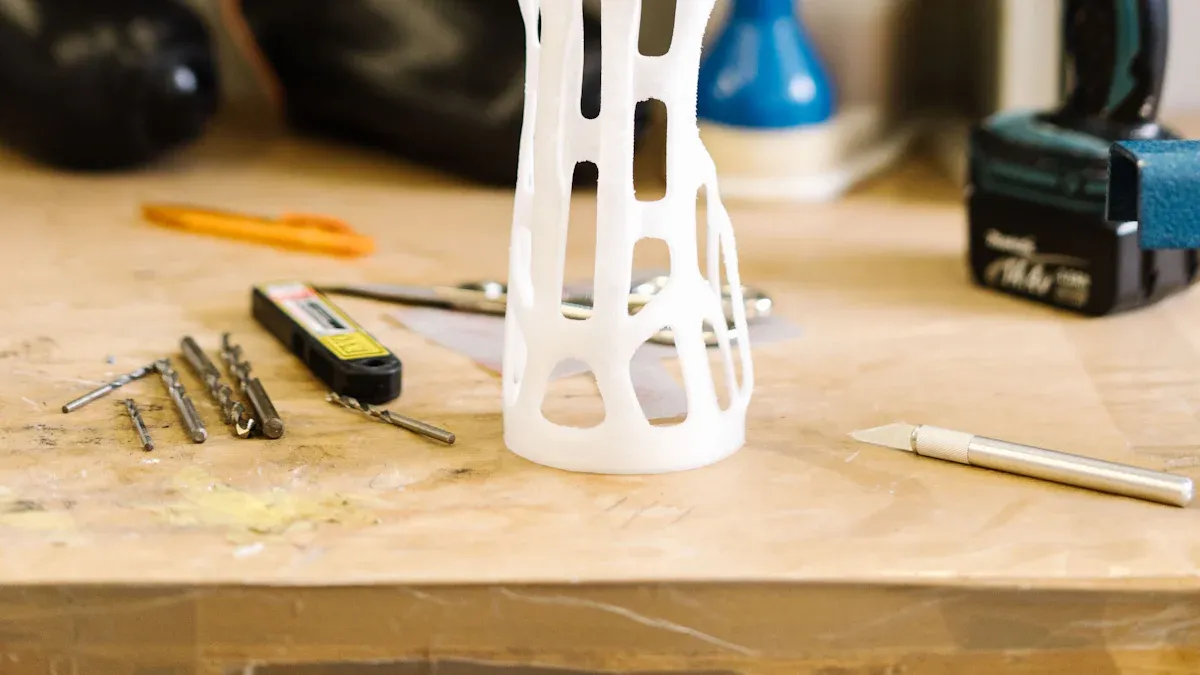
When you print a temperature tower, some problems can happen. These problems can make it hard to get good results. Here are some common things that go wrong: The print might not stay on the bed. Sometimes, the tower gets knocked off before it is done. Big blobs of filament can show up while printing. These blobs might push the tower off the bed. The corners of the tower can lift up. This is called warping and can make the print fall over. If you see any of these problems, you should fix them fast. Watching your print closely helps you catch problems early and save filament.
Tips for Success
You can fix most temperature tower problems with a few steps. Try this checklist to help your print: First, check your G-code for the tower. Make sure M104 or M109 commands are at the right layers. Next, see if your printer’s firmware can change temperatures during a print. Update the firmware if it cannot. Change your cooling fan and print speed. Slower speeds and good fan settings help control temperature changes. Look at your printer’s hardware too. Check for clogged extruders or a bed that does not heat evenly.
You can use this table to keep track of what you try:
|
Step |
What to Do |
Why It Matters |
|---|---|---|
|
G-code review |
Check for temperature commands |
Makes sure changes work |
|
Firmware check |
Update if needed |
Lets printer switch temps |
|
Fan and speed adjustment |
Set good values |
Makes prints look better |
|
Hardware inspection |
Clean and level parts |
Stops print problems |
Tip: Write down your settings and changes every time. This helps you do better next time and avoid mistakes.
If you take your time and check everything, you will get good results. Careful setup and watching your print help you get better prints each time.
You can get great 3D prints by using a temperature tower. This tool lets you try different temperatures in one print. It helps you save both time and filament. When you set the right temperature, your filament flows smoothly. Layers stick together better, and you have fewer failed prints.
- Try many temperatures in one print to save time.
- Make your prints look better and feel smoother.
- Fix problems like warping or layers not sticking.
- Adjust settings for each kind of filament.
Use this method when you try new filaments or settings. You will notice your prints turn out better and work more often.
FAQ
How often should you print a temperature tower?
Print a temperature tower when you use a new filament brand or color. This helps you find the best settings for each spool. It also keeps your prints looking the same every time.
Can you use the same temperature tower for different materials?
No, you need a different temperature tower for each material type. PLA, ABS, and PETG all need their own temperature ranges. Always use a tower that matches the filament you want to test.
What if your printer does not support automatic temperature changes?
You can change the temperature by hand in your slicer’s G-code. In Cura, use the “ChangeAtZ” script to do this. This lets you set new temperatures at different heights in your print.
Do you need to change other settings besides temperature?
Yes. You should also check the cooling fan speed, print speed, and bed temperature. These settings help make your prints better. Change them to fit your filament and printer.
Why does your tower have stringing or blobs at some temperatures?
Stringing or blobs usually mean the temperature is too high. Lower the temperature in those parts of the tower. You can also change retraction settings to help fix these problems.