
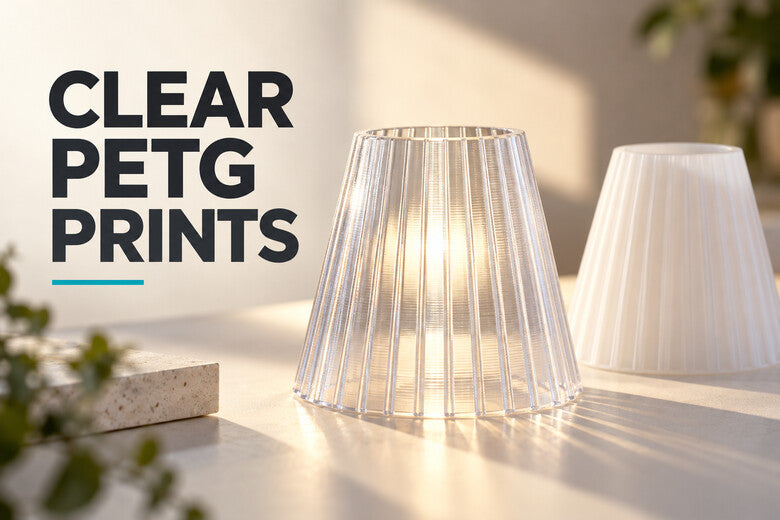
A spool labeled “clear” can look almost like glass before printing. The finished part often looks milky. That is normal for FDM: light meets layer lines, small gaps, internal walls and surface texture on its way through the object.
You can still make attractive translucent prints with clear PETG. The useful question is what the part needs to do: diffuse an LED softly, show a shape behind a cover, or let you read fine detail through it? Those goals need different designs. This guide starts with easy tests and avoids promising glass-like clarity from a standard print.
Clear, translucent and transparent: set the right goal
A transparent pane lets you distinguish detail behind it. A translucent pane passes light but blurs that detail. An opaque part blocks the view. Clear PETG filament can produce any of these appearances depending on the printed geometry and surface.
For a small LED diffuser, a softly cloudy finish may be exactly what you want. For a window or lens, every layer boundary and internal void becomes more noticeable. If clear vision through the part is essential, a cut acrylic or polycarbonate sheet may be a simpler choice than an FDM print. A printed cover should not be assumed suitable for protective eyewear or other safety-critical optics.

Why does clear PETG turn cloudy?
Light is scattered or reflected whenever it passes from plastic to air and back again. FDM parts contain many opportunities for that to happen: the outside layer texture, separate toolpaths, infill boundaries and tiny gaps between lines. A wet or inconsistent spool can add bubbles or rough extrusion. A clear filament label describes the material, not the optical performance of every printed shape.
Thickness matters too. A single thin wall may glow beautifully, while a thick part with visible infill looks more opaque. This does not mean “less material always equals more clarity”: a thin wall with holes or uneven lines can also look worse.
Start with the right filament and a reliable baseline
Choose an unpigmented clear PETG rather than a milky or heavily tinted variant when the goal is maximum light transmission. Brands and formulations differ, so compare small samples before committing to a large shade or cover.
Start from the tested PETG profile for your printer and filament. Check that the nozzle is clean, the spool feeds smoothly and the filament is in good condition. If you hear popping, see bubbles or get unusually rough strings, follow the filament maker’s drying instructions before tuning for appearance.
PETG can bond strongly to some build surfaces. Use a plate and any release layer recommended for that specific printer and surface; do not assume a smooth sheet is safe just because it gives a glossy first layer.
Design the part for the light effect you want
For a lamp diffuser
Keep the shade geometry simple and test a small section first. Thin, consistent walls allow more light through; ribs, texture or a matte surface spread the light and hide individual LEDs. Preview the sliced walls to make sure no tiny region disappears. Use only an LED and lamp assembly whose operating heat remains suitable for the PETG part, and keep plastic away from hot bulbs and other heat sources.
For a clearer panel
Try a small, flat coupon before making a full-sized window. Put the viewing face against a suitable smooth build surface if that surface is approved for PETG, and compare it with the top face. Reduce unwanted internal boundaries: depending on the panel design, either a continuous thin shell or carefully joined solid paths may work better than visible sparse infill. There is no universal infill percentage that guarantees transparency.
For a decorative object
Use the layer texture intentionally. A spiral wall or repeated ribs can turn the cloudy quality of FDM into an attractive lighting effect. If using vase mode, check that the model is compatible with a continuous single wall and that the wall is strong enough for its intended use.
Tune one small sample, not the entire project
Print two or three coupons with the same filament, geometry, orientation and lighting. Begin with the manufacturer’s PETG profile. Then change one factor at a time:
- Check line consistency. Calibrate flow using your usual method. Under-extrusion leaves gaps that scatter light; excess flow can leave ridges and blobs.
- Compare wall layouts. Try a thin continuous wall and a slightly thicker version. Inspect the sliced paths rather than relying on the wall-count number alone.
- Test temperature within the filament’s range. The aim is well-joined paths without scorching, stringing or loss of shape. Do not copy a temperature from a different PETG brand.
- Compare moderate cooling and speed. Too much cooling can change bonding; too little can spoil overhangs. Slower, steady printing can make paths more consistent, but the result is specific to the printer and shape.
- Compare surface finish. Inspect each sample both unlit and with the intended light behind it.

Do not jump straight to an extreme layer height or a large flow increase. Such settings can introduce scraping, over-extrusion and dimensional errors. The best-looking sample is the one that works with your actual part and printer.
What about sanding and polishing?
Improving the outside surface can reduce visible layer texture. A careful progression from appropriate wet sanding to polishing can help a flat face look clearer, but it will not remove voids inside the print. Sanding can initially make the surface look frosted until the later polishing steps are complete.
Test the process on a spare coupon first. Follow the abrasive and polish maker’s safety guidance, keep liquids away from powered equipment, and avoid unapproved solvent smoothing. Coatings can change appearance but may scratch, yellow or affect fit. If this is a functional enclosure, check its temperature, electrical and mechanical requirements separately.
Quick troubleshooting
- Milky throughout: Compare wall thickness and infill paths; look for internal air boundaries before changing the whole print profile.
- Visible bubbles or popping: Check moisture and dry the spool as its manufacturer specifies.
- Uneven clear and cloudy bands: Inspect flow consistency, speed changes, cooling and the sliced path.
- Strings or browned specks: Check nozzle cleanliness and the filament’s temperature range; do not raise temperature blindly.
- Nice sample but cloudy full part: Compare the real part’s thickness, orientation and number of internal paths with the test coupon.
A simple test you can finish today
- Print a small clear PETG rectangle and a short curved wall from the same spool.
- Keep the printer’s proven PETG profile for the first pair.
- Place both against a printed page, then in front of a low-temperature LED. Photograph them from the same distance and angle.
- Make one controlled change, such as wall thickness or calibrated flow, and print the pair again.
- Choose the version that meets your real goal: readable detail, soft diffusion or an attractive decorative texture.

FAQ
Can a normal FDM printer make completely transparent PETG?
It can make translucent parts and, with careful geometry and finishing, some relatively clear areas. Layer lines and internal interfaces make glass-like clarity difficult and highly dependent on the part. Use a sheet material for reliable see-through windows.
Does 100% infill always make a clearer print?
No. Closely joined solid paths can reduce some air gaps, but the number and direction of interfaces, flow and surface finish still matter. For a thin lamp shade, a simple continuous wall may transmit light better than a thick solid section. Compare test coupons.
Should I turn the cooling fan off?
Not automatically. Lower cooling may help paths join in some geometries, but excessive heat can ruin bridges and small details. Start with a suitable PETG profile and test a modest change within the printer’s limits.
Will drying make cloudy PETG clear?
Drying can fix moisture-related bubbles and uneven extrusion. It cannot erase normal FDM layer lines or internal boundaries. Follow the exact spool maker’s drying guidance.
Can I use a clear PETG print as a lamp shade?
A decorative shade can work with a suitable low-temperature LED setup. Check actual operating heat, the lamp’s construction and clearances, and the filament’s temperature limits. Do not use it near incandescent bulbs or exposed hot components.
Conclusion
Clear PETG is easiest to enjoy when you design for translucency first. A diffuser, decorative cover or lit texture can look excellent without pretending to be glass. For better clarity, reduce gaps, keep extrusion consistent and polish the outside if the project warrants it. Make two or three small samples under the real lighting before printing the full part.
