


When you spot your heat bed worn out, you should stop your printer right away. Safety comes first, especially if you see cracks or warping. Take a close look at the bed and check if it heats evenly. If your printer struggles to keep a steady temperature, you might need a new bed. Here are some quick things you can check:
- Look for cracks or warping on the bed.
- See if the heating feels uneven.
- Decide if the bed needs replacing.
You can handle this, even if you are new to 3D printing!
Key Takeaways
- Stop your printer immediately if you notice cracks or uneven heating on the heat bed. Safety is the top priority.
- Regularly inspect and clean your heat bed to prevent wear. A clean surface leads to better print adhesion and quality.
- When replacing a heat bed, choose one that matches your printer's specifications. Compatibility ensures safe and effective operation.
- Perform routine maintenance every few months. This includes checking wiring, cleaning the bed, and running calibration prints.
- If you encounter error messages, do not ignore them. They can indicate serious issues that need immediate attention.
Spotting a Heat Bed Worn Out
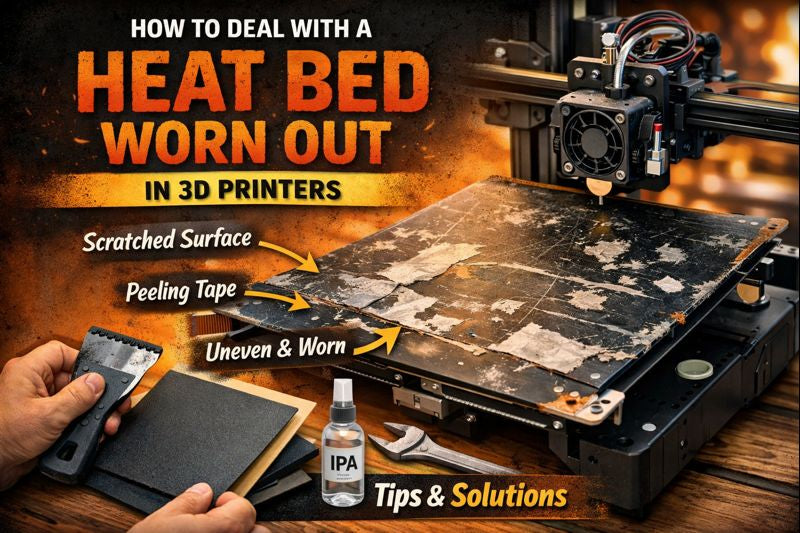
Visual Signs and Surface Damage
You can often spot a heat bed worn out just by looking at it. Check for cracks, chips, or warping on the surface. Sometimes, you might see dents or bulges. These spots can mess up your prints. If you notice leftover filament or dust stuck to the bed, clean it off. Even small bumps can cause big problems. Loose screws or wobbly parts can also make the bed uneven. Take a minute to tighten everything up before you start printing again.
Tip: Shine a flashlight across the bed. This trick helps you see dents or raised areas you might miss in normal light.
Print Quality Issues
A heat bed worn out can show up in your prints. You might see lines or strange patterns, even on tall prints. Sometimes, the first layer does not stick well. Other times, you get bulges or dents in your finished piece. Here are some common problems you might notice:
- Prints do not stick to the bed.
- You see lines or marks running through your print.
- Problems show up even on prints that are 150mm high or more.
- The bottom of your print looks rough or uneven.
If you keep having these issues, check your bed for damage or dirt. Regular cleaning and checking for loose screws can help keep your prints looking sharp.
Quick Function Checks
You do not need fancy tools to check if your heat bed is working right. Touch the bed (carefully, when cool) to feel for bumps or dips. Run your hand over the surface to spot rough patches. Make sure the bed heats up evenly. If you notice cold spots, your bed might not work as it should. Always check that the bed is stable and does not wobble. A quick look and a gentle touch can save you from bigger problems later.
Remember, catching a heat bed worn out early can save you time and money. Stay alert for these signs, and you will keep your printer running smoothly.
Immediate Actions for a Worn-Out Bed
Safe Shutdown Procedures
When you notice something wrong with your printer’s bed, you need to act fast. Here’s what you should do right away:
- Turn off your 3D printer immediately if you see the bed overheating or acting strange.
- Unplug the printer from the wall to make sure it’s safe.
- Wait for the bed to cool down before you touch anything.
- Check all the wiring and safety devices before you use the printer again.
- Make regular maintenance a habit to catch problems early.
Damage Assessment
After you shut down your printer, take a closer look at the bed. You want to find out how bad the damage is. Use this table to help you spot common problems and what to do next:
|
Sign of Failure |
What You See |
What To Do |
|---|---|---|
|
Cracks or warping |
Uneven surface, poor prints |
Replace the heatbed |
|
Slow heating |
Long wait for temperature |
Check wiring, replace if needed |
|
Cold spots |
Uneven bed temperature |
Try insulation, replace if not fixed |
You might notice your printer struggles to keep the bed hot. Heat loss can make it hard to reach the right temperature. If you see the temperature drop quickly after the heater turns off, you may need better insulation. Sometimes, thermal cameras show that heat escapes from the bed, especially when the printer is under stress or the surface is exposed. Look for cold spots or uneven heating by feeling the bed (when cool) or watching the temperature graph.
Safety Precautions
Safety always comes first when dealing with a heat bed worn out. Here are some simple steps to protect yourself:
- Always let the bed cool before you touch it.
- Wear gloves if you need to handle sharp or broken parts.
- Keep liquids away from the printer to avoid electric shock.
- Double-check that the printer is unplugged before you start repairs.
- If you feel unsure, ask for help from someone with experience.
Stay alert and careful. Taking these steps helps you avoid injury and keeps your printer in good shape.
Repairing a Heat Bed Worn Out
Cleaning and Restoring the Surface
You can bring a tired print bed back to life with the right cleaning steps. Start by removing any big chunks of leftover filament with a scraper. This helps you avoid scratching the surface later. For daily cleaning, grab some isopropyl alcohol (IPA). It works well on glass, PEI, and BuildTak beds. IPA removes oils and light residue that can mess with print adhesion.
If you use a glass bed, window cleaner is another good choice. It cuts through grease and leaves the surface clear. For a deeper clean, mix a little dish soap with warm water. Wipe the bed with a soft cloth, then dry it completely. Acetone can help with stubborn spots on glass or PEI, but use it sparingly. Too much acetone can damage the surface.
Here’s a quick cleaning routine you can follow:
- Scrape off large residue after each print.
- Wipe with IPA or window cleaner for daily use.
- Deep clean with soap and water every few weeks.
- Use acetone only for tough stains, and only on glass or PEI.
If you see scratches or rough spots, you can gently sand the bed with fine-grit sandpaper. Move in small circles and don’t press too hard. For extra protection, cover the bed with Kapton tape. This tape gives you a smooth, heat-resistant surface and helps your prints stick better.
Tip: Clean your bed often. A clean bed means fewer failed prints and less frustration.
Fixing Wiring and Connectors
Sometimes, a heat bed worn out is not just about the surface. Wiring and connectors can cause problems too. Loose or damaged connectors can overheat and even melt. You might notice your bed heats up slowly or not at all. Sometimes, the heat comes and goes. This can happen if a pin inside the connector bends or if the connection is loose.
To fix these issues, follow these steps:
- Use an H2.0 Allen key to remove the screws holding the bed.
- Carefully disconnect the heat bed cables. Don’t pull or use force.
- Check the wires and connectors for signs of burning, melting, or bent pins.
- If you find damage, desolder the bad cable or connector. Remember which wire goes where.
- Solder a new connector or wire in place. Work in a well-ventilated area and use a fume extractor if you have one.
- Reconnect the cables and secure everything tightly.
If you see any design flaws in the controller board, like weak connectors, consider upgrading them. High-temperature tape can help secure wires and prevent them from moving around.
Note: Never rush when working with wiring. Take your time and double-check your work. Safe repairs keep your printer running longer.
Repair vs. Replacement Decision
You might wonder if you should repair your heat bed or just get a new one. Here’s how you can decide:
- If the surface only has light scratches or residue, cleaning and a little sanding can fix it.
- If you see deep cracks, warping, or large cold spots, replacement is usually the best choice.
- For wiring issues, repair makes sense if you can replace a connector or wire safely.
- If connectors keep melting or the board has design flaws, a new bed or upgraded parts may save you more trouble.
Here’s a quick table to help you decide:
|
Problem Type |
Repair or Replace? |
|---|---|
|
Light residue |
Repair (cleaning) |
|
Deep cracks/warping |
Replace |
|
Loose connector |
Repair (replace connector) |
|
Repeated overheating |
Replace |
If you feel unsure, ask for help from someone with more experience. Sometimes, replacing a heat bed worn out saves you time and gives you better print results.
Remember: A safe and smooth bed means better prints and less stress.
Replacing the Heat Bed
Choosing a Compatible Bed
You want your new heat bed to fit your printer and your needs. Not all heat beds work the same way. Some heat up fast, while others cost less. Take a look at this table to compare the main types:
|
Heat Bed Type |
Pros |
Cons |
|---|---|---|
|
PCB Heatbed |
Easy to use, Even Heating, Cheap |
Slow Heating Time, Heat Area not Controllable |
|
Kapton Film Heater |
Fast Heating, Reliable, Thin, Precise Temperature, Long Life |
Needs extra safety, Expensive, Cannot use raw |
|
Aluminium Clad |
Customizable, Cheap, Hardware Control |
Needs thermal paste, Wiring must match power |
Check your printer’s manual for size and voltage. If you want fast heating, Kapton film works well. If you want something simple, PCB heatbeds are a good choice. Aluminium beds are great if you like to tinker.
Tip: Always match the voltage and size to your printer. This keeps things safe and easy.
Installation Steps
Ready to swap out your old bed? Here’s a step-by-step guide you can follow:
- Turn off your printer and unplug it.
- Remove the five bed leveling screws with a 2.5mm hex wrench.
- Flip the heat bed assembly over, lifting from the back.
- Loosen the eight screws on the power block terminal with a small flat head screwdriver.
- Remove the ground wire’s screw using a 1.5mm hex wrench. Take out the two cable chain screws with a 2mm hex wrench.
- Take out the screws on the two cable clamps with a 2mm hex wrench. Remove the center screw on the power block terminal with a 2.5mm hex wrench.
- Remove the twelve screws holding the plastic plate to the heat bed with a 2mm hex wrench.
- Peel away the insulation pad from the silicone heated mat.
- Remove the screw on the silicone heated mat with a 1.5mm hex wrench.
- Place the new silicone heated mat on the base. Guide the thermocouple cables through the center hole.
- Put the insulation pad back on the mat. Guide the cables through the hole and put the plastic plate on top.
- Slide the cables into the cable clamp loops and attach the clamps.
- Secure the cable chain to the bed with two screws.
- Tighten the eight screws on the power block terminal. Make sure the cables are snug.
- Put the heat bed assembly back on the printer. Align the leveling screws and springs. Tighten the screws.
- Power on the printer and run the bed-leveling feature.
Testing After Replacement
You want to make sure your new bed works before you print. Here’s what you should do:
- Plug in the printer and turn it on.
- Run the device self-test. This checks if everything works.
- If you see no errors, you did it right!
- If you see problems, turn off the printer and check your steps. Make sure all wires are tight.
Replacing a heat bed worn out can feel tricky, but you can do it with patience and care. Testing helps you catch mistakes before you start printing.
Note: Always test before your first print. This saves time and keeps your printer safe.
Preventing Heat Bed Wear
Maintenance and Cleaning Tips
You want your 3D printer to last a long time. Regular cleaning keeps your heat bed in top shape. Every three months, wipe the bed with isopropyl alcohol or a gentle cleaner. Remove dust and leftover filament after each print. Compressed air works great for blowing away small bits. If you see sticky spots, use a scraper or a soft cloth.
Here’s a table with some easy maintenance routines:
|
Maintenance Routine |
Description |
|---|---|
|
Clean gently with compressed air |
Removes dust and debris that can cause wear. |
|
Run a short calibration print |
Spots new problems before they get worse. |
|
Inspect and clean the bed surface |
Checks for scratches or warping; replace if needed. |
|
Re-run all calibration steps |
Keeps your prints accurate and smooth. |
|
Lubricate the rails or rods |
Makes sure the bed moves smoothly. |
|
Check cable connections |
Stops heat errors and keeps things safe. |
|
Check belts for slack or fraying |
Tight belts help your prints look better. |
Calibration and Protection
Calibration keeps your printer working right. Run a short calibration print every few months. This test helps you spot problems early. If you see lines or bumps, check your bed for damage. Re-run all calibration steps to fix small issues before they get big.
You can protect your bed with Kapton tape or a glue stick. These create a barrier between the print and the bed. They also make it easier to remove finished prints. If you use a glass bed, a glue stick helps with adhesion and protects the surface.
Try using a protective layer. It saves your bed from scratches and makes cleanup easier.
Wiring and Socket Checks
Loose wires can cause big problems. Check the tightness of all wire connections at least once a year. It’s smart to check before you start a long print, too. Look for signs of melting or burning near the sockets. If you see anything strange, fix it right away.
Avoid using insulation tape on hot parts. It can melt and make things worse. Use high-temperature tape or proper connectors instead. Regular checks keep your printer safe and help you avoid sudden failures.
Stay safe. A quick wiring check can save your printer from damage.
Troubleshooting After Repair or Replacement
Adhesion and Release Problems
You might notice your prints not sticking to the bed after a repair or replacement. Sometimes, the first layer peels off or leaves rough spots. A clean bed makes a huge difference. Try washing the bed with dish soap and hot water. Dry it well before printing. Adjust the bed temperature and slow down the first layer speed, especially if you use PETG or other tricky filaments. The bed surface can change over time, so keep checking it.
- Make sure the bed is super clean and leveled.
- Pick the right filament for your project. Some stick better than others.
- Run First Layer Calibration to help your prints stick.
If you keep having trouble, double-check your cleaning routine and calibration. Small changes can fix big problems!
Uneven Heating
Uneven heating can mess up your prints and cause warping. You can test the bed’s temperature with a few simple steps.
|
Step |
Description |
|---|---|
|
Thermistor test |
Use a hairdryer to see if the LCD shows a temperature change. No change? The thermistor might be bad. |
|
Swapping connections |
Swap the Hotend and heatbed thermistor connections on the mainboard to test the port. |
|
IPA Test |
Wipe the bed with isopropyl alcohol, heat it, and watch if it evaporates evenly. |
|
Check cables |
Look for damaged cables or loose PSU connections. |
|
Measuring resistance |
The thermistor should read about 100K at room temperature. |
|
Measuring voltages |
The bed should get ~12V (MK2/S) or ~24V (MK3/S). |
|
Disconnect Power Panic |
If nothing works, disconnect the PowerPanic cable from the board. |
Error Messages
Sometimes, you see error messages after fixing or replacing the heat bed. One common message is ‘Error 2562, Communication with the Hot Bed MCU is Abnormal.’ This means the printer cannot talk to the heat bed’s controller. Resetting the printer might not help if the connections or the MCU have problems.
- Check that the power cable connects firmly to the AC power board.
- Use a multimeter to measure the resistance of the heat bed pins. You should see 50-60 ohms.
- Look under the bed for loose power cables.
- Inspect the AC power board for burn marks or loose wires.
- If you still see errors, reach out to the service team.
Another error, ‘BED THERMAL RUNAWAY,’ pops up when the printer senses a sudden temperature drop. This can happen if a wire breaks or the sensor fails. Check all wires and sensors to fix this issue.
Don’t ignore error messages. They help you catch problems early and keep your printer safe.
You can keep your 3D printer running strong by staying on top of simple care routines. Clean your bed, check for damage, and fix small issues early. Try these habits:
- Rotate and inspect your bed every few months.
- Clean the surface after each print.
- Watch for signs of wear like cracks or cold spots.
|
How It Helps You |
|
|---|---|
|
Clean print head |
Stops clogs and keeps prints smooth |
|
Lubricate moving parts |
Reduces wear and keeps things moving |
|
Inspect parts |
Catches problems before they get worse |
|
Calibrate often |
Keeps your prints looking their best |
A little care goes a long way. You will get better prints and your printer will last longer! 🚀
FAQ
How often should you clean your 3D printer’s heat bed?
You should clean your heat bed after every few prints. If you see dust or leftover filament, wipe it off right away. Regular cleaning helps your prints stick better and keeps your bed in good shape.
Can you use regular tape instead of Kapton tape on the heat bed?
Kapton tape works best because it handles high heat. Regular tape can melt or leave sticky stuff behind. If you want smooth prints and easy cleanup, stick with Kapton or other heat-resistant tapes.
What should you do if your bed still has cold spots after repairs?
Try checking the wires and connectors again. Sometimes, a loose wire causes uneven heating. If you still find cold spots, you might need a new heat bed. Don’t ignore this problem, or your prints may fail.
Is it safe to print with a cracked or warped heat bed?
No, it’s not safe. A cracked or warped bed can cause prints to fail or even damage your printer. Stop printing right away. Fix or replace the bed before you start another print.