


Bed adhesion problems usually show up fast: the first layer not sticking, corners curling up, or the part popping loose mid-print. The frustrating part is that “try glue” sometimes works… and sometimes wastes your time.
This guide is built for people who print regularly and want a repeatable way to diagnose what’s happening. We’ll start with the quick read: what your first layer is telling you, and what to change first.
3D printer bed adhesion problems: a 2-minute diagnosis
Before you touch a single setting, run a simple first-layer test (a 20×20 mm single-layer square is enough). Watch it go down, then look closely.
- Lines are round and separated (you can see gaps between them) → your nozzle is too high (Z-offset too positive) or you’re under-extruding.
- Lines are very thin and scraped-looking, or the nozzle drags → nozzle is too low (too much squish), which can also cause adhesion failures.
- It sticks in some spots but not others → bed leveling/mesh (or a warped plate) is the likely culprit.
- First layer looks fine, then corners lift later → this is often warping from cooling/thermal contraction, not “adhesion” in the narrow sense.
If you’re only going to remember one thing: a good first layer is boring—consistent lines, gently flattened, touching each other, and not glossy-smeared.
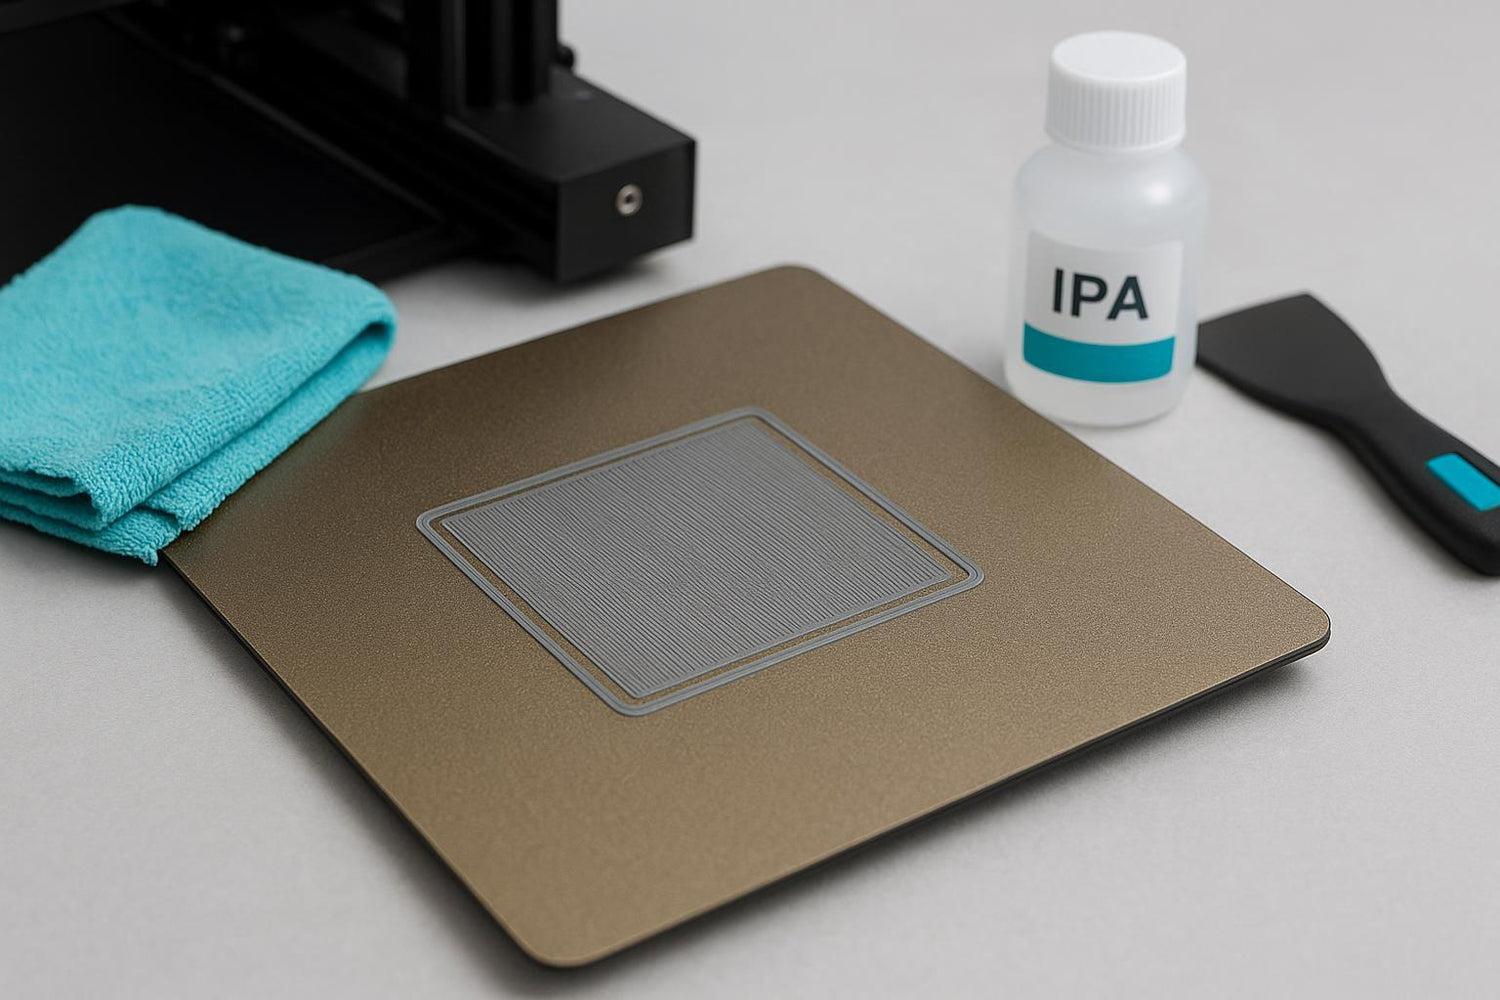
Fix the surface first (cleaning that actually removes oils)
If your printer was working last week and suddenly isn’t, assume the problem is your build surface until proven otherwise. Finger oils are enough to make PEI act like it “randomly stopped working.”
A quick wipe with isopropyl alcohol (IPA) helps between prints, but many experienced users find that a periodic wash with dish soap and warm water is what truly resets the surface because it removes skin oils better than a fast wipe.
If you’re trying to clean a PEI sheet (yes, literally “clean PEI sheet” as a troubleshooting step) and it still feels “random,” this is usually the missing step.
Here’s the practical routine:
- Let the plate cool (safer to handle, less likely to smear softened residue).
- Remove the plate if it’s removable.
- Wash with warm water + mild dish soap, rinse thoroughly, and dry with a lint-free towel.
- Handle by the edges after cleaning.
- Optional maintenance: use IPA for quick wipe-downs, using a clean lint-free towel each time.
For a general overview of cleaning methods by bed type, see Creality’s guide on how to clean a 3D print bed.
Pro Tip: If adhesion is “fine in the center but fails near one corner,” don’t assume it’s only leveling. That corner may simply be the one you touch most while removing prints.
Leveling vs Z-offset: the difference that saves hours
People mix these up constantly, and it leads to endless tinkering.
- Bed leveling (or tramming) is about making the nozzle-to-bed distance consistent across the whole surface.
- Z-offset is about setting the absolute nozzle height so the first layer has the right squish.
Simplify3D’s troubleshooting checklist is a good reference point for why both matter (and why first-layer speed and cooling can be part of the same problem): Simplify3D’s “Not Sticking to the Bed” troubleshooting guide.
A simple workflow that works on most FDM printers
- Clean the nozzle tip (a blob of plastic can throw off probing).
- Level/mesh the bed at printing temperature if your workflow allows it.
- Adjust Z-offset in small steps (0.02–0.05 mm at a time).
Done when: your first-layer test square prints with consistent line width and the lines lightly press together.
If you want a deeper “root cause” explanation (especially the nozzle-height vs thermal-contraction model), Obico lays it out clearly in Obico’s bed adhesion troubleshooting guide.
First-layer settings that matter (speed, temps, cooling)
Once the surface is clean and the nozzle height is close, slicer settings become meaningful. If you change settings before cleaning/height, you can chase your tail.
Slow the first layer down
A fast first layer gives filament less time to wet the surface and bond. Many troubleshooting guides recommend lowering first-layer speed as a first response; Simplify3D specifically calls out reducing first-layer speed as a core fix in their bed-adhesion troubleshooting page.
Practical starting point (works for many machines/materials):
First layer speed: 15–30 mm/s
Dial in bed temperature (and let it soak)
Bed temperature isn’t just a number—stability matters. Give the bed a couple minutes to soak so the surface temperature is even.
If you print a lot of PLA and get random releases, it’s often worth testing a small bump in bed temperature (within your filament’s recommended range) after you’ve confirmed nozzle height.
Don’t blast cooling on layer 1
Part cooling can shrink the plastic before it bonds well.
A common, safe default:
Fan: 0% for layer 1, then ramp up gradually
When the problem is warping, not adhesion
If your first layer looks decent but corners lift later, treat it as a cooling and shrinkage problem.
Common tells:
The part stays stuck until the print gets taller, then edges start to lift.
Only one side lifts (the side facing a draft, A/C vent, or open window).
Fixes that usually help:
- Reduce fan (especially for ABS/ASA).
- Add a brim (more on that below).
- Block drafts or use an enclosure.
⚠️ Warning: If you’re tempted to solve warping by cranking bed temp and glue to the moon, pause. Overdoing adhesion can make parts hard to remove and can damage coatings. The goal is “reliably sticks during the print, releases when cool,” not “permanent bond.”
Bed surface cheat sheet (PEI vs glass vs tape)
Your surface is part of the system. If you jump between materials and plates, you’ll see different adhesion behavior even with identical settings.
PEI (smooth or textured)
- Great everyday surface, but it’s sensitive to skin oils.
- When adhesion goes “mysteriously bad,” a soap-and-water wash often fixes it.
If you’re running a Sovol printer and want a spare or replacement plate, a flexible PEI plate is one of the simplest quality-of-life upgrades because it makes removal easier and can restore consistent adhesion. Example: Sovol PEI flexible steel build plate for SV05/SV06.
Glass
- Can work well, but cleanliness and the right adhesive strategy matter.
- If you’re using glue stick on glass, think of it as a controlled interface layer (and clean it off periodically).
Painter’s tape
- Still useful, especially for quick experiments.
- Replace it when it gets scuffed or contaminated.
For a broader discussion of build plate surfaces, prep, and adhesion aids, Sovol EU has a detailed guide here: How to master build plate adhesion for successful 3D prints.
Brims, rafts, and small parts: increasing contact area
Sometimes your settings are fine—the part just doesn’t have much footprint.
- Brim: Adds extra lines around the base to hold edges down. Good first move for corner lift.
- Raft: Prints a full base under the part. Useful for tiny contact patches, but it’s slower and uses more material.
If you keep hearing people argue about brim vs raft, the short version is: start with a brim when you’re fighting edge lift, and move to a raft when the part’s footprint is genuinely too small to trust.
A conservative “do this in order” checklist
If you’re stuck, follow this order. It’s boring, but it’s fast.
- Wash the plate with dish soap + warm water; dry; don’t touch the print area.
- Re-run bed leveling/mesh.
- Tune Z-offset using a one-layer square.
- Slow first layer + reduce fan on layer 1.
- Add a brim if corners lift.
- Only then consider adhesive aids.
For additional PLA-specific troubleshooting ideas, All3DP’s overview is a good reference: All3DP’s PLA not sticking to the bed fixes.
Next steps (if you want fewer “mystery failures”)
- If your plate is old, glossy, or damaged, replacing it can be more productive than endless tuning. For example, the SV08 PEI print plate kit is a straightforward replacement surface option.
- If you want to go deeper on surface prep and slicer settings, Sovol EU’s longer guide is worth bookmarking.