


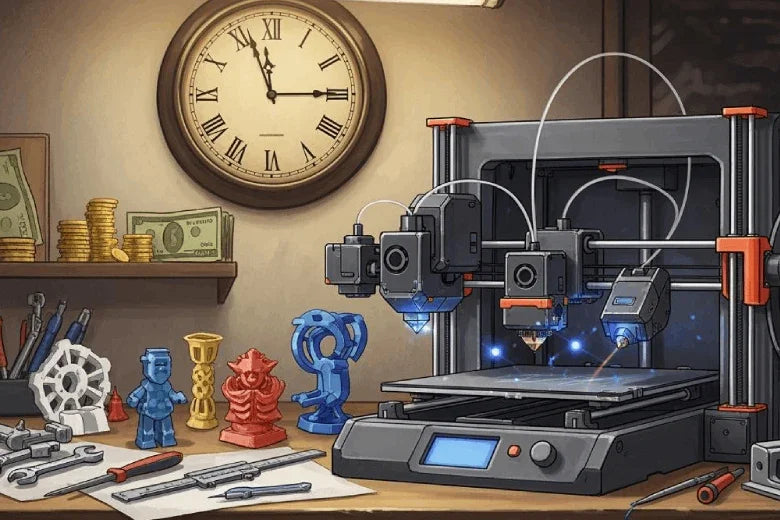
You can cut costs and speed up production using 3d printed tool changers. Many users now choose printed solutions for their flexibility and fast turnaround.
|
Aspect |
Traditional Methods |
3D Printing (Additive Manufacturing) |
|---|---|---|
|
Tooling Costs |
$25,000 – $100,000 per retooling change |
|
|
Production Speed |
Long lead times |
Less than 2 weeks |
|
Design Flexibility |
Limited by mold design |
High design freedom |
|
Inventory Holding Costs |
High due to MOQ requirements |
Reduced with on-demand production |
|
Non-Recurring Engineering Expenses |
High due to complex setups |
Significantly lower |
- Many people now adopt tool changer 3D printers and multi-material printing as technology becomes more accessible.
- Interest keeps growing in these solutions.
Key Takeaways
- 3D printed tool changers significantly reduce costs and production time compared to traditional methods, allowing for more efficient manufacturing.
- Automation features in 3D printed systems enable 24/7 operation, cutting project turnaround times by up to 70% and minimizing waste.
- Multi-material printing simplifies complex designs, allowing you to create advanced parts in one job, which saves time and enhances product functionality.
3D printed tool changers boost efficiency
Faster tool swaps save time
You can dramatically reduce downtime by using tool changer 3d printers such as the ProForge 300, Voron 2.4, Jubilee, and DAKSH V2. These machines feature automatic tool swaps, which means you spend less time waiting and more time producing. The fully mechanical tool changer and ultra-fast tool changing capabilities allow you to switch tools in under four seconds. This speed gives you a clear advantage over manual or traditional tool changing methods. When you use a magnetic toolchanger or a printed effector, you minimize operator interaction and cleaning operations. You also improve coordination between adjacent printers, which boosts production capabilities. The end effector design in these systems ensures reliability and ease of use, so you can focus on your projects instead of troubleshooting. Intelligent error state detection and automatic XYZ calibration further reduce failed prints and wasted materials. You gain more control over your workflow and see faster turnaround times.
Tip: If you want to maximize efficiency, choose a 3d printed tool changer with integrated nozzle ooze blockers and status LEDs on each toolhead. These features help you troubleshoot quickly and maintain high print quality.
Multi-material printing made easy
Multi-material printing becomes simple when you use advanced tool changer systems. You can print complex parts in a single job, eliminating the need for assembly steps. For example, you can combine rigid and flexible materials in one component, enhancing the functionality of your products. The Palette 300 automates material switching, so you achieve precision and quality without manual intervention. You can create parts with different mechanical properties, such as a can pusher part that uses PLA for the inner section and Nylon for the outer layer. This combination provides wear resistance and durability. The end effector and printed effector designs allow seamless transitions between materials, which reduces the learning curve for new users. User-friendly software integration makes multi-material printing accessible, even if you are new to the technology. You also benefit from rapid material switching, which can occur up to 50 times per second, ensuring consistent quality and speed.
Multi-material printing lets you:
- Print all parts in one job, saving time.
- Combine rigid and flexible materials for advanced functionality.
- Achieve high-quality transitions between materials.
- Reduce waste and speed up production.
- Focus on design rather than machine operation.
Automation for workflow gains
Automation features in 3d printed tool changers transform your workflow. You can run your printers 24/7, which significantly reduces project turnaround times. Precision with less waste means you save on materials and avoid rework. Off-site manufacturing allows you to print custom elements for rapid assembly. You can cut project duration by up to 70% by leveraging continuous building and AI-driven project management. The end effector and printed effector systems support high accelerations and print speeds, so you complete jobs faster. Fully enclosed designs enable you to print with high-temperature materials, expanding your options. Open-source solutions give you control over the source code, so you can tailor your setup to fit your needs. These options are often free or less expensive than proprietary alternatives, making them ideal for hobbyists and small businesses. You can customize your workflow and scale your operations without costly retooling.
|
Feature |
Description |
|---|---|
|
Seamless Transition |
Move from prototyping to production without expensive changes. |
|
Reduction in Lead Times |
On-demand production cuts lead times and improves responsiveness. |
|
Waste Reduction |
Print tools as needed to minimize waste. |
|
Digital Inventory and JIT |
Store designs digitally and support just-in-time manufacturing. |
|
Automated Post-Processing |
Streamline production and reduce labor costs. |
|
Cost Reduction |
Lower inventory costs for spare parts by up to 90%. |
You gain efficiency, flexibility, and scalability by adopting 3d printed tool changers and multi-material printing. These innovations help you stay competitive and responsive in a fast-changing market.
Saving money with tool changer 3D printers
Lower costs with 3D printed parts
You can lower your manufacturing and upgrade costs by using 3d printed parts for your tool changer systems. Traditional manufacturing methods often require expensive molds and high minimum order quantities. In contrast, 3d printed toolchanger components allow you to produce only what you need, when you need it. This approach works especially well for low-volume production and complex geometries. You maintain a consistent cost per part, even as your production volume increases. Traditional manufacturing may offer better surface finishes and a wider range of materials, but 3d printing continues to improve in both areas.
3d printed toolchanger parts help you:
- Avoid large upfront investments in tooling.
- Reduce waste by producing only necessary components.
- Quickly iterate on end effector and magnetic toolchanger designs.
- Enable localized production, which cuts down on logistics costs.
You also benefit from the environmental advantages of 3d printed parts. The additive process uses only the material required for each tool or effector, reducing waste by up to 90% compared to traditional methods. Localized production further minimizes your carbon footprint by eliminating the need for long supply chains.
Avoiding expensive commercial tool changers
Tool changer 3d printers give you a cost-effective alternative to commercial tool changers. Commercial systems often come with high price tags and ongoing maintenance fees. By building your own 3d printed toolchanger, you avoid these expenses and gain more control over your workflow. The table below highlights the long-term cost benefits:
|
Aspect |
3D Printing Benefits |
Traditional Manufacturing Drawbacks |
|---|---|---|
|
Prototyping Costs |
Faster, cheaper, and more precise |
High costs and time commitments |
|
Low-Volume Production |
Cost-effective without hefty upfront costs |
Requires significant investment for molds |
|
Manufacturing Costs |
Reduced waste material |
Generates substantial waste |
User testimonials show that you can cut prototyping costs by up to 70% and custom fixture costs by 80% when you switch to 3d printed toolchanger solutions. Many users report that lighter printed tools and effectors allow their production lines to run faster and more efficiently. You also avoid the licensing fees and proprietary restrictions that come with commercial systems.
Tip: Choose open-source tool changer 3d printers to maximize flexibility and minimize ongoing costs. You can adapt your end effector and effector designs as your needs evolve.
Reduced labor and maintenance
You save on labor and maintenance with 3d printed toolchanger systems. Automation features reduce the need for manual intervention, letting you focus on higher-value tasks. The modular design of printed effectors and end effector assemblies makes repairs and upgrades simple. You can print replacement parts on demand, which keeps downtime to a minimum.
To build cost-effective 3d printed toolchanger systems, follow these strategies:
|
Strategy |
Importance |
Application Tips |
|---|---|---|
|
Lightweight |
Less material = lower cost and faster build times |
Use lattice structures or ribbed geometries to maintain stiffness. Use topology optimization software. |
|
Hollowing & Drain Holes |
Reduces print time and material usage |
Shell large parts to 2–3 mm wall thickness and add drain holes for easy post-processing. |
|
Orientation Optimization |
Affects support material use and build time |
Orient parts to minimize overhangs and reduce supports. Optimize critical surfaces for finish. |
|
Material Selection |
Premium materials add cost |
Use standard resin unless specific properties are needed. Choose lower-cost materials when possible. |
|
Order in Batches |
Optimizes builds for bulk discounts |
Order > 100 parts for discounts and align team timelines for consolidation. |
|
Choose a More Flexible Deadline |
Efficient machine use |
Select standard lead times and batch parts smartly. |
|
Design with Material Efficiency |
Direct impact on price |
Avoid oversized solids; shell parts and design lightweight features only if necessary. |
|
Minimize Overall Volume |
Direct impact on price |
Break prototypes into functional zones and remove non-critical details early. |
|
Design Around Lead Time |
Flexible deadlines optimize machine use |
Choose standard lead times and use quick prints for early testing. |
You can further reduce maintenance by addressing common failure points. For example, you should manage wires and airlines to prevent snagging, which can obstruct tool holder movement. Adding weights or using drag chains for cable management helps ensure smooth operation. Many users have completed over 100 tool change cycles without failure after making these improvements.
Multi-material printing with 3d printed toolchanger systems also reduces the need for manual assembly and post-processing. You can print complex parts with multiple materials in a single job, saving both time and labor. The end effector and effector designs support rapid tool changes, which keeps your workflow efficient.
By adopting 3d printed toolchanger solutions, you lower your costs, reduce waste, and streamline your operations. You gain the flexibility to adapt your tool and effector setups as your business grows, all while maintaining high efficiency and reliability.
You gain faster production, lower costs, and greater flexibility with 3D printed tool changers. If you want to build or upgrade, review the assembly stages below:
|
Assembly Stage |
Description |
|---|---|
|
Motion System Assembly |
Set up the printer’s motion system. |
|
Tool-Changer Assembly |
Assemble the tool changer mechanism. |
|
V6 Dock Assembly |
Install the V6 docking system. |
|
V6 Bowden Tool Assembly |
Build the Bowden tool system. |
|
Motion System Electronics |
Wire and set up electronics. |
Common barriers include lack of design expertise, unclear strategies, and underestimating 3D printing’s potential. Overcome these by learning design for additive manufacturing and understanding each process’s limits.
FAQ
How durable are 3D printed tool changers?
You can expect high durability with proper material selection. Use engineering-grade filaments like PETG or Nylon for best results.
Can you upgrade your existing printer with a 3D printed tool changer?
Yes, you can retrofit many open-source printers. Check compatibility with your printer’s firmware and motion system before starting.
What maintenance do 3D printed tool changers require?
You should clean moving parts and check for loose fasteners weekly.
Note: Lubricate rails and inspect tool docks to prevent print failures.